
背景
设计一个公共动作,在界面设计器可以拖到页面里,点击之后跳转指定页面。就像导入导出一样。
实现思路
元数据计算时,初始化跳转动作,为本模块以及依赖于本模块的所有模块生成该跳转动作。实现所有模型都有该跳转动作的元数据。
代码示例:
package pro.shushi.pamirs.top.core.init;

import com.google.common.collect.Lists;
import org.apache.commons.collections4.MapUtils;
import org.springframework.stereotype.Component;
import pro.shushi.pamirs.boot.base.enmu.ActionTargetEnum;
import pro.shushi.pamirs.boot.base.enmu.ActionTypeEnum;
import pro.shushi.pamirs.boot.base.model.ViewAction;
import pro.shushi.pamirs.boot.common.api.command.AppLifecycleCommand;
import pro.shushi.pamirs.boot.common.extend.MetaDataEditor;
import pro.shushi.pamirs.core.common.InitializationUtil;
import pro.shushi.pamirs.meta.annotation.fun.extern.Slf4j;
import pro.shushi.pamirs.meta.api.dto.meta.Meta;
import pro.shushi.pamirs.meta.api.dto.meta.MetaData;
import pro.shushi.pamirs.meta.domain.model.ModelDefinition;
import pro.shushi.pamirs.meta.enmu.ActionContextTypeEnum;
import pro.shushi.pamirs.meta.enmu.SystemSourceEnum;
import pro.shushi.pamirs.meta.enmu.ViewTypeEnum;
import pro.shushi.pamirs.top.api.TopModule;
import pro.shushi.pamirs.top.api.model.Teacher;

import java.util.*;
import java.util.stream.Collectors;

@Slf4j
@Component
public class DemoModuleAppInstall implements MetaDataEditor {
    @Override
    public void edit(AppLifecycleCommand command, Map<String, Meta> metaMap) {
        InitializationUtil util = InitializationUtil.get(metaMap, TopModule.MODULE_MODULE, TopModule.MODULE_NAME);
        if (util == null) {
            return;
        }
        if (MapUtils.isEmpty(metaMap)) {
            return;
        }

        Set<String> dependencyFileModels = metaMap.values().stream()
                .filter(v -> v.getData().containsKey(TopModule.MODULE_MODULE))
                .map(Meta::getModule)
                .collect(Collectors.toSet());
        for (String module : metaMap.keySet()) {
            if (!dependencyFileModels.contains(module)) {
                // 不依赖本模块,不生成跳转动作
                continue;
            }
            Meta meta = metaMap.get(module);
            MetaData metaData = meta.getCurrentModuleData();
            List<ModelDefinition> modelList = metaData.getDataList(ModelDefinition.MODEL_MODEL);
            for (ModelDefinition data : modelList) {
                makeDefaultModelViewAction(meta, data, dependencyFileModels);
            }
        }
    }

    // 跳转的xml模版 name
    public static final String DEFAULT_VIEW_NAME = "fixed_teacher_table";

    private void makeDefaultModelViewAction(Meta meta, ModelDefinition data, Set<String> dependencyFileModels) {
        if (!dependencyFileModels.contains(data.getModule())) {
            // 当前模块使用了其他模块的模型,对方模块未依赖本模块,不生成跳转动作
            return;
        }
        Map<String, Object> context = new HashMap<>();
        context.put("model", "'" + data.getModel() + "'");
        // 创建 跳转表格页面 viewAction,根据实际需求更改
        makeDefaultViewAction(meta, data,
                "teacherListDialog",
                "教师表格",
                null,
                ActionContextTypeEnum.CONTEXT_FREE,
                ViewTypeEnum.TABLE, 99,
                Teacher.MODEL_MODEL, DEFAULT_VIEW_NAME, ActionTargetEnum.DIALOG,
                context);
    }

    private void makeDefaultViewAction(Meta meta, ModelDefinition data,
                                             String viewActionName,
                                             String displayName,
                                             String title,
                                             ActionContextTypeEnum contextType,
                                             ViewTypeEnum viewType,
                                             int priority,
                                             String resModel,
                                             String resViewName,
                                             ActionTargetEnum target,
                                             Map<String, Object> context) {
        String sign = ViewAction.sign(data.getModel(), viewActionName);
        ViewAction defaultViewAction = meta.getData().get(data.getModule())
                .getDataItem(ViewAction.MODEL_MODEL, sign);
        boolean newAction = false;
        if (null == defaultViewAction) {
            defaultViewAction = new ViewAction();
            newAction = true;
        }
        if (newAction || SystemSourceEnum.MANUAL.equals(defaultViewAction.getSystemSource())) {
            defaultViewAction.setDisplayName(displayName)
                    .setLabel(defaultViewAction.getDisplayName())
                    .setName(viewActionName)
                    .setModel(data.getModel());
            defaultViewAction.setTitle(title)
                    .setViewType(viewType)
                    .setTarget(Optional.ofNullable(target).orElse(ActionTargetEnum.ROUTER))
                    .setResModel(resModel)
                    .setResViewName(resViewName)
                    .setResModule(null)
                    .setResModuleName(null)
                    .setContextType(contextType)
                    .setActionType(ActionTypeEnum.VIEW)
                    .setBindingType(Lists.newArrayList(ViewTypeEnum.TABLE))
                    .setContext(context)
                    .setPriority(priority)
                    .setSystemSource(SystemSourceEnum.MANUAL);
            defaultViewAction.setSign(sign);
            if (newAction) {
                defaultViewAction.construct();
                meta.getData().get(data.getModule()).addData(defaultViewAction);
            } else {
                defaultViewAction.disableMetaCompleted();
            }
        }
    }
}
xml模版示例,默认模版文件放到/pamirs/views/模块编码/template下面
可以利用界面设计器生成需要的跳转页面。在base_view表里面根据model以及title查询,template字段就是xml模版。拷贝出来之后,在view标签里指定一个name(即上文的DEFAULT_VIEW_NAME),然后保存为xml文件放到resource/pamirs/views/模块编码/template路径下面
<view model="top.Teacher" name = "fixed_teacher_table" type="table">
<template colSpan="FULL" slot="search">
<field colSpan="QUARTER" data="enumType" widget="Select"/>
<field allowClear="true" autoFillOptions="true" colSpan="QUARTER" data="professionalId" label="科目id" showThousandth="false" statistics="false" widget="Integer"/>
</template>
<template colSpan="FULL" cols="24" slot="tableGroup"/>
<template slot="actionBar">
<action label="导入" name="internalGotoListImportDialog"/>
<action label="导出" name="internalGotoListExportDialog" sync="true"/>
<action label="打印" name="internalGotoPrintDialog"/>
</template>
<template checkbox="true" colSpan="FULL" defaultPageSize="OPTION_2" enableSequence="false" filter="" inlineActiveCount="THREE" slot="table" sortable="false">
<field allowClear="true" autoFillOptions="true" colSpan="HALF" data="teacherName" label="教师名字" patternType="NONE" showCount="false" type="TEXT" widget="Input"/>
<field allowClear="true" autoFillOptions="true" colSpan="HALF" data="field00001" invisible="true" label="嵌入网页" patternType="NONE" showCount="false" type="TEXT" widget="Input"/>
<field allowClear="true" autoFillOptions="true" colSpan="HALF" data="readStatus" label="读取状态" optionColorStyle="COLORFUL" widget="Select">
<options>
<option displayName="未读" label="未读" name="NO_READ"/>
<option displayName="结束" label="结束" name="READ"/>
</options>
</field>
<field data="createDate" widget="DateTimePicker"/>
<field data="writeDate" widget="DateTimePicker"/>
<template slot="rowActions" colSpan="FULL">
</template>
<field data="id" invisible="true"/>
</template>
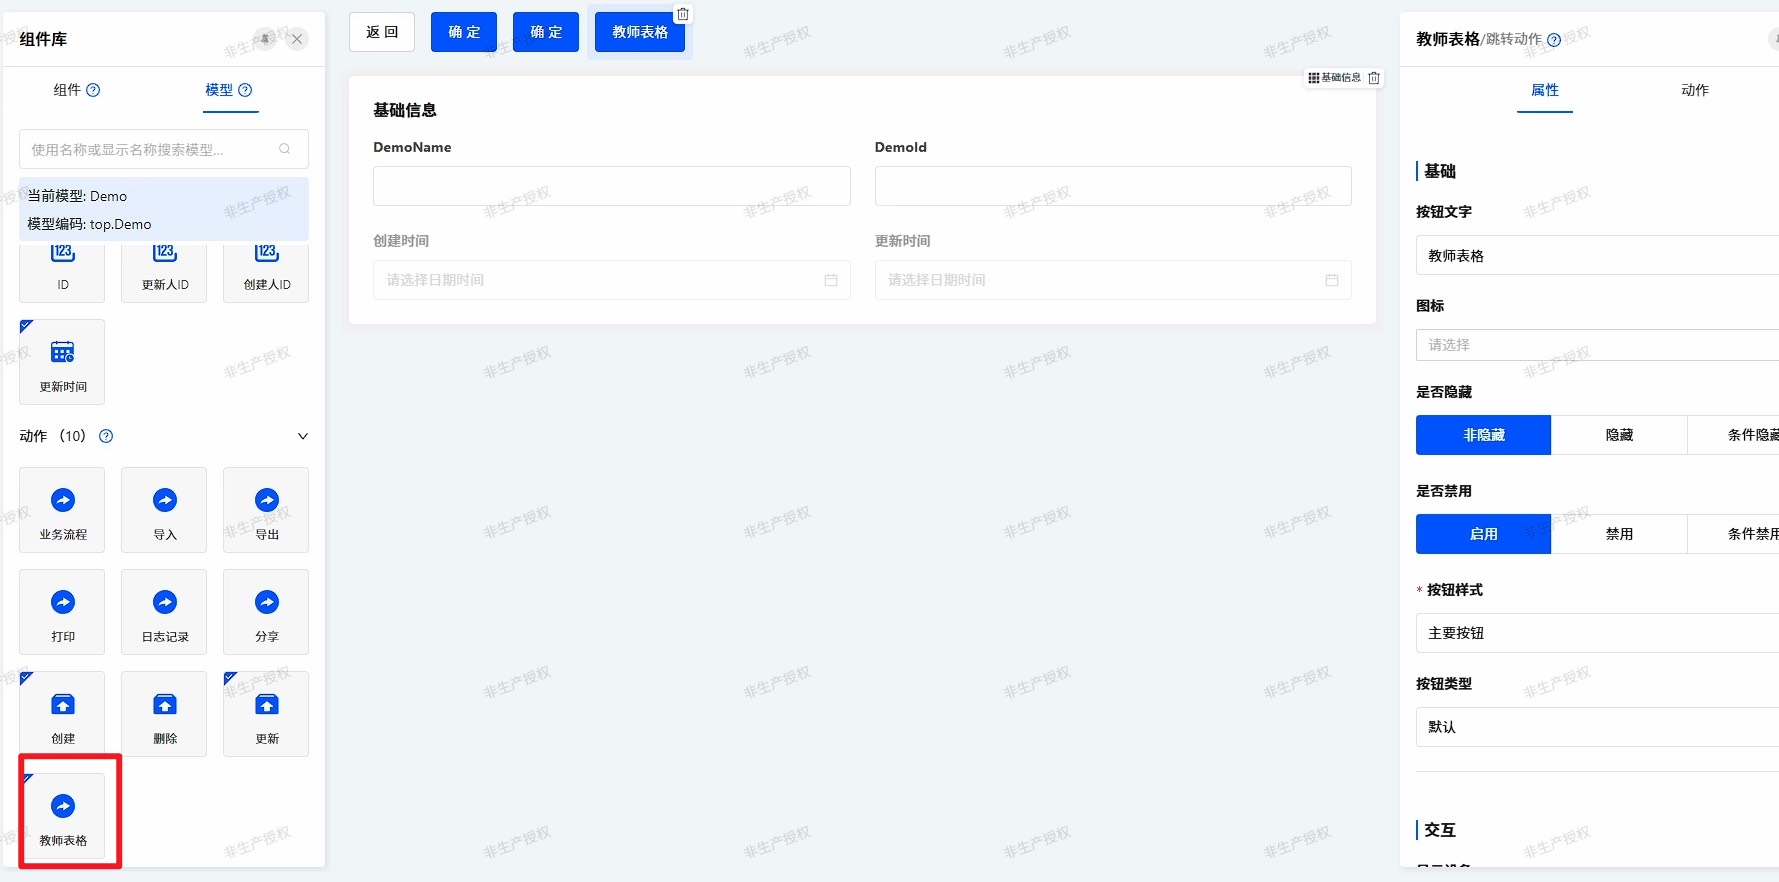
</view>效果:

Oinone社区 作者:yexiu原创文章,如若转载,请注明出处:https://doc.oinone.top/other/22199.html
访问Oinone官网:https://www.oinone.top获取数式Oinone低代码应用平台体验