
1 Oinone平台首页介绍
1.1 首页包括全局首页和应用首页两类
- 全局首页:指用户在登录时未指定重定向地址的情况下使用的应用首页
- 应用首页:指用户在切换应用时使用的首页
PS:全局首页本质上也是应用首页,是在用户没有指定应用时使用的首页。如登录后。
1.2 全局首页查找规则
- 找到当前用户有权限访问的全部应用。
- 若使用AppConfig配置首页,则优先使用该配置作为全局首页。若未指定或无权限访问,则继续第3步。
- 依次按照应用优先级,获取有权限的首页或菜单作为全局首页。
- 若未查找到任何可访问页面,则提示无权限访问相关异常,用户无法进入平台。
1.3 应用首页查找规则
- 在指定应用下,获取有权限的首页或菜单作为应用首页。
- 若未查找到任何可访问页面,则提示无权限访问相关异常,用户进入应用后无法正常查看或操作。
2 配置全局首页
2.1 使用应用优先级设置全局首页
/**
 * 演示模块
 *
 * @author Adamancy Zhang at 16:55 on 2024-03-24
 */
@UxHomepage(@UxRoute(DemoDepartment.MODEL_MODEL))
@Component
@Boot
@Module(
        name = DemoModule.MODULE_NAME,
        displayName = "演示应用",
        version = "1.0.0",
        dependencies = {ModuleConstants.MODULE_BASE},
        priority = 0
)
@Module.module(DemoModule.MODULE_MODULE)
@Module.Advanced(selfBuilt = true)
public class DemoModule implements PamirsModule {

    public final static String MODULE_MODULE = "demo";

    public final static String MODULE_NAME = "demo";

    @Override
    public String[] packagePrefix() {
        return new String[]{"pro.shushi.pamirs.demo"};
    }

}
注意事项
@UxHomepage用于指定应用首页@Module#priority用于指定模块优先级,按升序排列
PS:下面描述的内容不再提供完整的模块定义内容,仅针对@UxHomepage进行介绍。
3 配置应用首页
3.1 使用@UxHomepage配置应用首页
指定模型的默认表格视图作为应用首页
@UxHomepage(@UxRoute(DemoDepartment.MODEL_MODEL))该指定方式将产生以下结果:
- 生成一个跳转动作(ViewAction),其模型编码为
DemoDepartment.MODEL_MODEL,动作名称为homepage。 - 设置ModuleDefinition#homePageModel和ModuleDefinition#homePageName为该跳转动作。
指定模型对应的菜单作为应用首页
在当前应用下有如下菜单定义:
/**
 * 演示模块菜单
 *
 * @author Adamancy Zhang at 17:16 on 2024-03-24
 */
@UxMenus
public class DemoMenus {

    @UxMenu("演示部门")
    @UxRoute(DemoDepartment.MODEL_MODEL)
    class DepartmentManagement {
    }

    @UxMenu("演示员工")
    @UxRoute(DemoEmployee.MODEL_MODEL)
    class EmployeeManagement {
    }
}
根据菜单定义我们可以知道:
演示部门这个菜单会生成一个跳转动作(ViewAction),其模型编码为DemoDepartment.MODEL_MODEL,动作名称为DemoMenus_DepartmentManagement。
因此,我们可以使用如下方式指定应用首页为演示部门这个菜单:
@UxHomepage(actionName = "DemoMenus_DepartmentManagement", value = @UxRoute(DemoDepartment.MODEL_MODEL))4 在应用中心修改应用首页
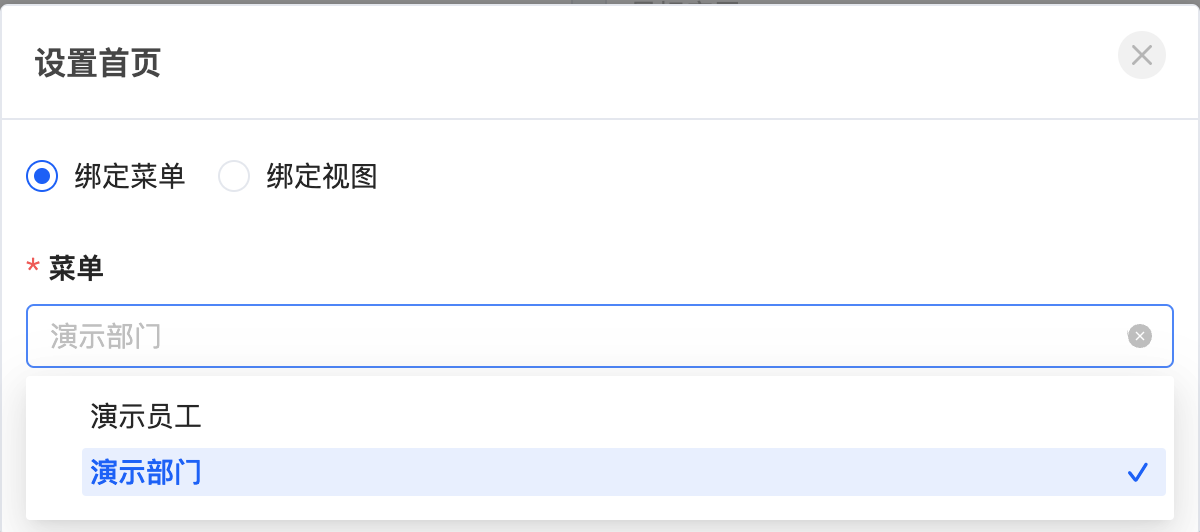
在平台启动之后,将无法通过代码的方式修改首页,因此需要在应用中心修改应用首页。
按照如下图所示操作对应用首页进行设置。
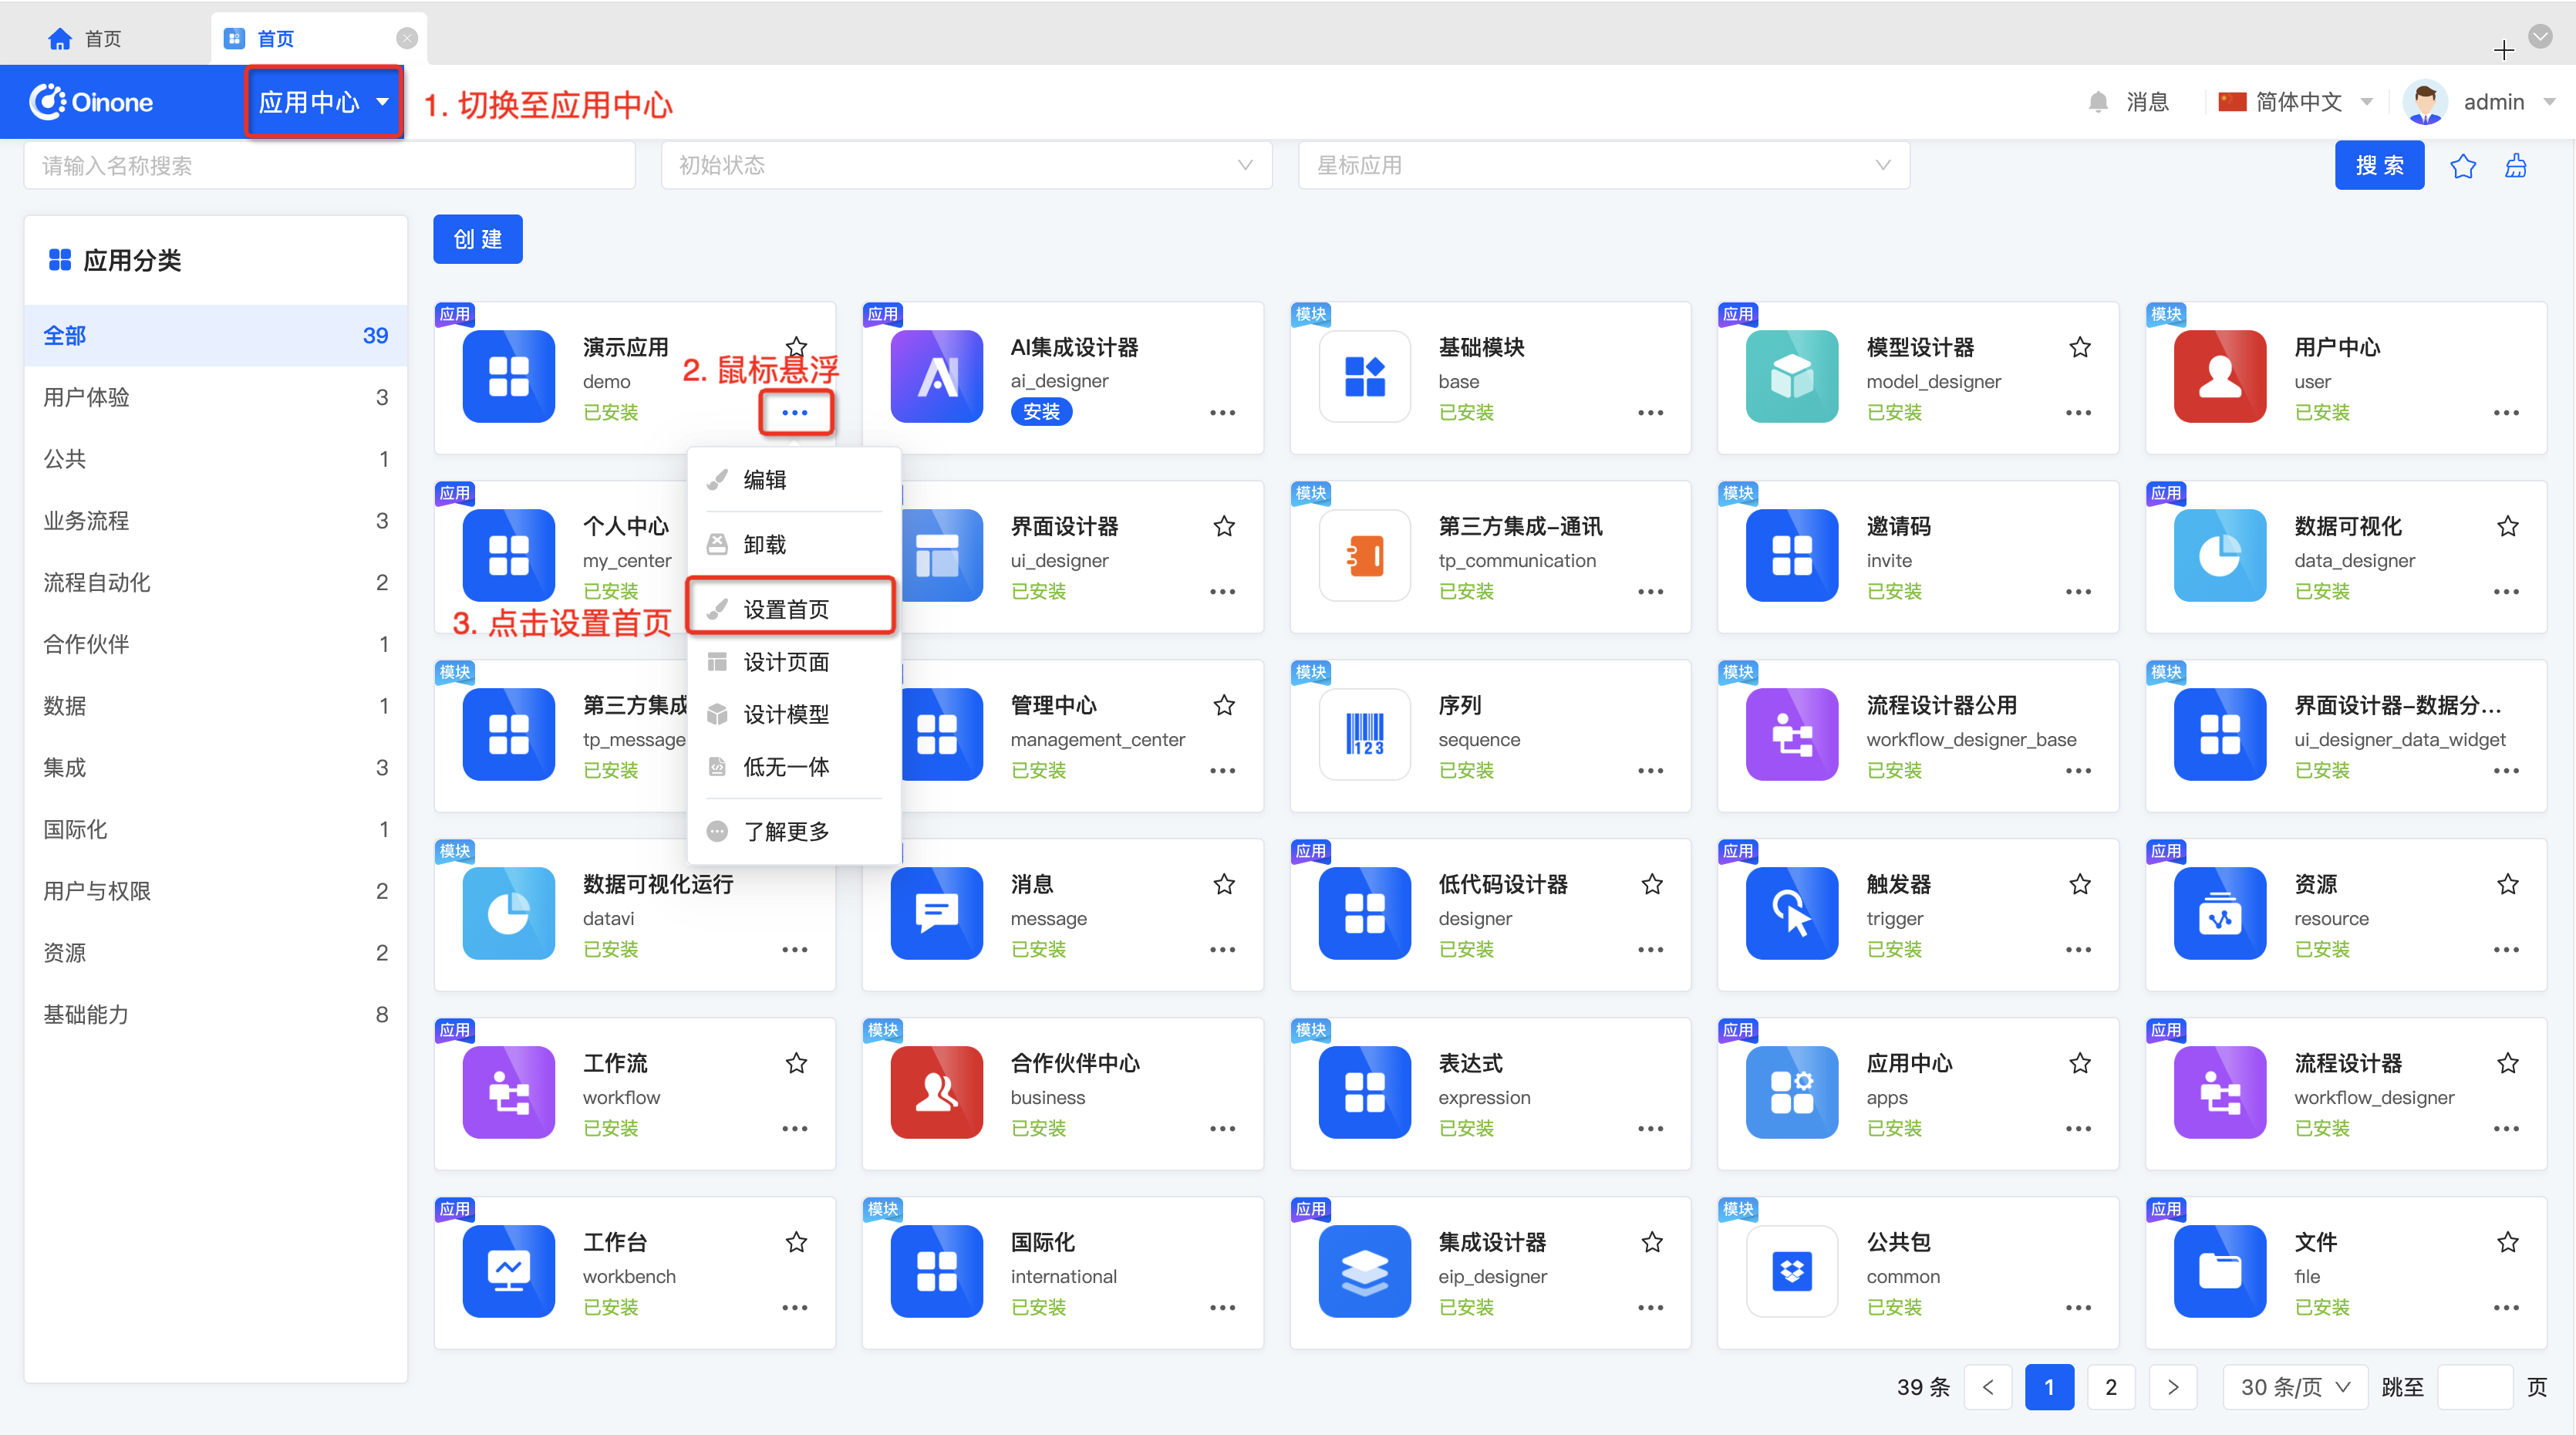

在绑定菜单选项中,选择指定菜单即可。
本文来自投稿,不代表Oinone社区立场,如若转载,请注明出处:https://doc.oinone.top/backend/6394.html