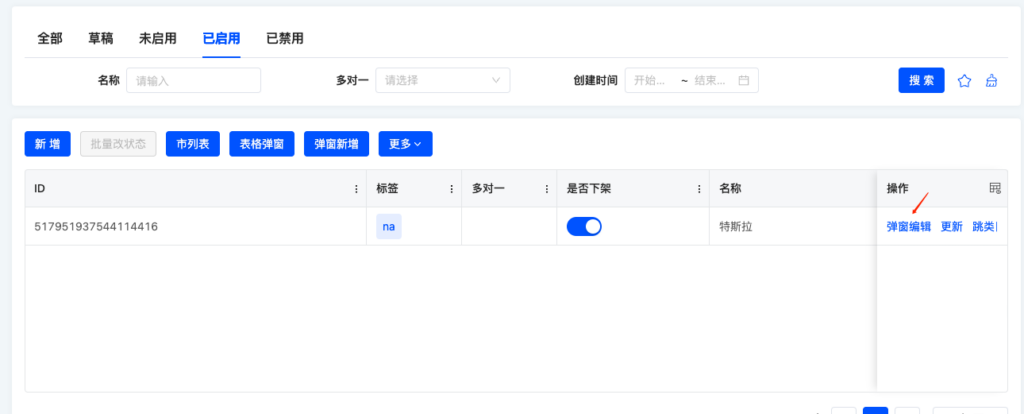
提交数据动作如何把弹窗内的数据完全返回

场景介绍

  1. 表格行的操作列有一个打开弹窗的动作
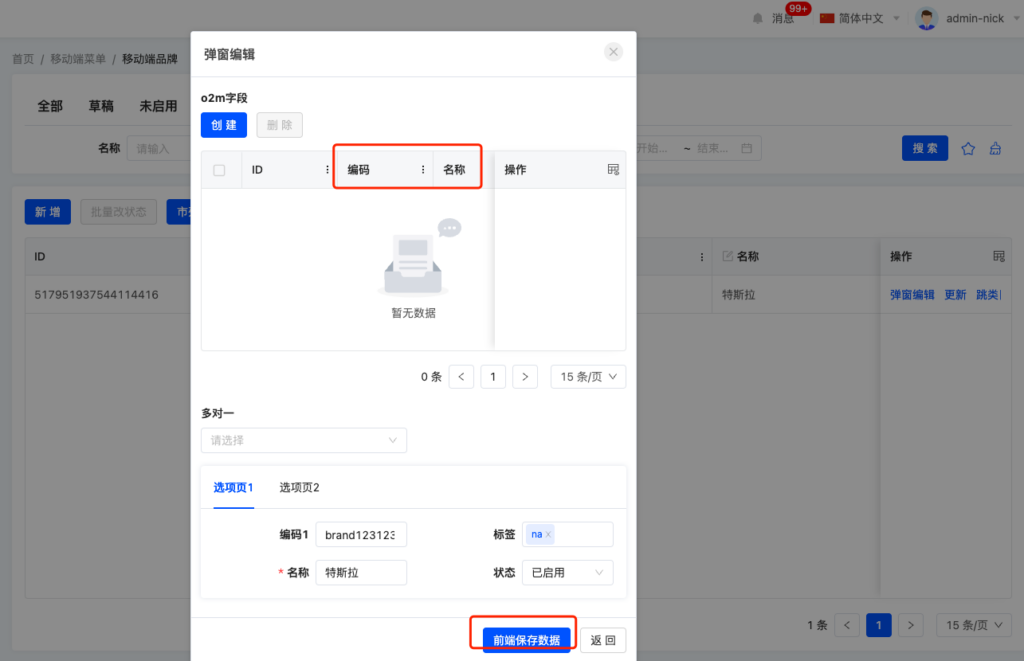
  2. 弹窗内为表格行数据的表单,表单内有一个o2m字段,展示了除关联关系字段(大部分场景为id)外的其他字段
  3. 弹窗底部动作区域有一个提交数据的客户端动作,该动作会将弹窗内表单的数据回写到表格行的数据上
场景截图

提交数据动作如何把弹窗内的数据完全返回
提交数据动作如何把弹窗内的数据完全返回

问题现象

点击提交数据的客户端动作,会将数据回写到表格行的数据上,但是表格行拿到的o2m字段的数据只有id字段,o2m字段的编码和名称并不会提交到表格行,o2m字段默认提交规则是只会提交关联关系字段(大部分场景为id)的数据

解决方案

该方案适合5.x版本,4.x版本新建的字段组件无法自动生成属性面板,建议拿下面的组件在SPI加上model和name注册实现

  1. 自定义o2m字段所在的组件,m2m字段或者其他类似问题的组件也是如下面组件一样覆写submit方法即可
    import {
    BaseFieldWidget,
    FormO2MTableFieldWidget,
    ModelFieldType,
    SPI,
    SubmitRelationValue,
    SubmitValue,
    ViewType
    } from '@kunlun/dependencies';
    @SPI.ClassFactory(
    BaseFieldWidget.Token({
    viewType: ViewType.Form,
    ttype: ModelFieldType.OneToMany,
    widget: 'SubmitAllDataO2MTable'
    })
    )
    export class MyFormO2MTableFieldWidget extends FormO2MTableFieldWidget {
    public async submit(submitValue: SubmitValue): Promise<Record<string, unknown> | SubmitRelationValue | undefined> {
    return { [this.itemName]: this.value };
    }
    }
  2. 在界面设计器的组件功能内新增对应业务类型的自定义组件,组件内的元件api名称填写上面组件的名称SubmitAllDataO2MTable
  3. 在界面设计器的设计页面切换o2m字段组件为SubmitAllDataO2MTable

参考文档

Oinone社区 作者:nation原创文章,如若转载,请注明出处:https://doc.oinone.top/frontend/14187.html

访问Oinone官网:https://www.oinone.top获取数式Oinone低代码应用平台体验

Like (0)
nation's avatarnation数式员工
Previous 2024年6月27日
Next 2024年6月28日

相关推荐

  • 前端表格复制

    我们可能会遇到表格复制的需求,也就是表格填写的时候,不是增加一行数据,而是增加一个表格。以下是代码实现和原理分析。 代码实现 在 boot 工程的 main.ts 中加入以下代码 import { registerDesignerFieldWidgetCreator, selectorDesignerFieldWidgetCreator } from '@oinone/kunlun-ui-designer-dependencies'; // 注册无代码组件,将表头分组的无代码组件,注册成字段表格组件 registerDesignerFieldWidgetCreator( { widget: 'DynamicCreateTable' }, selectorDesignerFieldWidgetCreator({ widget: TABLE_WIDGET })! ); DynamicCreateTableWidget 动态添加表格 ts 组件 import { FormO2MTableFieldWidget, Widget, DslDefinition, RuntimeView, SubmitValue, BaseFieldWidget, ModelFieldType, SPI, ViewType, ActiveRecord, uniqueKeyGenerator } from '@oinone/kunlun-dependencies'; import { MyMetadataViewWidget } from './MyMetadataViewWidget'; import DynamicCreateTable from './DynamicCreateTable.vue'; @SPI.ClassFactory( BaseFieldWidget.Token({ viewType: ViewType.Form, ttype: ModelFieldType.OneToMany, widget: 'DynamicCreateTable' }) ) export class DynamicCreateTableWidget extends FormO2MTableFieldWidget { public myMetadataViewWidget: MyMetadataViewWidget[] = []; @Widget.Reactive() public myMetadataViewWidgetLength = 0; @Widget.Reactive() public myMetadataViewWidgetKeys: string[] = []; protected props: Record<string, unknown> = {}; public initialize(props) { super.initialize(props); this.props = props; this.setComponent(DynamicCreateTable); return this; } // region 创建动态表格 @Widget.Method() public async createTableWidget(record: ActiveRecord) { const index = this.myMetadataViewWidget.length; const handle = uniqueKeyGenerator(); const slotKey = `MyMetadataViewWidget_${handle}`; const widget = this.createWidget( new MyMetadataViewWidget(handle), slotKey, // 插槽名称 { subIndex: index, metadataHandle: this.metadataHandle, rootHandle: this.rootHandle, automatic: true, internal: true, inline: true } ); this.initDynamicSubview(this.props, widget); widget.setData(record); this.myMetadataViewWidgetLength++; this.myMetadataViewWidgetKeys.push(slotKey); this.myMetadataViewWidget.push(widget); } protected initDynamicSubview(props: Record<string, unknown>, widget: MyMetadataViewWidget) { const { currentViewDsl } = this; let viewDsl = currentViewDsl; if (!viewDsl) { viewDsl = this.getViewDsl(props)…

    2025年7月21日
    78100
  • 【前端】IOC容器(v4)

    什么是IOC容器? IOC不是一种技术,只是一种思想,一个重要的面向对象编程的法则,它能指导我们如何设计出松耦合,更优良的程序。传统应用程序都是由我们在类内部主动创建依赖对象,从而导致类与类之间高耦合,难于测试;有了IOC容器后,把创建和查找依赖对象的控制权交给了容器,由容器进行注入组合对象,所以对象与对象之间是松散耦合,这样也方便测试,利于功能复用,更重要的使程序的整个体系结构变得非常灵活。在运行期,在外部容器动态的将依赖对象注入组件,当外部容器启动后,外部容器就会初始化。创建并管理对象实例,以及销毁,这种应用本身不负责依赖对象的创建和维护,依赖对象的创建和维护是由外部容器负责的称为控制反转。 IOC(控制反转)和DI(依赖注入) IOC(Inversion of Control, 控制反转):通过外部容器管理对象实例的一种思想。DI(Dependency Injection, 依赖注入):IOC的一种实现方式。 作者简述 IOC是Spring框架(一种以Java为语言开发的框架)的核心,并贯穿始终。其面向接口的开发能力,使得服务调用方和服务提供方可以做到完全解耦,只要遵循接口定义的规则进行调用,具体服务的实现可以是多样化的。 对于前端,我们使用inversify进行了IOC的实现。其强大的解耦能力可以使得平台进行大量的抽象,而无需关系具体的实现。 接下来,我们将介绍IOC在开发中的基本运用。 API 为了方便起见,我们将IOC相关功能与组件SPI的调用方式放在了一起。(更高版本的平台版本将自动获得该能力) export class SPI { /** * register singleton service */ public static Service; /** * autowired service property/parameter in service */ public static Autowired; /** * service construct after execute method */ public static PostConstruct; /** * autowired service in widget */ public static Instantiate; /** * autowired services in widget */ public static Instantiates; /** * service construct after execute method in widget */ public static InstantiatePostConstruct; } 创建第一个服务 service/ProductService.ts import { ServiceIdentifier } from '@kunlun/dependencies'; /** * 产品 */ export interface Product { id: string; name: string; } /** * 产品服务 */ export interface ProductService { /** * 获取产品列表 */ getProducts(): Promise<Product[]>; /** * 通过ID获取产品 * @param id 产品ID */ getProductById(id: string): Promise<Product | undefined>; } /** * 产品服务Token */ export const ProductServiceToken = ServiceIdentifier<ProductService>('ProductService'); service/impl/ProductServiceImpl.ts import { SPI } from '@kunlun/dependencies'; import { Product, ProductService, ProductServiceToken } from '../ProductService'; @SPI.Service(ProductServiceToken) export class ProductServiceImpl implements ProductService { public async getProducts(): Promise<Product[]> { // request api get products return []; } public async getProductById(id:…

    前端 2023年11月1日
    1.2K00
  • 「前端」动作API

    概述 在 oinone 前端平台中,提供了四种动作 跳转动作(页面跳转、打开弹窗、抽屉) 服务端动作(调用接口) 客户端动作(返回上一页、关闭弹窗等) 链接动作(打开执行的链接) 快速开始 // 基础使用示例 import { executeViewAction, executeServerAction, executeUrlAction } from '@kunlun/dependencies'; // 示例 1: 基础页面跳转(去创建页面) executeViewAction(action); // 示例 2: 带参数的页面跳转(查询ID为123的数据),去编辑、详情页 executeViewAction(action, undefined, undefined, { id: '123' }); // 示例 3: 页面跳转的参数,用最新的,防止当前页面的参数被带到下一个页面 executeViewAction(action, undefined, undefined, { id: '123' , preserveParameter: true}); // 示例 4: 调用服务端接口 const params = { id: 'xxx', name: 'xxx' }; await executeServerAction(action, params); await executeServerAction(action, params, { maxDepth: 2 }); // 接口数据返回的数据层级是3层 -> 从0开始计算, 默认是2层 // 执行链接动作 executeUrlAction(action); API 详解 executeViewAction 参数名 描述 类型 必填 默认值 — action 视图动作 RuntimeViewAction true router 路由实例 Router false undefined matched 路由匹配参数 Matched false undefined extra 扩展参数 object false {} target 规定在何处打开被链接文档(可参考 a 标签的 target) string false undefined executeServerAction 参数名 描述 类型 必填 默认值 ​action 服务端动作 RuntimeServerAction true param 传递给后端的参数 object true context 配置接口返回的数据层级(默认是两层) {maxDepth: number} false executeUrlAction 参数名 描述 类型 必填 默认值 ​action 链接动作 IURLAction true

    2025年3月21日
    1.3K00
  • oio-pagination 分页

    API 参数 说明 类型 默认值 版本 currentPage(v-model:currentPage) 当前页数 number – defaultPageSize 默认的每页条数 number 15 disabled 禁用分页 boolean – pageSize 每页条数 number – pageSizeOptions 指定每页可以显示多少条 string[] [’10’, ’15’, ’30’, ’50’, ‘100’, ‘200’] showQuickJumper 是否可以快速跳转至某页 boolean false showSizeChanger 是否展示 pageSize 切换器,当 total 大于 50 时默认为 true boolean – total 数据总数 number 0 事件 事件名称 说明 回调参数 change 页码或 pageSize 改变的回调,参数是改变后的页码及每页条数 Function(page, pageSize) noop

    2023年12月18日
    1.3K00
  • 【界面设计器】自定义字段组件实战——表格字段组合展示

    阅读之前 此文章为实战教程,已假定你熟悉了【界面设计器】较为完整的【自定义组件】相关内容。 如果在阅读过程中出现的部分概念无法理解,请自行学习相关内容。【前端】文章目录 业务背景 表格中的一列使用多个字段组合展示。 演示内容:表格中存在两列,【编码】和【基础信息】。将【名称】、【创建时间】、【更新时间】在【基础信息】一列展示。 业务分析及实现思路 从需求来看,我们需要实现一个【组合列】组件,并且该组件允许在【表格】视图中使用。由于【组合列】本身也是一个字段,因此这里需要选择需要组合字段中的其中一个字段作为组件切换的基础字段,比如我们可以选择【名称】字段作为基础字段。 在【组合列】组件的属性面板中,我们需要再自定义一个【组合列配置】组件,用来选择需要将哪些字段进行组合,以及为每个组合提供一些基础配置。 这里需要理解一个基本概念,即【组合列】的属性面板是【组合列配置】的【执行页面】。所有组件的属性面板在【执行页面】时都是【表单】视图。 因此我们可以实现一个【组合列配置】组件,并且该组件允许在【表单】视图中使用。其业务类型使用【文本】,我们在保存配置数据时,可以使用JSON数据结构来存储复杂结构。(这里的实现思路并非是最符合协议设定的,但可以满足绝大多数组件场景) 在【组合列配置】组件中,我们可以允许用户添加/移除组合,并且每个组合有两个属性,【标题】和【字段】。 准备工作 此处你应该已经在某个业务模型下,可以完整执行当前模型的全部【增删改查】操作。 业务模型定义 (以下仅展示本文章用到的模型字段,忽略其他无关字段。) 名称 API名称 业务类型 是否多值 长度(单值长度) 编码 code 文本 否 128 名称 name 文本 否 128 创建时间 createDate 日期时间 否 – 更新时间 updateDate 日期时间 否 – 实现页面效果展示 表格视图 创建组件、元件 准备工作完成后,我们需要根据【业务背景】确定【组件】以及【元件】相关信息,并在【界面设计器】中进行创建。 以下操作过程将省略详细步骤,仅展示可能需要确认的关键页面。 创建组合列组件 创建组合列元件 创建组合列配置组件 创建组合列配置元件 设计组合列元件属性面板 创建compositeConfig字段,并切换至【组合配置】组件。 设计组合列配置元件属性面板 启动SDK工程进行组件基本功能开发 PS:这里由于我们创建了两个组件,因此,将SDK分开下载后,然后将组合列配置SDK中的演示代码(kunlun-plugin/src)移动到组合列SDK中,在同一工程中进行开发,最后只需将相关JS文件和CSS文件上传到组合列组件中即可,组合列配置组件可以不进行上传。这里需要注意的是,上传多个包含相同组件功能的JS文件和CSS文件可能在运行时导致无法正常替换、冲突等问题。 (npm相关操作请自行查看SDK工程中内置的README.MD) 开发步骤参考 打开【表格】视图,将【名称】字段的组件切换为【组合列】组件。 在属性面板中看到【组合列配置】组件,并优先实现【组合列配置】组件。这里的属性面板就是【组合列配置】对应的【执行页面】。 当【组合列配置】组件可以按照预先设计的数据结构正确保存compositeConfig属性时,可以在【组合列】组件中的props定义中直接获取该属性,接下来就可以进行【组合列】组件的开发。 代码实现参考 工程结构 typing.ts export interface CompositeConfig { key: string; label?: string; field?: string; value?: string; } CompositeColumnConfig.vue <template> <div class="composite-column-config"> <oio-form v-for="item in list" :data="item" :key="item.key"> <oio-form-item label="标题" name="label"> <oio-input v-model:value="item.label" /> </oio-form-item> <oio-form-item label="字段" name="field"> <a-select class="oio-select" dropdownClassName="oio-select-dropdown" v-model:value="item.field" :options="fields" /> </oio-form-item> <oio-button type="link" @click="() => removeItem(item)">移除</oio-button> </oio-form> <oio-button type="primary" block @click="addItem">添加</oio-button> </div> </template> <script lang="ts"> import { uniqueKeyGenerator } from '@kunlun/dependencies'; import { WidgetInstance } from '@kunlun/ui-designer-dependencies'; import { OioButton, OioForm, OioFormItem, OioInput } from '@kunlun/vue-ui-antd'; import { Select as ASelect } from 'ant-design-vue'; import { computed, defineComponent, PropType, ref, watch } from 'vue'; import { CompositeConfig } from '../../typing'; export default defineComponent({ name: 'CompositeColumnConfig', components: { OioForm, OioFormItem, OioInput, OioButton, ASelect }, props: { currentInstance: { type:…

    2023年11月1日
    1.5K00

Leave a Reply

Please Login to Comment