Excel导入扩展点-整体导入(批量导入)

1、【导入】在有些场景,需要获取Excel导入的整体数据,进行批量的操作或者校验

可以通过实现导入扩展点的方式实现,入参data是导入Excel的数据列表;业务可以根据实际情况进行数据校验

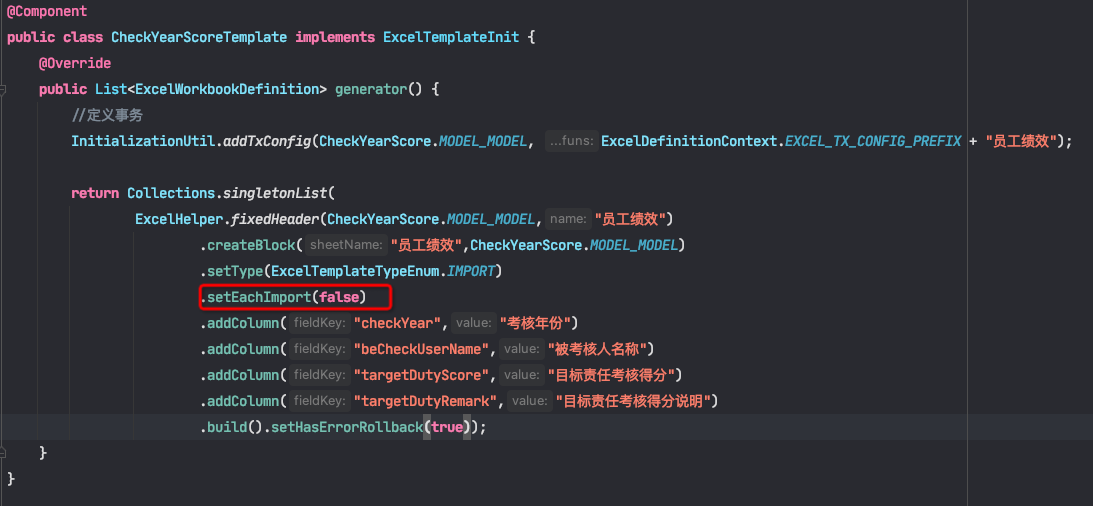
1)Excel模板定义,需要设置setEachImport(false)

Excel导入扩展点-整体导入(批量导入)

2)导入扩展点API定义

pro.shushi.pamirs.file.api.extpoint.ExcelImportDataExtPoint#importData

3)示例代码参考:

pro.shushi.pamirs.translate.extpoint.ResourceTranslationImportExtPoint#importData

@Slf4j
@Component
@Ext(ExcelImportTask.class)
public class ResourceTranslationImportExtPoint extends AbstractExcelImportDataExtPointImpl<List<ResourceTranslationItem>> {

    @Override
    //TODO 表达式,可以自定义,比如可以支持1个模型的多个【导入名称】的不同模板
    @ExtPoint.Implement(expression = "importContext.definitionContext.model==\"" + ResourceTranslation.MODEL_MODEL + "\"")
    public Boolean importData(ExcelImportContext importContext, List<ResourceTranslationItem> dataList) {
        //TODO dataList就是excel导入那个sheet的所有内容

        return true;
    }

}

2、【导入】逐行导入的时候做事务控制

在模板中定义中增加事务的定义,并设置异常后回滚。参加示例代码:

excel模板定义

@Component
public class DemoItemImportTemplate implements ExcelTemplateInit {

    public static final String TEMPLATE_NAME = "商品导入模板";

    @Override
    public List<ExcelWorkbookDefinition> generator() {
        //定义事务(导入处理中,只操作单个表的不需要事务定义。)
        //是否定义事务根据实际业务逻辑确定。比如:有些场景在导入前需要删除数据后在进行导入就需要定义事务
        InitializationUtil.addTxConfig(DemoItem.MODEL_MODEL, ExcelDefinitionContext.EXCEL_TX_CONFIG_PREFIX + TEMPLATE_NAME);

        return Collections.singletonList(
                ExcelHelper.fixedHeader(DemoItem.MODEL_MODEL, TEMPLATE_NAME)
                        .setType(ExcelTemplateTypeEnum.IMPORT)
                        .createSheet("商品导入-sheet1")
                        .createBlock(DemoItem.MODEL_MODEL)
                        .addUnique(DemoItem.MODEL_MODEL,"name")
                        .addColumn("name","名称")
                        .addColumn("description","描述")
                        .addColumn("itemPrice","单价")
                        .addColumn("inventoryQuantity","库存")
                        .build().setEachImport(true)
                        //TODO 设置异常后回滚的标识,这个地方会回滚事务
                        .setHasErrorRollback(true)
                        .setExcelImportMode(ExcelImportModeEnum.SINGLE_MODEL)
        );

    }
}

导入逻辑处理

@Slf4j
@Component
@Ext(ExcelImportTask.class)
public class DemoItemImportExtPoint extends AbstractExcelImportDataExtPointImpl<DemoItem> implements ExcelImportDataExtPoint<DemoItem> {

    @Autowired
    private DemoItemService demoItemService;

    @Override
    @ExtPoint.Implement(expression = "importContext.definitionContext.model == \"" + DemoItem.MODEL_MODEL + "\"")
    public Boolean importData(ExcelImportContext importContext, DemoItem data) {
        ExcelImportTask importTask = importContext.getImportTask();
        try {
            DemoItemImportTask hrExcelImportTask = new DemoItemImportTask().queryById(importTask.getId());

            String publishUserName = Optional.ofNullable(hrExcelImportTask).map(DemoItemImportTask::getPublishUserName).orElse(null);
            data.setPublishUserName(publishUserName);

            demoItemService.create(data);
        } catch(PamirsException e) {
            log.error("导入异常", e);
        } catch (Exception e) {
            log.error("导入异常", e);
        }
        return Boolean.TRUE;
    }
}

Oinone社区 作者:望闲原创文章,如若转载,请注明出处:https://doc.oinone.top/backend/4856.html

访问Oinone官网:https://www.oinone.top获取数式Oinone低代码应用平台体验

(0)
望闲的头像望闲数式管理员
上一篇 2023年12月5日 pm6:17
下一篇 2023年12月18日 am9:59

相关推荐

  • 【Excel导入/导出】多Sheet导入导出示例(4.7.x及以上版本)

    代码示例 示例仅供参考 点击下载代码示例 业务场景 准备工作:两个模型,物料(Material)和物料类别(MaterialCategory)。目标:在一个Excel模板中同时导入和导出两个模型的数据。 Material模型 @Model.model(Material.MODEL_MODEL) @Model.Advanced(unique = {"code"}) @Model(displayName = "物料", labelFields = {"name"}) public class Material extends IdModel { private static final long serialVersionUID = -2594216864389636135L; public static final String MODEL_MODEL = "maas.Material"; @Field.String @Field(displayName = "物料编码", required = true) private String code; @Field.String @Field(displayName = "物料名称", required = true) private String name; } MaterialCategory模型 @Model.model(MaterialCategory.MODEL_MODEL) @Model.Advanced(unique = {"code"}) @Model(displayName = "物料类别", labelFields = {"name"}) public class MaterialCategory extends IdModel { private static final long serialVersionUID = 6300896634558908349L; public static final String MODEL_MODEL = "maas.MaterialCategory"; @Field.String @Field(displayName = "类别编码", required = true) private String code; @Field.String @Field(displayName = "类别名称", required = true) private String name; } 模板定义 MaterialTemplate @Component public class MaterialTemplate implements ExcelTemplateInit { public static final String TEMPLATE_NAME = "materialTemplate"; @Override public List<ExcelWorkbookDefinition> generator() { WorkbookDefinitionBuilder builder = WorkbookDefinitionBuilder.newInstance(Material.MODEL_MODEL, TEMPLATE_NAME) .setDisplayName("物料和物料类别") .setEachImport(Boolean.FALSE);//设置importData的入参为 (ExcelImportContext importContext, List<MaterialCategory> data),如入参是单个对象,请删除setEachImport(Boolean.FALSE) createMaterialSheet(builder); createMaterialCategorySheet(builder); return Collections.singletonList(builder.build()); } private static void createMaterialSheet(WorkbookDefinitionBuilder builder) { builder.createSheet().setName("物料") .createBlock(Material.MODEL_MODEL, ExcelAnalysisTypeEnum.FIXED_HEADER, ExcelDirectionEnum.HORIZONTAL, "A1:B2") .createHeader().setStyleBuilder(ExcelHelper.createDefaultStyle()).setIsConfig(Boolean.TRUE) .createCell().setField("code").setAutoSizeColumn(Boolean.TRUE).and() .createCell().setField("name").setAutoSizeColumn(Boolean.TRUE).and() .and() .createHeader().setStyleBuilder(ExcelHelper.createDefaultStyle(v -> v.setBold(Boolean.TRUE)).setHorizontalAlignment(ExcelHorizontalAlignmentEnum.CENTER)) .createCell().setValue("物料编码").and() .createCell().setValue("物料名称"); } private static void createMaterialCategorySheet(WorkbookDefinitionBuilder builder) { builder.createSheet().setName("物料类别") .createBlock(MaterialCategory.MODEL_MODEL, ExcelAnalysisTypeEnum.FIXED_HEADER, ExcelDirectionEnum.HORIZONTAL, "A1:B2") .createHeader().setStyleBuilder(ExcelHelper.createDefaultStyle()).setIsConfig(Boolean.TRUE) .createCell().setField("code").setAutoSizeColumn(Boolean.TRUE).and()…

    2024年4月23日
    1.3K00
  • 【OpenGauss】后端部署使用OpenGauss高斯数据库

    Gauss数据库配置 适配版本 4.7.8.3之后的版本 配置步骤 Maven配置 去华为官网下周驱动包:gsjdbc4.jar;https://support.huaweicloud.com/mgtg-dws/dws_01_0032.html <dependency> <groupId>org.postgresql</groupId> <artifactId>gsjdbc</artifactId> <version>4</version> <scope>system</scope> <!– 下面两种方式都可以–> <systemPath>${pom.basedir}/libs/gsjdbc4.jar</systemPath> <!–<systemPath>/Users/wangxian/java-tools/guassdb/gsjdbc4.jar</systemPath>–> </dependency> 导入 scope 为 system 的包,spring 编译插件需要增加 includeSystemScope: true 配置。 <plugin> <groupId>org.springframework.boot</groupId> <artifactId>spring-boot-maven-plugin</artifactId> <configuration> <includeSystemScope>true</includeSystemScope> </configuration> <executions> <execution> <goals> <goal>repackage</goal> </goals> </execution> </executions> </plugin> JDBC连接配置 pamirs: datasource: pamirs: type: com.alibaba.druid.pool.DruidDataSource driverClassName: org.postgresql.Driver url: jdbc:postgresql://127.0.0.1:5432/pamirs?currentSchema=demo username: XXXXXX password: XXXXXX initialSize: 5 maxActive: 200 minIdle: 5 maxWait: 60000 timeBetweenEvictionRunsMillis: 60000 testWhileIdle: true testOnBorrow: false testOnReturn: false poolPreparedStatements: true asyncInit: true base: type: com.alibaba.druid.pool.DruidDataSource driverClassName: org.postgresql.Driver url: jdbc:postgresql://127.0.0.1:5432/pamirs?currentSchema=demo_base username: XXXXXX password: XXXXXX initialSize: 5 maxActive: 200 minIdle: 5 maxWait: 60000 timeBetweenEvictionRunsMillis: 60000 testWhileIdle: true testOnBorrow: false testOnReturn: false poolPreparedStatements: true asyncInit: true 连接url配置 点击查看官方文档:官方文档 url格式 jdbc:postgresql://${host}:${port}/${database}?currentSchema=${schema} 在pamirs连接配置时,${database}和${schema}必须完整配置,不可缺省。 其他连接参数如需配置,可自行查阅相关资料进行调优。 方言配置 pamirs方言配置 pamirs: dialect: ds: base: type: GaussDB version: 5 majorVersion: 5.0.1 pamirs: type: GaussDB version: 5 majorVersion: 5.0.1 数据库版本 type version majorVersion 5.x GaussDB 5 5.0.1 PS:由于方言开发环境为5.0.1版本,其他类似版本(5.x)原则上不会出现太大差异,如出现其他版本无法正常支持的,可在文档下方留言。 schedule方言配置 pamirs: event: enabled: true schedule: enabled: true dialect: type: GaussDB version: 5 major-version: 5.0.1 type version majorVersion GaussDB 5 5.0.1 PS:由于schedule的方言在多个版本中并无明显差异,目前仅提供一种方言配置。 其他配置 逻辑删除的值配置 pamirs: mapper: global: table-info: logic-delete-value: (EXTRACT(epoch FROM CURRENT_TIMESTAMP) * 1000000 + EXTRACT(MICROSECONDS FROM CURRENT_TIMESTAMP))::bigint Gauss数据库用户初始化及授权 — init root…

    2024年3月27日
    2.4K00
  • 【HighGo】后端部署使用HighGo数据库

    HighGo数据库配置 驱动配置 jdbc仓库 https://mvnrepository.com/artifact/com.highgo/HgdbJdbc Maven配置(6.0.1版本可用) <highgo.version>6.0.1.jre8</highgo.version> <dependency> <groupId>com.highgo</groupId> <artifactId>HgdbJdbc</artifactId> <version>${highgo.version}</version> </dependency> JDBC连接配置 pamirs: datasource: base: type: com.alibaba.druid.pool.DruidDataSource driverClassName: com.highgo.jdbc.Driver url: jdbc:highgo://127.0.0.1:5866/oio_base?currentSchema=base,utl_file username: xxxxxx password: xxxxxx initialSize: 5 maxActive: 200 minIdle: 5 maxWait: 60000 timeBetweenEvictionRunsMillis: 60000 testWhileIdle: true testOnBorrow: false testOnReturn: false poolPreparedStatements: true asyncInit: true 连接url配置 官方文档 https://www.highgo.com/document/zh-cn/application/jdbc.html url格式 jdbc:highgo://ip:端口号/数据库名?currentSchema=schema1,schema2 在jdbc连接配置时,${database}和${schema}必须完整配置,不可缺省。 jdbc指定schema时可以在currentSchema后指定多个schema,中间用,分隔,第一个schema为业务库表存放的主schema。 highgo数据库6.0版本里每个数据库默认会带一个utl_file的schema,该模式与文件访问功能有关,需要带在jdbc的schema中,但不能放在第一个。 其他连接参数如需配置,可自行查阅相关资料进行调优。 方言配置 pamirs方言配置 pamirs: dialect: ds: base: type: HighGoDB version: 6 major-version: 6.0.1 biz_data: type: HighGoDB version: 6 major-version: 6.0.1 数据库版本 type version majorVersion 6.0.x HighGo 6 6.0.1 PS:由于方言开发环境为6.0.1版本,其他类似版本(6.0.x)原则上不会出现太大差异,如出现其他版本无法正常支持的,可在文档下方留言。 schedule方言配置 pamirs: event: enabled: true schedule: enabled: true dialect: type: HighGoDB version: 6 major-version: 6.0.1 其他配置 逻辑删除的值配置 pamirs: mapper: global: table-info: logic-delete-value: (EXTRACT(epoch FROM CURRENT_TIMESTAMP) * 1000000 + EXTRACT(MICROSECONDS FROM CURRENT_TIMESTAMP))::bigint Highgo数据库用户初始化及授权 — init oio_base user (user name can be modified by oneself) CREATE USER oio_base WITH PASSWORD 'Test@12345678'; — if using automatic database and schema creation, this is very important. ALTER USER oio_base CREATEDB; SELECT * FROM pg_roles; — if using highgo database, this authorization is required. GRANT CREATE ON DATABASE highgo TO oio_base;

    2025年7月10日
    45200
  • Oinone离线部署设计器JAR包

    概述 Oinone平台为合作伙伴提供了多种部署方式,这篇文章将介绍如何在私有云环境部署Oinone平台JAR包。 本文以5.2.6版本为例进行介绍。 部署环境要求 包含全部中间件及设计器服务的环境要求 CPU:8 vCPU 内存(RAM):16G以上 硬盘(HDD/SSD):60G以上 仅设计器服务的环境要求 CPU:8 vCPU 内存(RAM):8G以上 硬盘(HDD/SSD):40G以上 部署准备 在部署环境创建部署目录 mkdir -p /home/admin/oinone-designer PS:为方便管理,所有Oinone部署所需文件都应该在该目录下存放。 服务器需要安装的中间件 JDK:jdk_1.8_221版本以上 下载地址 MySQL:8.0.26版本以上 下载地址 Redis:5.0.2版本以上 下载地址 安装教程 Zookeeper:3.5.8版本以上 下载地址 安装教程 Nginx:任意版本(推荐使用源码编译安装方式,并开启rewrite、https等功能模块) Linux安装教程 下载地址 使用Docker启动所有中间件 点击下载一键部署所有中间件套件包 middleware-kits.zip 部署清单 下面列举了文章中在本地环境操作结束后的全部文件: 设计器JAR包:pamirs-designer-boot-v5.2-5.2.6.jar 离线部署结构包:oinone-designer-jar-offline.zip 第三方数据库驱动包(非MySQL数据库必须) PS:如需一次性拷贝所有部署文件到部署环境,可以将文档步骤在本地环境执行后,一次性将所有文件进行传输。 在本地环境准备部署文件 下载离线部署结构包 oinone-designer-jar-offline.zip 下载部署JAR包 5.2.6版本发布日志 查看更多版本 找到独立部署所有设计器JAR标题,下面有对应的JAR包提供下载。 例如:https://oinone-jar.oss-cn-zhangjiakou.aliyuncs.com/install/oinone-designer/pamirs-designer-boot-v5.2-5.2.6.jar 后端服务部署 将部署JAR包移动到backend目录下,并重命名为oinone-designer.jar mv pamirs-designer-boot-v5.2-5.2.6.jar backend/oinone-designer.jar PS:该名称为startup.sh脚本的默认值,可根据实际情况自行修改 将Pamirs许可证移动到backend/config目录下,并重命名为license.lic mv oinone-demo_1730163770607.lic backend/config/license.lic 加载非MySQL数据库驱动(按需) 将驱动jar文件移动到backend/lib目录下即可。 以KDB8数据库驱动kingbase8-8.6.0.jar为例 mv kingbase8-8.6.0.jar backend/lib/ PS:backend/lib目录为非设计器内置包的外部加载目录(外部库),可以添加任何jar包集成到设计器中。 修改backend/startup.sh脚本 IP:修改为可被外部访问的IP地址 DB_BASE_:base库相关数据库连接配置 DB_PAMIRS_:pamirs库相关数据库连接配置 REDIS_:Redis相关配置 MQ_NAME_SERVER:RocketMQ的name-server连接地址 ZOOKEEPER_:Zookeeper相关配置 PS:若需要配置方言或其他参数,可直接修改backend/config/application.yml配置文件,变量仅用于简单配置场景 执行startup.sh脚本启动 sh startup.sh 执行完成后会打印三个路径 后端路径:backend root path: /path/to/backend 前端路径:frontend root path: /path/to/frontend Nginx配置路径:nginx services path: /path/to/nginx Nginx配置 在本地nginx服务中找到nginx.conf,并添加Nginx配置路径为加载目录 http { … include /path/to/nginx/*.conf; } 修改结构包中的default.conf第7行root配置为前端路径到dist目录下 server { … root /path/to/frontend/dist; } 修改结构包中的oss.conf第30行alias配置为前端路径到static目录下 server { … location /static { … alias /path/to/frontend/static; } } 访问服务 使用http://127.0.0.1:9090访问服务

    2024年11月1日
    1.6K00
  • 项目中工作流引入和流程触发

    目录 1. 使用工作流需要依赖的包和设置2. 触发方式2.1 自动触发方式2.2 触发方式 1.使用工作流需要依赖的包和设置 1.1 工作流需要依赖的模块 需在pom.xml中增加workflow、sql-record和trigger相关模块的依赖 workflow:工作流运行核心模块 sql-record:监听流程发布以后对应模型的增删改监听 trigger:异步任务调度模块 <dependency> <groupId>pro.shushi.pamirs.workflow</groupId> <artifactId>pamirs-workflow-api</artifactId> </dependency> <dependency> <groupId>pro.shushi.pamirs.workflow</groupId> <artifactId>pamirs-workflow-core</artifactId> </dependency> <dependency> <groupId>pro.shushi.pamirs.core</groupId> <artifactId>pamirs-sql-record-core</artifactId> </dependency> <dependency> <groupId>pro.shushi.pamirs.core</groupId> <artifactId>pamirs-trigger-core</artifactId> </dependency> <dependency> <groupId>pro.shushi.pamirs.core</groupId> <artifactId>pamirs-trigger-bridge-tbschedule</artifactId> </dependency> 在application.yml中增加对应模块的依赖以及sql-record路径以及其他相关设置 pamirs: … record: sql: #改成自己路径 store: /opt/pamirs/logs … boot: init: true sync: true modules: … – sql_record – trigger – workflow … sharding: define: data-sources: ds: pamirs models: "[trigger.PamirsSchedule]": tables: 0..13 event: enabled: true schedule: enabled: true # ownSign区分不同应用 ownSign: demo rocket-mq: # enabled 为 false情况不用配置 namesrv-addr: 192.168.6.2:19876 trigger: auto-trigger: true 2.触发方式 2.1自动触发方式 在流程设计器中设置触发方式,如果设置了代码触发方式则不会自动触发 2.2代码调用方式触发 2.2.1.再流程设计器中触发设置中,设置为是否人工触发设置为是 2.2.2.查询数据库获取该流程的编码 2.2.3.在代码中调用 /** * 触发⼯作流实例 */ private Boolean startWorkflow(WorkflowD workflowD, IdModel modelData) { WorkflowDefinition workflowDefinition = new WorkflowDefinition().queryOneByWrapper( Pops.<WorkflowDefinition>lambdaQuery() .from(WorkflowDefinition.MODEL_MODEL) .eq(WorkflowDefinition::getWorkflowCode, workflowD.getCode()) .eq(WorkflowDefinition::getActive, 1) ); if (null == workflowDefinition) { // 流程没有运⾏实例 return Boolean.FALSE; } String model = Models.api().getModel(modelData); //⼯作流上下⽂ WorkflowDataContext wdc = new WorkflowDataContext(); wdc.setDataType(WorkflowVariationTypeEnum.ADD); wdc.setModel(model); wdc.setWorkflowDefinitionDefinition(workflowDefinition.parseContent()); wdc.setWorkflowDefinition(workflowDefinition); wdc.setWorkflowDefinitionId(workflowDefinition.getId()); IdModel copyData = KryoUtils.get().copy(modelData); // ⼿动触发创建的动作流,将操作⼈设置为当前⽤户,作为流程的发起⼈ copyData.setCreateUid(PamirsSession.getUserId()); copyData.setWriteUid(PamirsSession.getUserId()); String jsonData = JsonUtils.toJSONString(copyData.get_d()); //触发⼯作流 新增时触发-onCreateManual 更新时触发-onUpdateManual Fun.run(WorkflowModelTriggerFunction.FUN_NAMESPACE, "onCreateManual", wdc, msgId, jsonData); return Boolean.TRUE; }

    2023年11月7日
    1.6K00

Leave a Reply

登录后才能评论