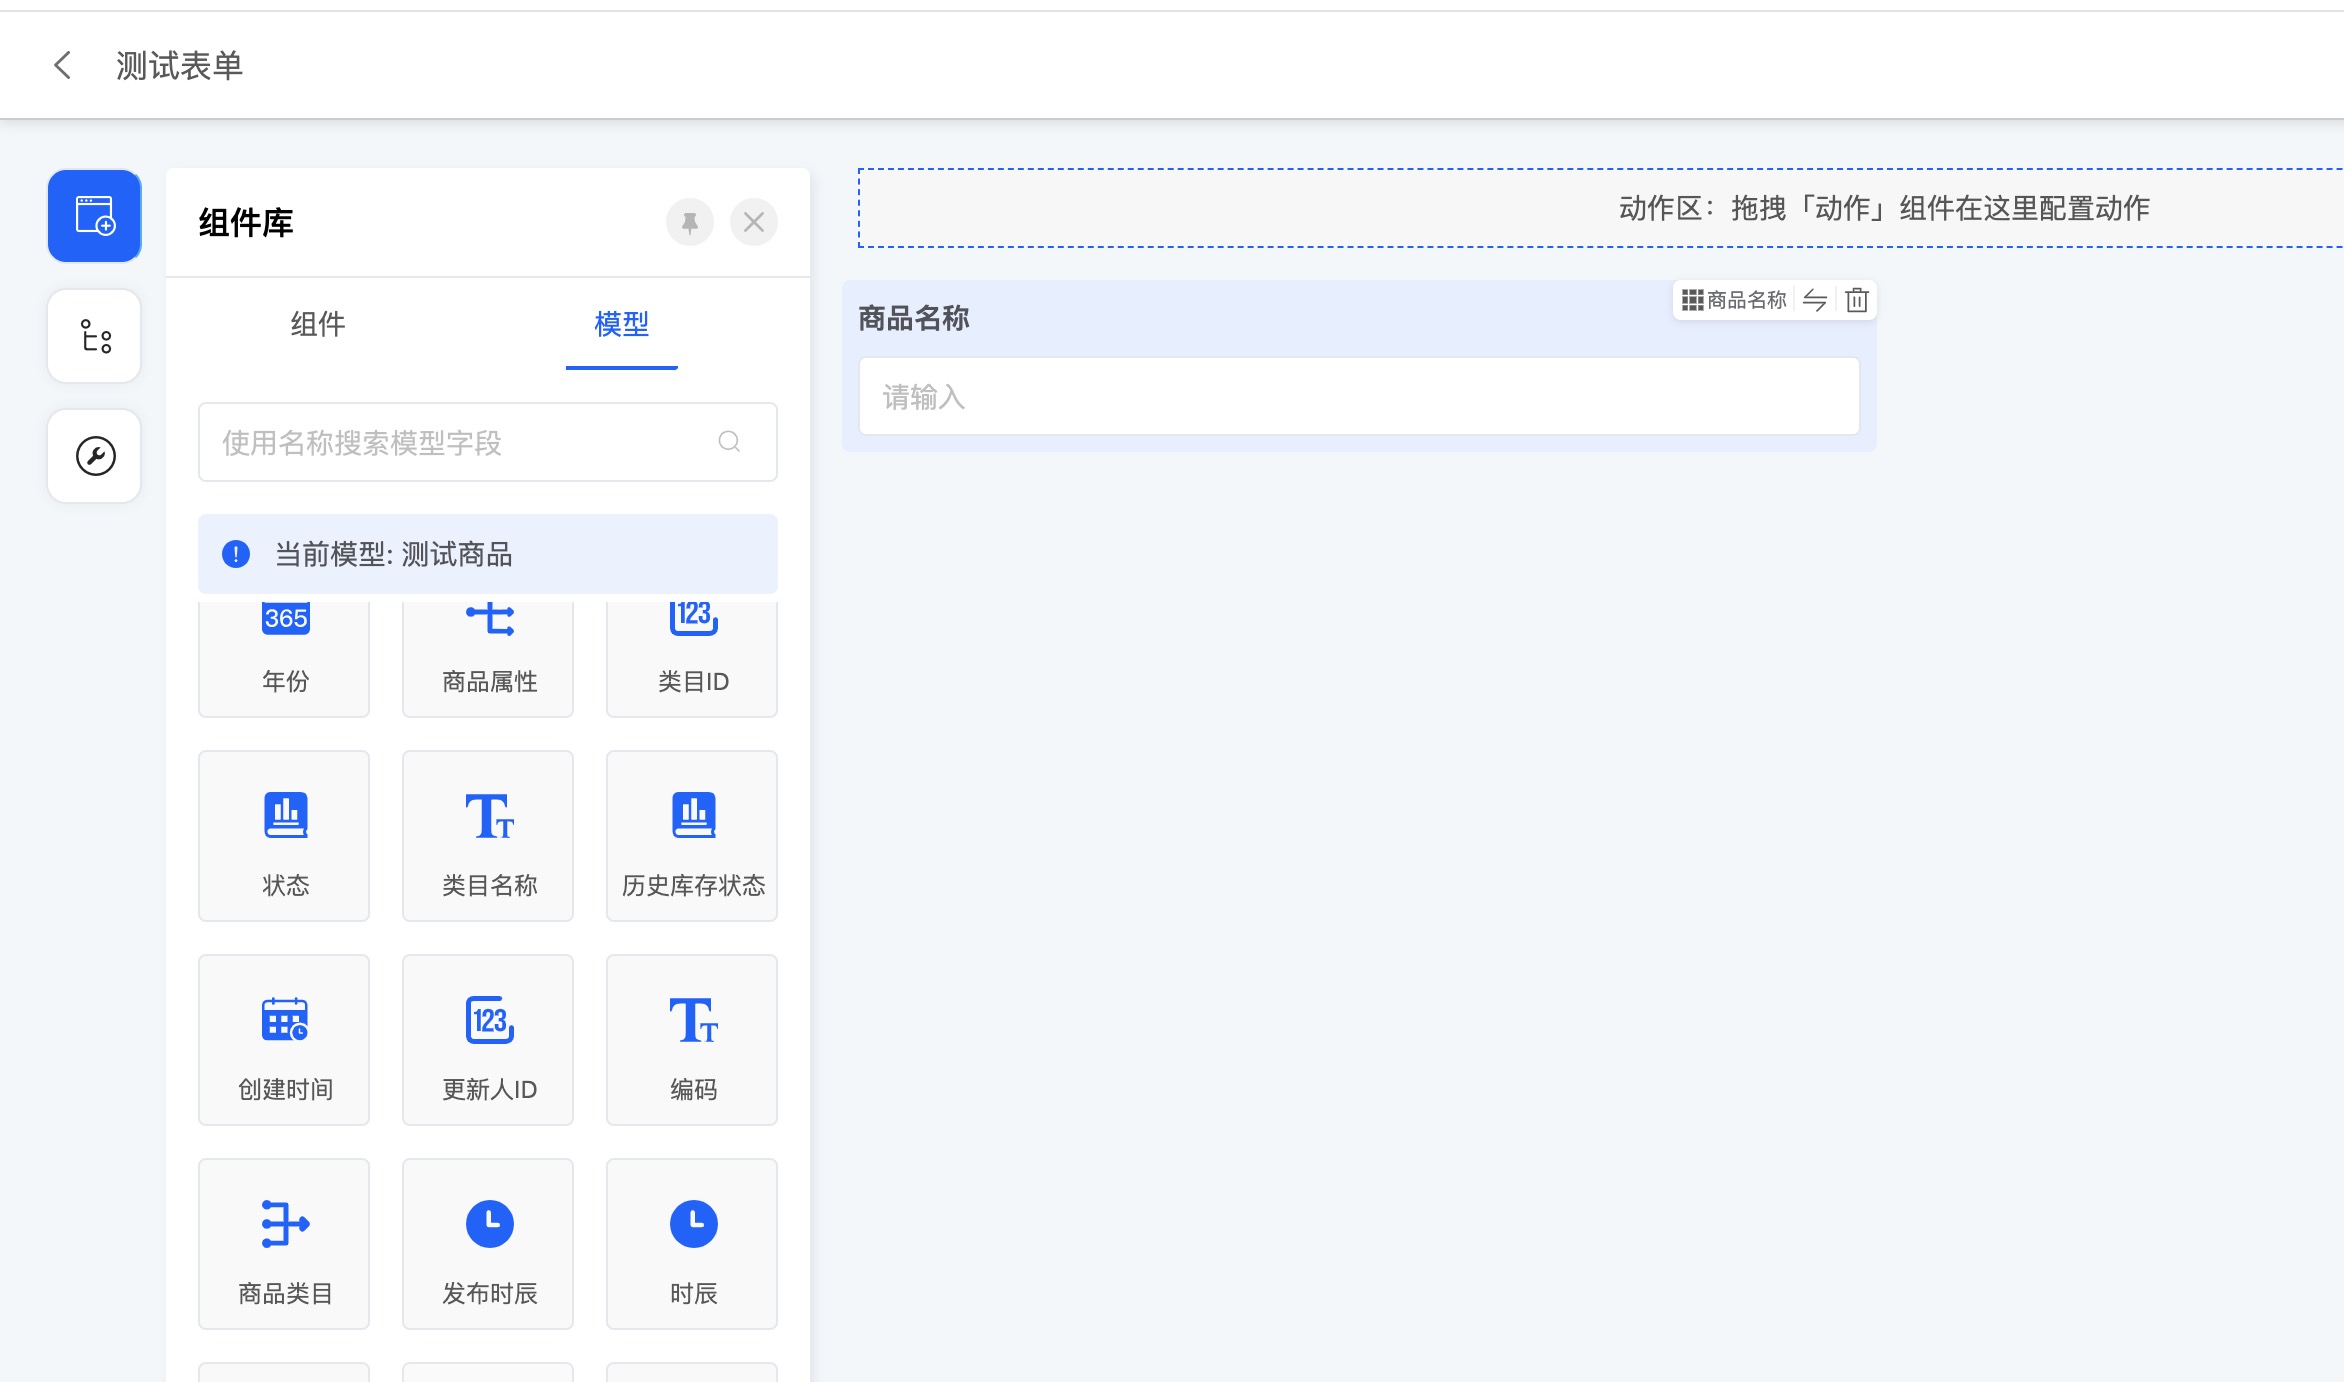
1. 审批/填写节点的视图页面
在界面设计器中创建对应模型的表单视图,可根据业务场景需要自定义所需流程待办的审批页面
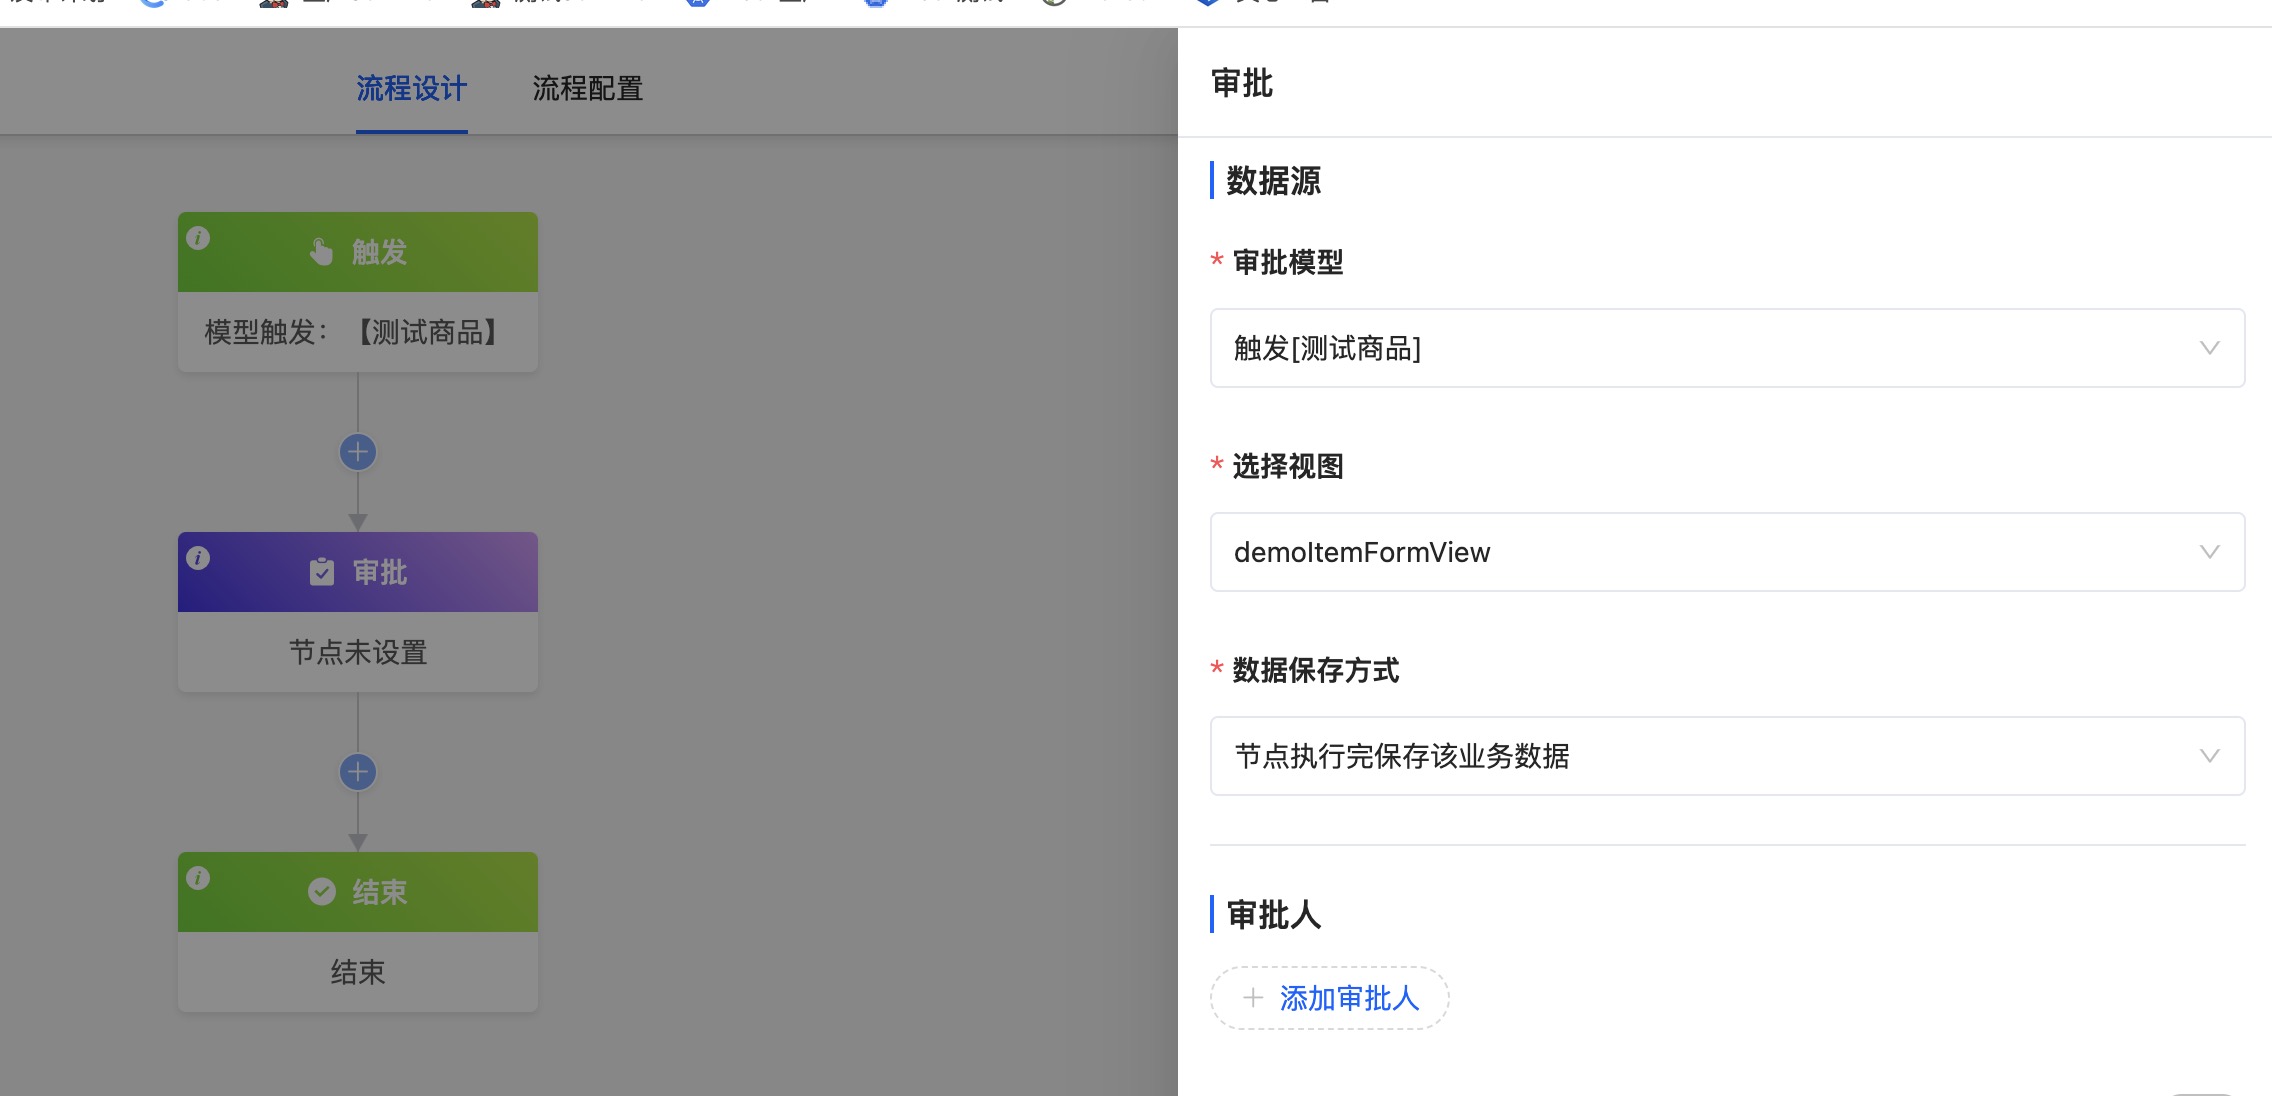
2. 在审批/填写节点中选择刚创建的视图
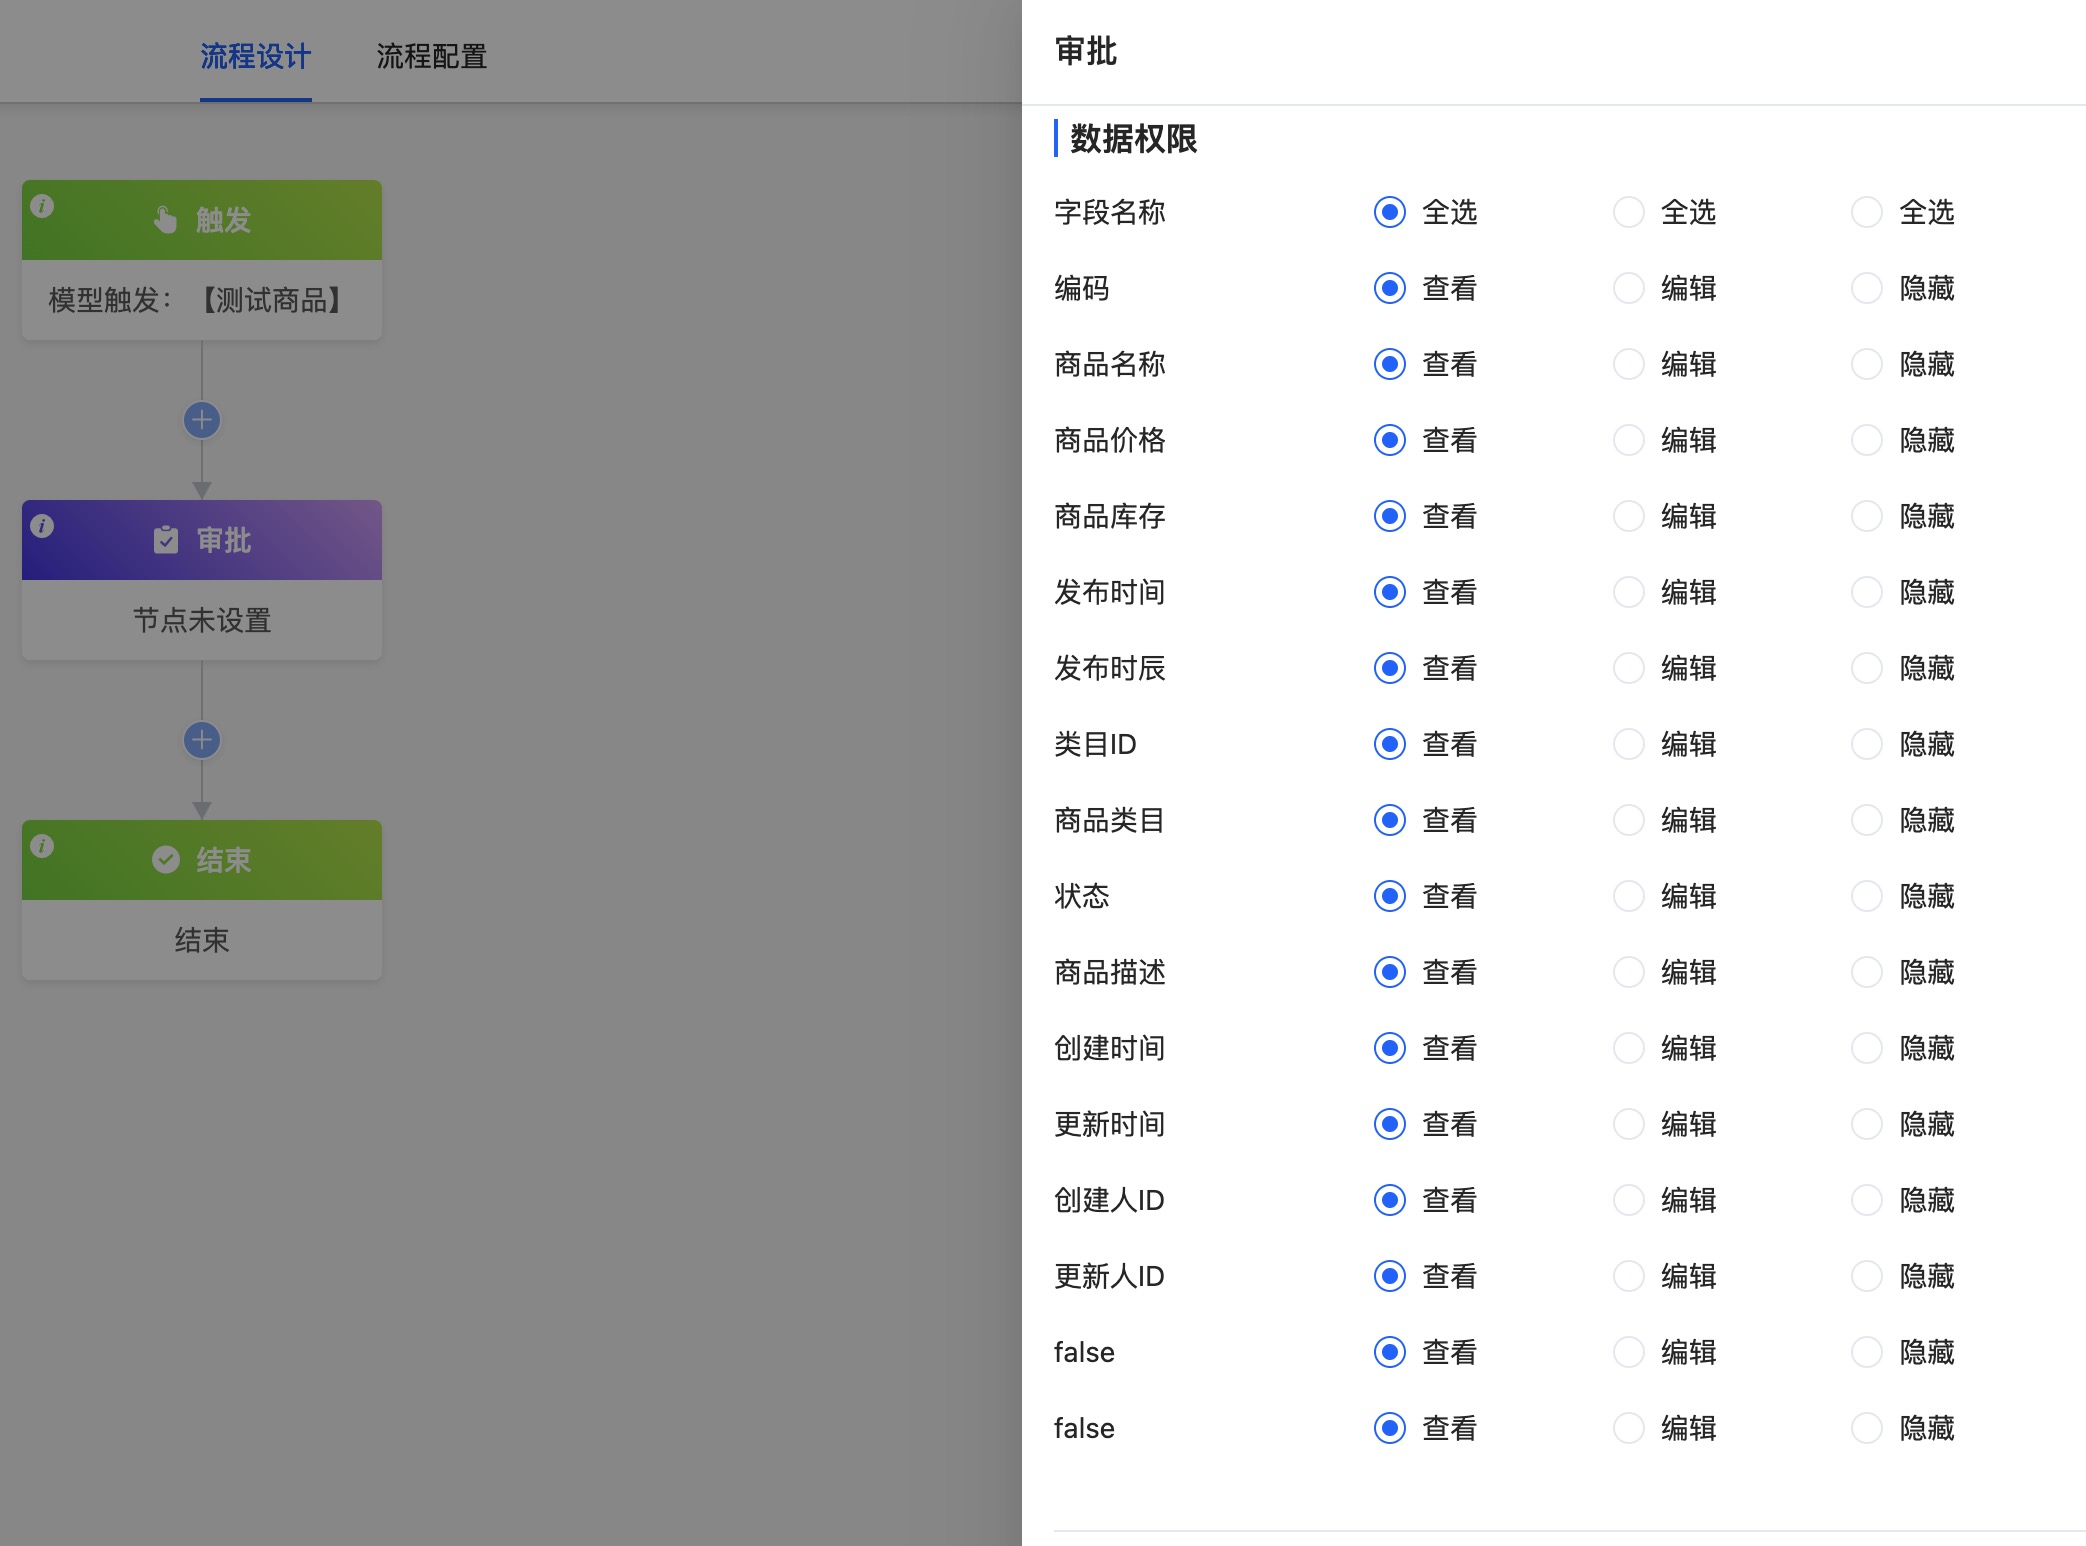
在工作流待办数据权限可在节点数据权限中可对字段设置查看、编辑、隐藏

Oinone社区 作者:数式-海波原创文章,如若转载,请注明出处:https://doc.oinone.top/backend/7224.html
访问Oinone官网:https://www.oinone.top获取数式Oinone低代码应用平台体验

在界面设计器中创建对应模型的表单视图,可根据业务场景需要自定义所需流程待办的审批页面
2. 在审批/填写节点中选择刚创建的视图
在工作流待办数据权限可在节点数据权限中可对字段设置查看、编辑、隐藏
Oinone社区 作者:数式-海波原创文章,如若转载,请注明出处:https://doc.oinone.top/backend/7224.html
访问Oinone官网:https://www.oinone.top获取数式Oinone低代码应用平台体验
介绍 数式Oinone默认提供了阿里云、腾讯云、华为云、又拍云、Minio和本地文件存储这几种文件存储系统,如果我们有其他的文件存储系统需要对接,或者是扩展现有的文件系统,可以通过SPI继承AbstractFileClient注册新的文件存储系统。 代码示例 这里以扩展自有的本地文件系统为例 继承了内置的本地文件存储LocalFileClient,将其中上传文件的方法重写 package pro.shushi.pamirs.demo.core.file; import org.springframework.stereotype.Component; import org.springframework.web.bind.annotation.RequestMapping; import org.springframework.web.bind.annotation.RequestMethod; import org.springframework.web.bind.annotation.ResponseBody; import org.springframework.web.bind.annotation.RestController; import org.springframework.web.multipart.MultipartFile; import org.springframework.web.multipart.support.StandardMultipartHttpServletRequest; import pro.shushi.pamirs.framework.connectors.cdn.client.LocalFileClient; import pro.shushi.pamirs.meta.annotation.fun.extern.Slf4j; import pro.shushi.pamirs.meta.common.spi.SPI; import javax.servlet.http.HttpServletRequest; @Slf4j @Component // 注册新的文件存储系统类型 @SPI.Service(DemoLocalFileClient.TYPE) @RestController @RequestMapping("/demo_file") public class DemoLocalFileClient extends LocalFileClient { public static final String TYPE = "DEMO_LOCAL"; @Override public CdnFileForm getFormData(String fileName) { CdnConfig cdnConfig = getCdnConfig(); CdnFileForm fileForm = new CdnFileForm(); String uniqueFileName = Spider.getDefaultExtension(CdnFileNameApi.class).getNewFilename(fileName); String fileKey = getFileKey(cdnConfig.getMainDir(), uniqueFileName); //前端获取uploadUrl,上传文件到该地址 fileForm.setUploadUrl(cdnConfig.getUploadUrl() + "/demo_file/upload"); //上传后,前端将downloadUrl返回给后端 fileForm.setDownloadUrl(getDownloadUrl(fileKey)); fileForm.setFileName(uniqueFileName); Map<String, Object> formDataJson = new HashMap<>(); formDataJson.put("uniqueFileName", uniqueFileName); formDataJson.put("key", fileKey); fileForm.setFormDataJson(JSON.toJSONString(formDataJson)); return fileForm; } @ResponseBody @RequestMapping(value = "/upload", produces = "multipart/form-data;charset=UTF-8",method = RequestMethod.POST) public String uploadFileToLocal(HttpServletRequest request) { MultipartFile file = ((StandardMultipartHttpServletRequest) request).getFile("file"); // 例如可以根据file文件类型判断哪些文件是否可以上传 return super.uploadFileToLocal(request); } } 在application.yml内配置 cdn: oss: name: 本地文件系统 # 这里的type与代码中定义的文件存储系统类型对应 type: DEMO_LOCAL bucket: pamirs uploadUrl: http://127.0.0.1:8190 downloadUrl: http://127.0.0.1:6800 validTime: 3600000 timeout: 600000 active: true referer: localFolderUrl: /Users/demo/workspace/static
Oinone请求调用链路 请求格式与简单流程 在Oinone中请求数据存储在请求体中,以GQL的方式进行表示,也就是GQL格式的请求。 当我们发送一个GQL格式的请求,后端会对GQL进行解析,确定想要执行的方法,并对这个方法执行过程中所用到的模型进行构建,最后返回响应。 请求 # 请求路径 pamirs/base http://127.0.0.1:8090/pamirs/base # 请求体内容 query{ petShopProxyBQuery{ sayHello(shop:{shopName:"cpc"}){ shopName } } } 解析 # 简单理解 query 操作类型 petShopProxyBQuery 模块名称 + Query sayHello 方法 fun sayHello() 可以传入参数,参数名为 shop shopName 需要得到的值 响应 # data中的内容 "data": { "petShopQuery": { "hello": { "shopName": "cpc" } } } 具体流程 Oinone是基于SpringBoot的,在Controller中处理请求 会接收所有以 /pamirs 开始的POST请求,/pamirs/后携带的是模块名 @RequestMapping( value = "/pamirs/{moduleName:^[a-zA-Z][a-zA-Z0-9_]+[a-zA-Z0-9]$}", method = RequestMethod.POST ) public String pamirsPost(@PathVariable("moduleName") String moduleName, @RequestBody PamirsClientRequestParam gql, HttpServletRequest request, HttpServletResponse response) { …….. } 整体脉络 第四步执行中有两大重要的步骤,一步是动态构建GQL,一步是执行请求。 动态构建GQL 请求执行
前提 源码分析版本是 5.1.x版本 什么是协同开发模式 协同开发模式解决的是不同开发,在开发同一个模型时,不会相互影响,也不会影响到测试环境详见:Oinone协同开发使用手册 协同开发原理 在协同模式下,本地开发的元数据,配置pamirs.data.distribution.session.ownSign参数后,元数据前缀加ownSign值,然后只存在redis缓存,不落库。其它环境无法直接访问到该数据。测试环境,或其它环境访问,需要在url上加ownSign等于设置的,则读redis数据时,除了加载通用数据,也会合并ownSign前缀的redis数据,显示出来 注意事项 协同开发仅支持界面设计器,其他设计器均不支持 不支持权限配置 不支持工作流触发 版本支持 完整支持5.1.0及以上 功能详解 启动时操作 做元数据保护检查 配置ownSign,则key拼接为 ownSign + ‘:’ + key 清除掉ownSign的redis缓存数据;非ownSign不用清理 计算差量数据 有差量数据,放入ownSign标识数据,并清理本地标识 dubbo注册服务,group拼接group + ownSign 后进行注册 读取时操作 读本地 组装key: ownSign + ‘:’ + key 本地缓存有数据,更新缓存本地数据,返回 本地没有数据,读redis,并插入本地缓存 读远程 dubbo注册消费者,group拼接group + ownSign 后进行泛化调用 元数据保护检查 开启数据保护模式,在启动参数里加-PmetaProtected=pamirs 会在启动时,往redis里写入数据 private static final String META_PROTECTED_KEY = “pamirs:check:meta-protected”; private void writeMetaProtected(String metaProtected) { stringRedisTemplate.opsForValue().set(META_PROTECTED_KEY, metaProtected); } 如果同时又设置 pamirs.data.distribution.session.ownSign则会报错 在使用元数据保护模式下,不允许设置 [pamirs.distribution.session.ownSign] 处理逻辑如下 看redis是否启用保护标识的值 获取pamirs.distribution.session.ownSign配置 没有启动参数 且redis没有值,则retrun 如果有启动参数且配置了ownSign,报错 在使用元数据保护模式下,不允许设置 [pamirs.distribution.session.ownSign] 如果有启动参数且 redis没有值或启动参数设置 -P metaForceProtected,则写入redis 如果有启动参数, 且启动参数跟redis值不同,则报错[公共环境开启了元数据保护模式,本地开发环境需配置[pamirs.distribution.session.ownSign]] 如果没有启动参数且redis有值,但没有配置ownSign 报错[公共环境开启了元数据保护模式,本地开发环境需配置[pamirs.distribution.session.ownSign]] 核心代码如下MetadataProtectedChecker public void process(AppLifecycleCommand command, Set<String> runModules, List<ModuleDefinition> installModules, List<ModuleDefinition> upgradeModules, List<ModuleDefinition> reloadModules) { String currentMetaProtected = stringRedisTemplate.opsForValue().get(META_PROTECTED_KEY); String metaProtected = getMetaProtected(); boolean hasCurrentMetaProtected = StringUtils.isNotBlank(currentMetaProtected); boolean hasMetaProtected = StringUtils.isNotBlank(metaProtected); if (!hasCurrentMetaProtected && !hasMetaProtected) { return; } if (hasMetaProtected) { if (Spider.getDefaultExtension(SessionFillOwnSignApi.class).handleOwnSign()) { // 如果有启动参数且配置了ownSign throw new UnsupportedOperationException(“在使用元数据保护模式下,不允许设置 [pamirs.distribution.session.ownSign]”); } if (!hasCurrentMetaProtected || isForceProtected()) { writeMetaProtected(metaProtected); } else if (!metaProtected.equals(currentMetaProtected)) { // 如果有启动参数, 且启动参数跟redis值不同 throw unsupportedLocalOperation(); } } else { if (Spider.getDefaultExtension(SessionFillOwnSignApi.class).handleOwnSign()) { return; } // 没有启动参数且redis有值,但没有配置ownSign 报错 throw unsupportedLocalOperation(); } } 取ownSign方式 看header是否有ownSign这个标识 header没有,则从配置里取,并放到header里 ownSign的获取核心代码 CdDistributionSessionFillOwnSignApi @Override public String getCdOwnSign() { String cdOwnSign = null; // 看header是否有ownSign这个标识…
常用标签概览 servers/server:配置私有仓库用户名和密码进行认证,以 id 进行关联。 mirrors/mirror:配置镜像仓库拉取时的地址源和额外配置。 profiles/profile:配置多个可能使用的镜像仓库。 activeProfiles/activeProfile:配置默认激活的 profile,以 id 进行关联。 Oinone 私有仓库配置 以下配置可以在使用 Oinone 私有仓库的同时,也可以正常使用 aliyun 镜像源。 <servers> <server> <id>shushi</id> <username>${username}</username> <password>${password}</password> </server> </servers> <mirrors> <mirror> <id>shushi</id> <mirrorOf>shushi</mirrorOf> <url>http://ss.nexus.ixtx.fun/repository/public</url> <!– 忽略 https 认证,maven 版本过高时需要配置 –> <blocked>false</blocked> </mirror> </mirrors> <profiles> <profile> <id>shushi</id> <repositories> <repository> <!– 对应 server.id –> <id>shushi</id> <url>http://ss.nexus.ixtx.fun/repository/public</url> <releases> <enabled>true</enabled> </releases> <snapshots> <enabled>true</enabled> </snapshots> </repository> </repositories> <pluginRepositories> <pluginRepository> <!– 对应 server.id –> <id>shushi</id> <url>http://ss.nexus.ixtx.fun/repository/snapshots</url> <releases> <enabled>false</enabled> </releases> <snapshots> <enabled>true</enabled> </snapshots> </pluginRepository> </pluginRepositories> </profile> <profile> <id>aliyun</id> <repositories> <repository> <id>aliyun</id> <url>https://maven.aliyun.com/repository/public</url> <releases> <enabled>true</enabled> </releases> <snapshots> <enabled>false</enabled> </snapshots> </repository> </repositories> <pluginRepositories> <pluginRepository> <id>aliyun</id> <url>https://maven.aliyun.com/repository/public</url> <releases> <enabled>true</enabled> </releases> <snapshots> <enabled>false</enabled> </snapshots> </pluginRepository> </pluginRepositories> </profile> </profiles> <activeProfiles> <!– 使用 shushi 私有仓库 –> <activeProfile>shushi</activeProfile> <!– 使用 aliyun 镜像仓库 –> <activeProfile>aliyun</activeProfile> </activeProfiles> 常见问题 使用 mvn 时无法拉取 Oinone 最新版镜像,提示找不到对应的包 原因:在 Oinone 开源后,oinone-pamirs 内核相关包都被部署到 maven 中央仓库,但由于其他镜像仓库的同步存在延时,在未正确同步的其他镜像源拉取时会出现找不到对应的包相关异常。 解决方案:检查 mirrors 中是否配置了 aliyun 镜像源,如果配置了,使用上述 Oinone 私有仓库配置重新配置后,再进行拉取。这一问题是由于 mirrors 配置不当,拦截了所有从 maven 中央仓库拉取的地址替换为了 aliyun 镜像源导致的。