
注意:5.2.8 以上版本适用
需求
我们的权限控制需要在页面上有交互才可以在管理中心控制该动作权限,在没有页面交互的动作是不能进行授权操作的。所以本文章将介绍如何将页面上没有交互的动作接入到系统权限中管理。
一、扩展系统权限的菜单页面
实现
步骤:
-
创建授权节点
实现权限节点扩展接口:pro.shushi.pamirs.auth.api.extend.load.PermissionNodeLoadExtendApi#buildRootPermissions@Component @Order(88) public class MyTestNodeLoadExtend implements PermissionNodeLoadExtendApi { public static final String MODEL = AuthTest.MODEL_MODEL; public static final String MODULE = TopModule.MODULE_MODULE; public static final String FUN = "dataStatus"; @Override public List<PermissionNode> buildRootPermissions(PermissionLoadContext loadContext, List<PermissionNode> nodes) { //创建授权根节点 PermissionNode root = createMyNode(); List<PermissionNode> newNodes = new ArrayList<>(); //从缓存中读取需要授权的Action Action cacheAction = PamirsSession.getContext().getExtendCache(ActionCacheApi.class).get(MODEL, FUN); if (cacheAction != null) { //将该Action放入权限树 //权限鉴权的path路径是根据【cacheAction.getModel() + cacheAction.getName()】拼接的。和MODULE没有关系,这里MODULE可以自定义。 AuthNodeHelper.addNode(newNodes, root, AuthNodeHelper.createActionNode(MODULE, cacheAction, root)); } nodes.add(0, root); return newNodes; } private PermissionNode createMyNode() { return AuthNodeHelper.createNodeWithTranslate("MyNode", "自定义节点"); } } -
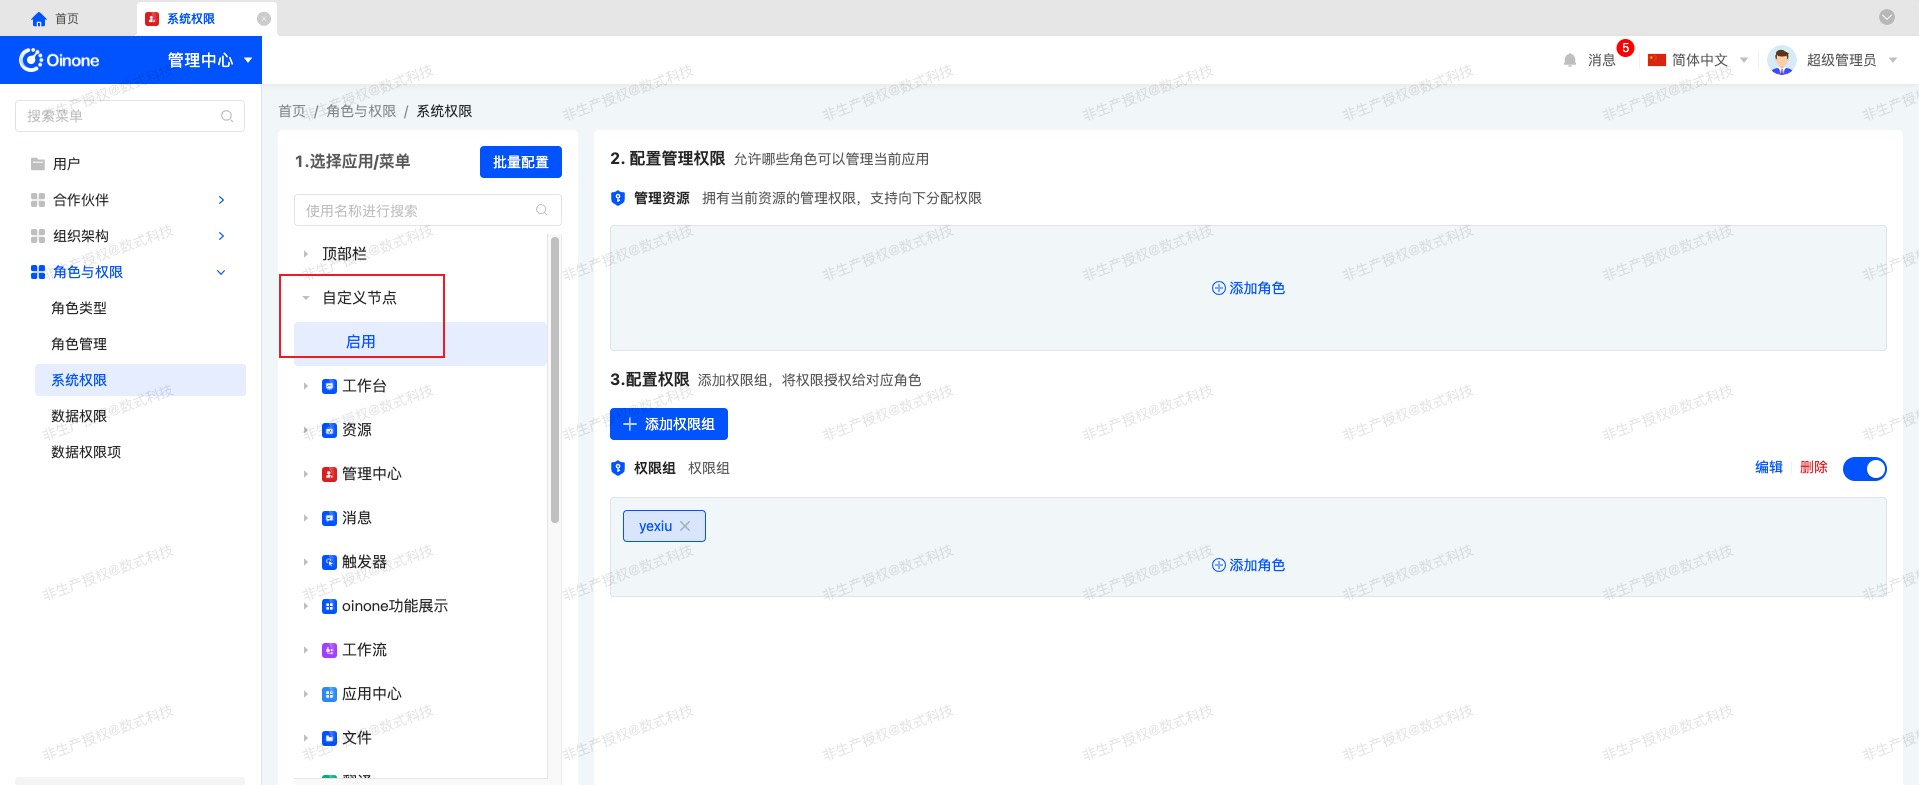
在管理中心中我们可以看到代码里创建的授权节点。

-
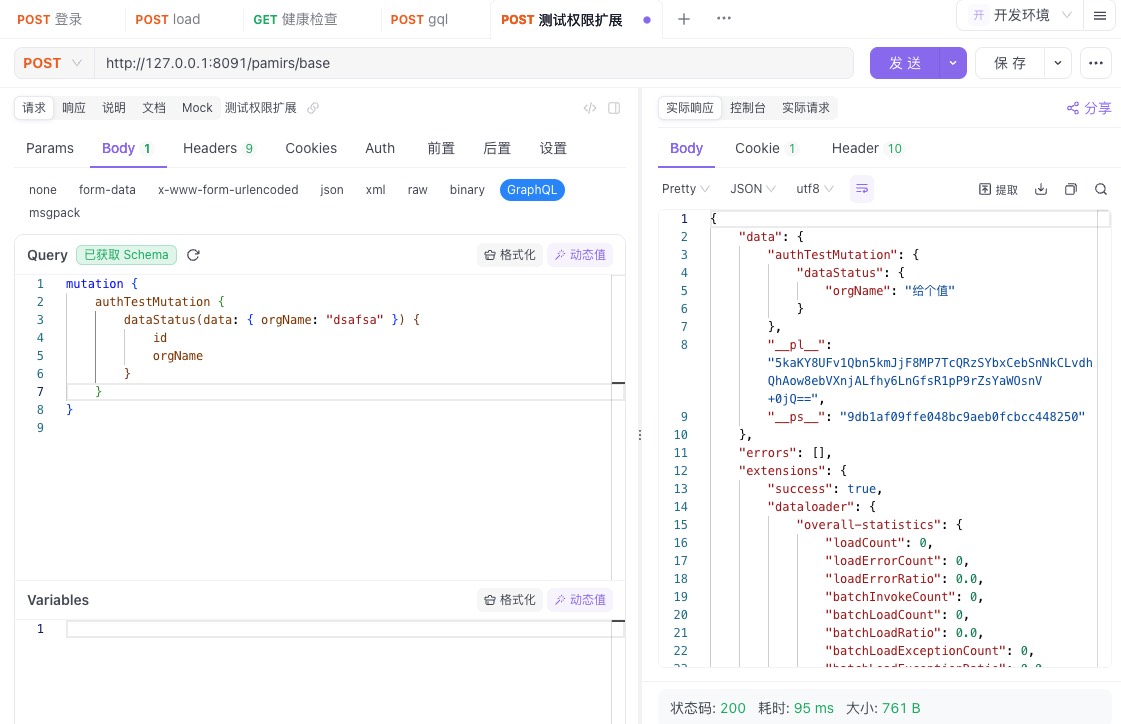
给角色分配该动作的权限,调用我们配置的AuthTest模型的dataStatus动作看效果。
二、扩展菜单下的动作权限
实现
步骤:
-
创建viewAction用于作为权限菜单
"permissionExtension"是自定义的viewAction的name,用于下面拼path路径鉴权。
因为这里只需要在系统权限那边利用这个viewAction创建出授权节点。所以”权限扩展form“可以随意定义名字,系统会拿默认视图。@Model.model(AuthTest.MODEL_MODEL) @Component @UxRouteButton( action = @UxAction(name = "permissionExtension", displayName = "权限扩展", label = "权限扩展", contextType = ActionContextTypeEnum.CONTEXT_FREE), value = @UxRoute(model = AuthTest.MODEL_MODEL, viewName = "权限扩展form", openType = ActionTargetEnum.ROUTER)) public class AuthTestAction { @Action(displayName = "启用", contextType = ActionContextTypeEnum.SINGLE) public AuthTest dataStatus(AuthTest data) { data.setOrgName("给个值"); return data; } } -
创建授权节点
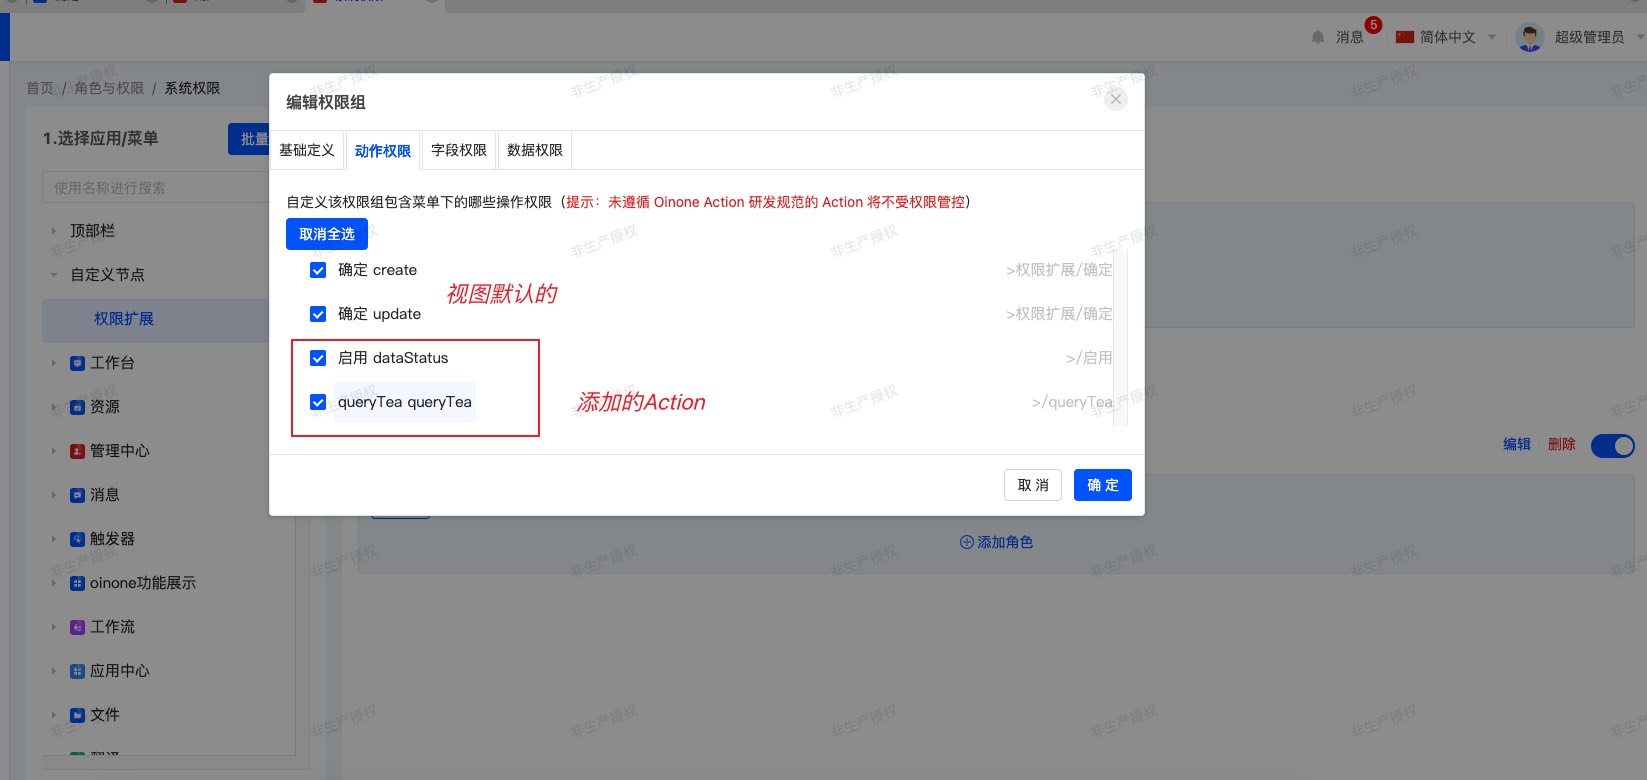
实现权限节点扩展接口:pro.shushi.pamirs.auth.api.extend.load.PermissionNodeLoadExtendApi#buildRootPermissions@Component @Order(88) public class MyTestNodeLoadExtend implements PermissionNodeLoadExtendApi { //创建授权根节点 @Override public List<PermissionNode> buildRootPermissions(PermissionLoadContext loadContext, List<PermissionNode> nodes) { PermissionNode root = AuthNodeHelper.createNodeWithTranslate("CustomNode", "自定义节点"); List<PermissionNode> newNodes = new ArrayList<>(); newNodes.add(root); ViewAction viewAction = new ViewAction().setModel(AuthTest.MODEL_MODEL).setName("permissionExtension").queryOne(); //将该Action放入权限树 //权限鉴权的path路径是根据【viewAction.getModel(), viewAction.getName()】拼接的。和MODULE没有关系,这里MODULE可以自定义。 if (viewAction != null) { root.getNodes().add(AuthNodeHelper.createViewActionNode(TopModule.MODULE_MODULE, viewAction, root)); } nodes.add(0, root); return newNodes; } //创建权限组里的动作权限节点 @Override public List<PermissionNode> buildNextPermissions(PermissionNode selected, List<PermissionNode> nodes) { //需要利用viewAction的path路径去判断当前选中节点是否是我们创建的自定义节点,返回为空则不向下处理授权节点。path路径是根据【viewAction.getModel(), viewAction.getName()】拼接的 String path = "/" + AuthTest.MODEL_MODEL + "/" + "permissionExtension"; if (!path.equals(selected.getPath())){ return null; } List<PermissionNode> newNodes = new ArrayList<>(); //从缓存中读取需要授权的Action List<Action> actions = new ArrayList<>(); actions.add(PamirsSession.getContext().getExtendCache(ActionCacheApi.class).get(AuthTest.MODEL_MODEL, "dataStatus")); actions.add(PamirsSession.getContext().getExtendCache(ActionCacheApi.class).get(Teacher.MODEL_MODEL, "queryTea")); //将这些Action放入动作权限树用于授权 //权限鉴权的path路径是根据【action.getModel(), action.getName()】拼接的。和TopModule.MODULE_MODULE没有关系,这里TopModule.MODULE_MODULE可以自定义。 for (Action action : actions) { newNodes.add(AuthNodeHelper.createActionNode(TopModule.MODULE_MODULE, action, selected)); } nodes.addAll(newNodes); return newNodes; } } -
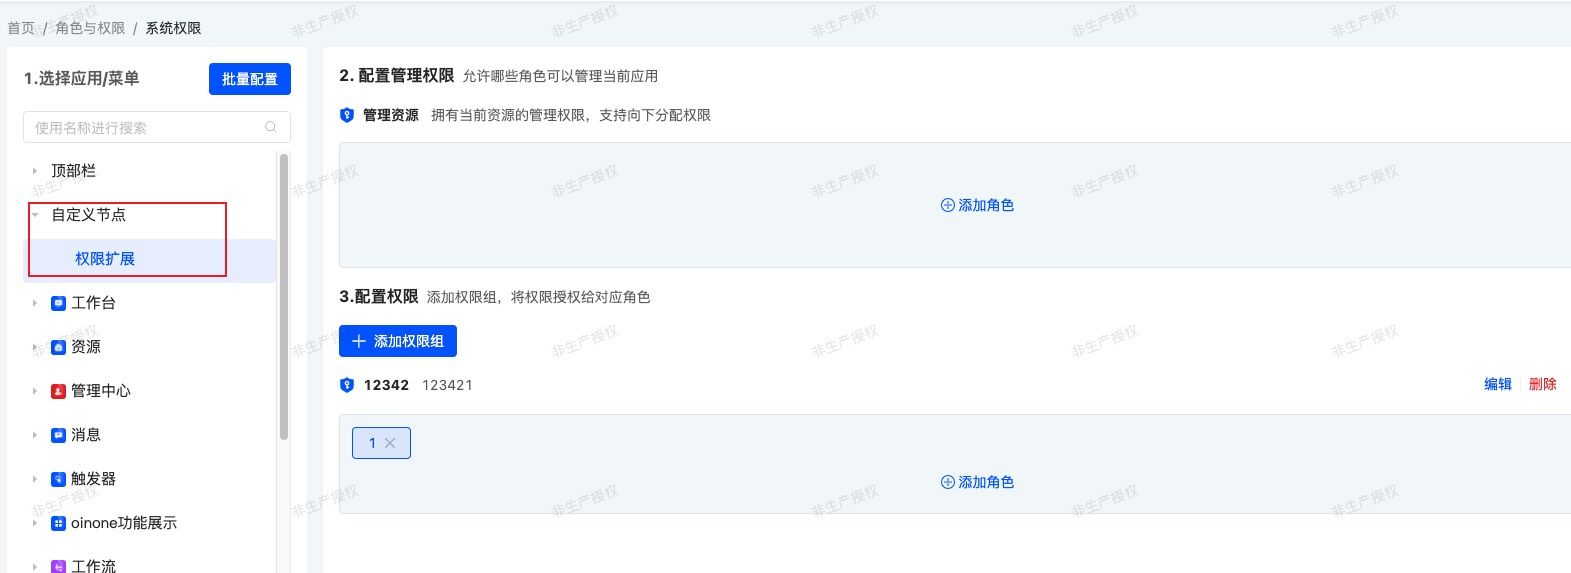
在管理中心中我们可以看到代码里创建的授权节点。
-
给角色分配该动作的权限,调用我们配置的AuthTest模型的dataStatus动作看效果。
Oinone社区 作者:yexiu原创文章,如若转载,请注明出处:https://doc.oinone.top/dai-ma-shi-jian/18976.html
访问Oinone官网:https://www.oinone.top获取数式Oinone低代码应用平台体验