
在 oinone 平台中,系统默认支持基础的国际化翻译功能。但由于日期时间组件的国际化依赖对应语言包,而全量引入语言包会显著增加打包体积,因此前端默认仅集成了中、英文的日期时间支持。若需为日期时间组件扩展其他语言(如日语)的国际化支持,需手动导入对应语言包并完成配置,具体步骤如下:
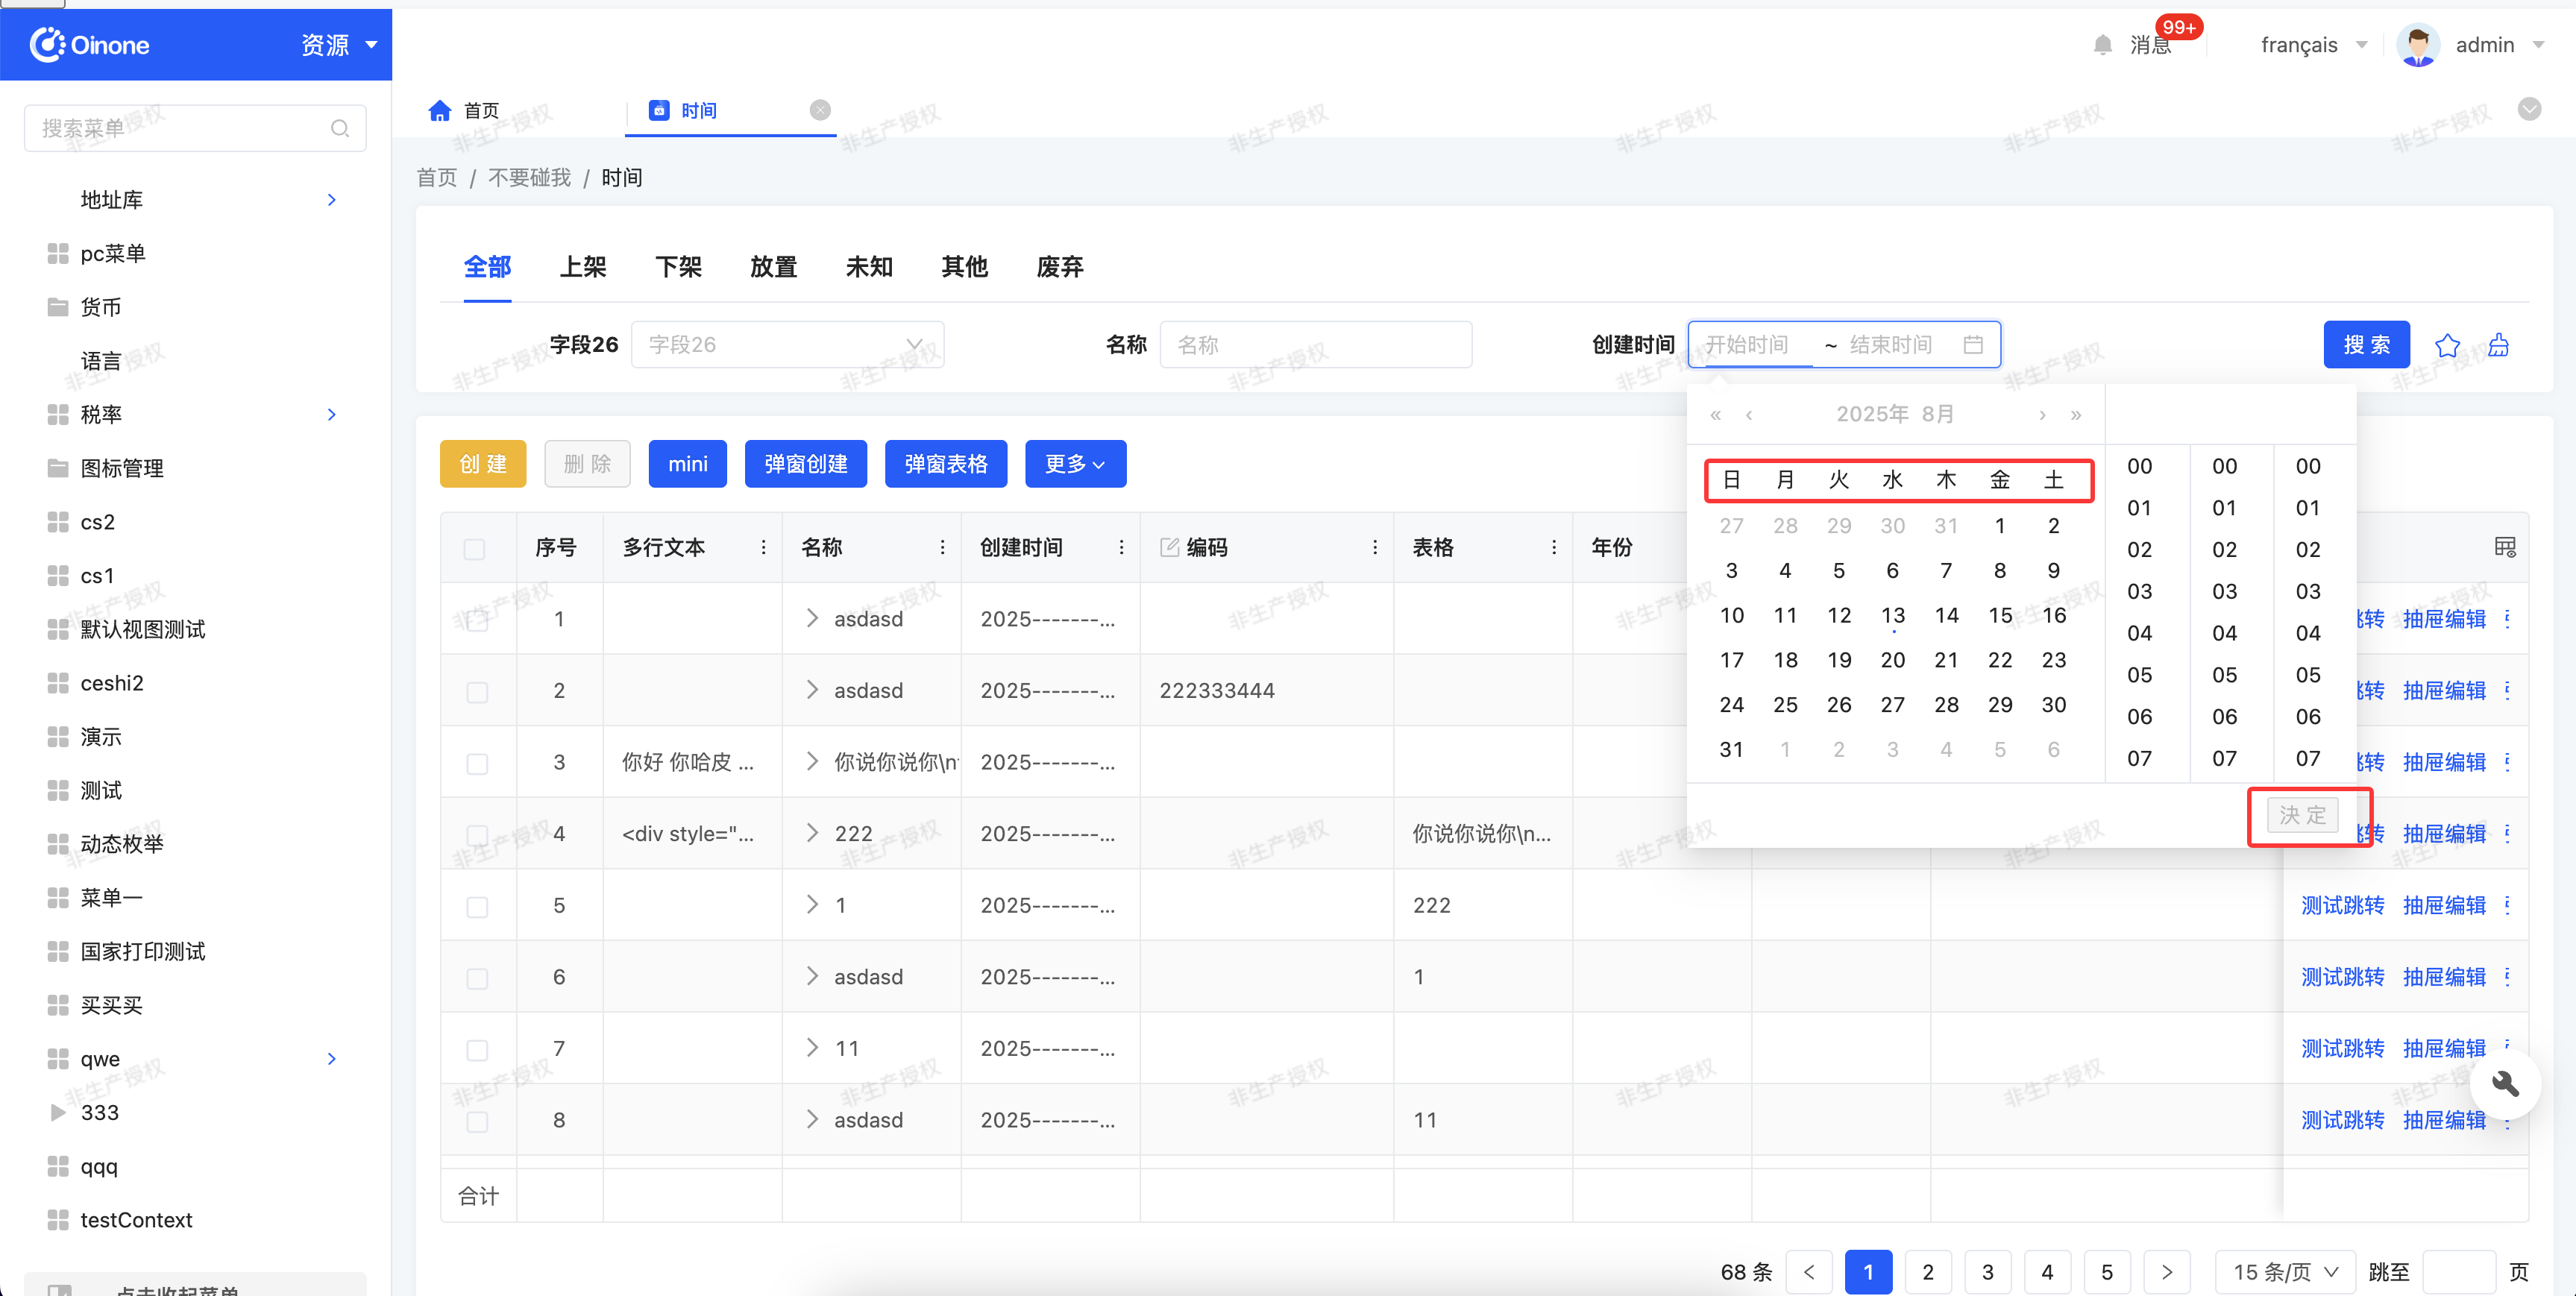

假设我们现在国际化翻译切换成了日语,那么我们在日期时间也要支持日语,那么需要如下操作:
1: 重写 RootWidget
继承平台默认的 RootWidget,SPI 注册条件保持跟平台一致即可覆盖平台默认的RootWidget
// CustomRootWidget.ts

import { RootComponentSPI, RootWidget, SPIFactory } from '@oinone/kunlun-dependencies';
import Root from './Root.vue';

// 通过SPI注册覆盖平台默认的root组件
@SPIFactory.Register(RootComponentSPI.Token({ widget: 'root' }))
export class CustomRootWidget extends RootWidget {
  public initialize() {
    super.initialize();
    this.setComponent(Root);
    return this;
  }
}
2: 覆盖 Root 组件的 Vue 文件
自定义的 Vue 文件需负责导入目标语言(如日语)的语言包,并根据当前语言环境动态切换配置。这里需要同时处理 ant-design-vue、element-plus 组件库及 dayjs 工具的语言包,确保日期组件的展示和交互统一适配目标语言。
<!-- Root.vue -->
<template>
<a-config-provider :locale="antLocale">
<el-config-provider :locale="eleLocale">
<match :rootToken="root">
<template v-for="page in pages" :key="page.widget">
<route v-if="page.widget" :path="page.path" :slotName="page.slotName" :widget="page.widget">
<slot :name="page.slotName" />
</route>
</template>
<route :path="pagePath" slotName="page" :widgets="{ page: widgets.page }">
<slot name="page" />
</route>
<route path="/" slotName="homePage">
<slot name="homePage" />
</route>
</match>
</el-config-provider>
</a-config-provider>
</template>
<script lang="ts">
import { CurrentLanguage, EN_US_CODE, UrlHelper, ZH_CN_CODE } from '@oinone/kunlun-dependencies';
import { ConfigProvider as AConfigProvider } from 'ant-design-vue';
import { ElConfigProvider } from 'element-plus';
import dayjs from 'dayjs';
// 导入ant-design-vue语言包
import enUS from 'ant-design-vue/es/locale/en_US';
import zhCN from 'ant-design-vue/lib/locale/zh_CN';
import jaJP from 'ant-design-vue/lib/locale/ja_JP'; // 新增:日语语言包
// 导入 dayjs的语言包
import 'dayjs/locale/zh-cn';
import 'dayjs/locale/ja'; // 新增:日语语言包
// 导入element-plus语言包
import elEn from 'element-plus/dist/locale/en.mjs';
import elZhCn from 'element-plus/dist/locale/zh-cn.mjs';
import elJaJP from 'element-plus/dist/locale/ja.mjs'; // 新增:日语语言包
import { computed, defineComponent, onMounted, onUnmounted, ref } from 'vue';
export default defineComponent({
components: { AConfigProvider, ElConfigProvider },
props: ['widgets', 'loginUrl', 'root', 'pages'],
inheritAttrs: false,
setup() {
const pagePath = computed(() => UrlHelper.append(UrlHelper.absolutePath(process.env.BASE_PATH), 'page'));
const locale = ref(zhCN.locale); // 初始化语言环境变量(默认中文)
const antLocale = ref(zhCN); // ant-design-vue的语言配置
const eleLocale = ref(elZhCn); // element-plus的语言配置
const refreshLocale = (languageCode: string) => {
switch (languageCode) {
case ZH_CN_CODE: // 中文
locale.value = zhCN.locale;
antLocale.value = zhCN;
eleLocale.value = elZhCn;
break;
case EN_US_CODE: // 英文
locale.value = enUS.locale;
antLocale.value = enUS;
eleLocale.value = elEn;
break;
case 'jp-JP': // 新增:日语判断
locale.value = jaJP.locale;
antLocale.value = jaJP;
eleLocale.value = elJaJP;
break;
default:
locale.value = zhCN.locale;
break;
}
// 更新dayjs的全局语言配置
dayjs.locale(locale.value);
};
onMounted(() => {
refreshLocale(CurrentLanguage.getCodeByLocalStorage());
CurrentLanguage.onRefreshLocalStorage(refreshLocale);
});
onUnmounted(() => {
CurrentLanguage.clearOnRefreshLocalStorage(refreshLocale);
});
return {
zhCN,
enUS,
elZhCn,
elEn,
locale,
pagePath,
antLocale,
eleLocale
};
}
});
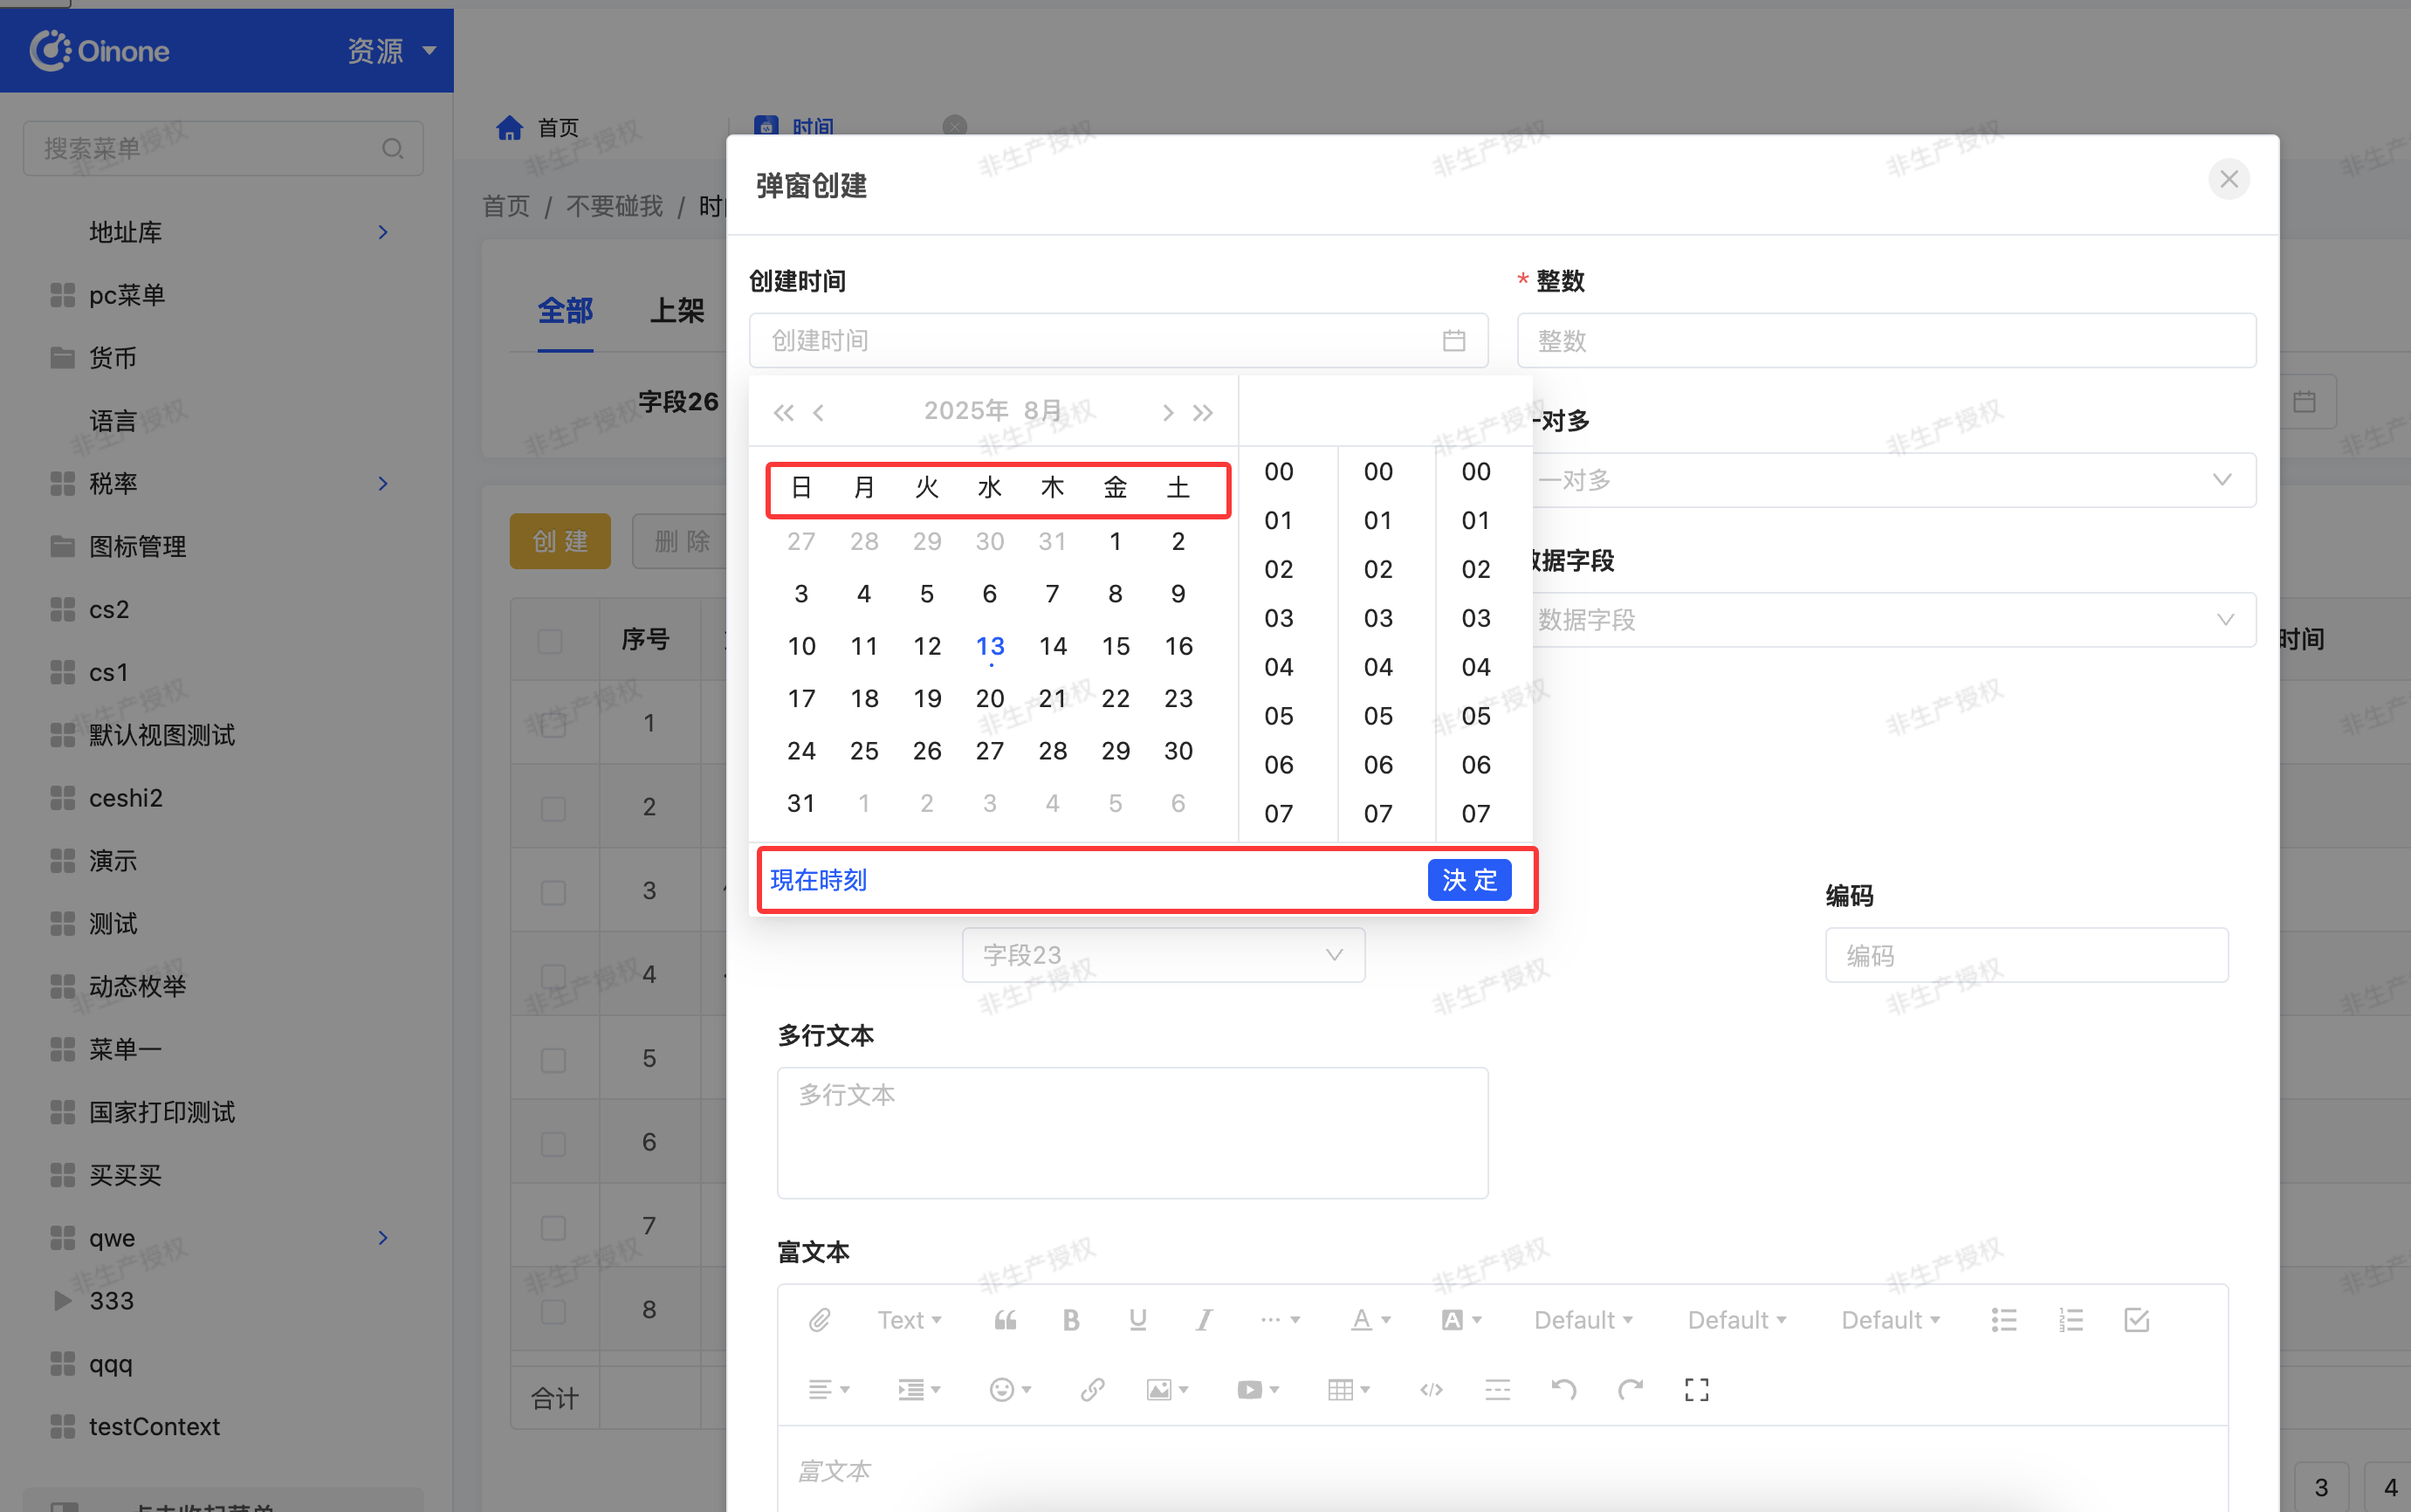
</script>3: 处理动态弹窗的国际化(特殊场景)
若业务中使用
executeViewAction动态打开弹窗,弹窗内的日期组件可能无法继承全局语言配置,因此需额外重写 DialogContainerWidget 以确保弹窗内的语言环境一致。
3.1 重写 DialogContainerWidget 类
import { DialogContainerWidget, RootComponentSPI, SPIFactory } from '@oinone/kunlun-dependencies';
import Dialog from './Dialog.vue';

// 注册自定义弹窗容器,覆盖默认组件
@SPIFactory.Register(RootComponentSPI.Token({ widget: 'dialog-container' }))
export class CustomDialogContainerWidget extends DialogContainerWidget {
  public initialize(props) {
    super.initialize(props);
    this.setComponent(Dialog);
    return this;
  }
}
<template>
<a-config-provider :locale="antLocale">
<el-config-provider :locale="eleLocale">
<slot />
</el-config-provider>
</a-config-provider>
</template>
<script lang="ts">
import { ConfigProvider as AConfigProvider } from 'ant-design-vue';
import dayjs from 'dayjs';
import { ElConfigProvider } from 'element-plus';
import { defineComponent, onMounted, ref } from 'vue';
// 导入ant-design-vue语言包
import enUS from 'ant-design-vue/es/locale/en_US';
import zhCN from 'ant-design-vue/lib/locale/zh_CN';
import jaJP from 'ant-design-vue/lib/locale/ja_JP'; // 日语
// 导入 dayjs的语言包
import 'dayjs/locale/zh-cn';
import 'dayjs/locale/ja'; // 日语
// 导入element-plus语言包
import elEn from 'element-plus/dist/locale/en.mjs';
import elZhCn from 'element-plus/dist/locale/zh-cn.mjs';
import elJaJP from 'element-plus/dist/locale/ja.mjs'; // 日语
import { EN_US_CODE, ZH_CN_CODE } from '@oinone/kunlun-vue-ui-antd';
export default defineComponent({
components: { AConfigProvider, ElConfigProvider },
inheritAttrs: false,
setup() {
const locale = ref(zhCN.locale);
const antLocale = ref(zhCN);
const eleLocale = ref(elZhCn);
onMounted(() => {
const lang = localStorage.getItem('language') || ('zh-CN' as any);
switch (lang) {
case ZH_CN_CODE:
locale.value = zhCN.locale;
antLocale.value = zhCN;
eleLocale.value = elZhCn;
break;
case EN_US_CODE:
locale.value = enUS.locale;
antLocale.value = enUS;
eleLocale.value = elEn;
break;
case 'jp-JP': // 新增日语判断
locale.value = jaJP.locale;
antLocale.value = jaJP;
eleLocale.value = elJaJP;
break;
default:
locale.value = zhCN.locale;
break;
}
dayjs.locale(locale.value);
});
return {
zhCN,
enUS,
elZhCn,
elEn,
locale,
antLocale,
eleLocale
};
}
});
</script>通过上述步骤,可实现 oinone 平台日期组件对新增语言(如日语)的国际化支持。核心逻辑是:通过重写全局配置组件引入目标语言包,并根据当前语言环境动态切换组件库和工具的语言配置;对于动态弹窗等特殊场景,需额外处理其容器组件以确保语言环境一致。
若需扩展其他语言(如韩语、法语等),只需参照上述步骤,替换对应的语言包并在 switch 逻辑中添加对应判断即可。
Oinone社区 作者:汤乾华原创文章,如若转载,请注明出处:https://doc.oinone.top/frontend/21519.html
访问Oinone官网:https://www.oinone.top获取数式Oinone低代码应用平台体验