
一、抽象模型,需要操作流程的模型继承此模型
定义流程相关的一些信息在模型中;如果直接定义在存储模型中,下面这些字段都是显示的指定为非存储字段。更好的建议:
1、如果有多个业务模型有这类需要,则可以把这些字段抽取到抽象模型中
2、如果仅有一个业务模型需要,则可以放到代理模型中
/**
 * 定义流程相关的一些信息在模型中
 */
@Model.model(DemoBaseAbstractModel.MODEL_MODEL)
@Model(displayName = "抽象模型")
@Model.Advanced(type= ModelTypeEnum.ABSTRACT)
public abstract class DemoBaseAbstractModel extends IdModel {

    public static final String MODEL_MODEL = "hr.simple.DemoBaseAbstractModel";

    // 流程相关
    @Field.Integer
    @Field(displayName = "工作流用户任务ID", summary = "业务数据列表中审核流程使用", invisible = true, store = NullableBoolEnum.FALSE)
    private Long workflowUserTaskId;

    @Field.Integer
    @Field(displayName = "流程实例ID", summary = "业务数据列表中催办使用", invisible = true, store = NullableBoolEnum.FALSE)
    private Long instanceId;

    @Field.String
    @UxForm.FieldWidget(@UxWidget(invisible = "true"))
    @UxDetail.FieldWidget(@UxWidget(invisible = "true"))
    @Field(displayName = "当前流程节点", store = NullableBoolEnum.FALSE)
    private String currentFlowNode;

    @Field.Boolean
    @Field(displayName = "能否催办", invisible = true, defaultValue = "false", store = NullableBoolEnum.FALSE)
    private Boolean canUrge;

    // 审批状态控制申请单是否可以被发起流程、能否编辑等控制
    @Field.Enum
    @Field(displayName = "审批状态", defaultValue = "NC")
    @UxForm.FieldWidget(@UxWidget(invisible = "true"))
    private ApprovalStatusEnum approvalStatus;

}
@Dict(dictionary = ApprovalStatusEnum.dictionary, displayName = "审批状态")
public enum ApprovalStatusEnum implements IEnum<String> {
    NC("NC", "待提交", "待提交"),
    PENDING("PENDING", "已提交", "已提交,待审批"),
    APPROVED("APPROVED", "已批准", "已批准"),
    REJECTED("REJECTED", "已拒绝", "已拒绝");

    public static final String dictionary = "land.enums.LandApprovalStatusEnum";

    private final String value;
    private final String displayName;
    private final String help;

    ApprovalStatusEnum(String value, String displayName, String help) {
        this.value = value;
        this.displayName = displayName;
        this.help = help;
    }

    public String getValue() {
        return value;
    }

    public String getDisplayName() {
        return displayName;
    }

    public String getHelp() {
        return help;
    }
}
二、实现公共逻辑(催办、撤销)
@Slf4j
@Component
@Model.model(DemoBaseAbstractModel.MODEL_MODEL)
public class DemoBaseAbstractModelAction {

    @Autowired
    private WorkflowInstanceService workflowInstanceService;

    @Action(displayName = "催办", summary = "流程催办", bindingType = ViewTypeEnum.TABLE, contextType = ActionContextTypeEnum.SINGLE)
    @Action.Advanced(invisible = "!activeRecord.canUrge")
    public DemoBaseAbstractModel urge(DemoBaseAbstractModel data) {
        if (data.getInstanceId() == null) {
            return data;
        }

        WorkflowInstance instance = new WorkflowInstance().setId(data.getInstanceId()).queryById();
        workflowInstanceService.urge(instance);
        PamirsSession.getMessageHub().success("催办操作成功");
        return data;
    }

    @Action(displayName = "提交审核", bindingType = ViewTypeEnum.TABLE, contextType = ActionContextTypeEnum.SINGLE)
    @Action.Advanced(invisible = "activeRecord.approvalStatus != 'NC'")
    public DemoBaseAbstractModel submit(DemoBaseAbstractModel data) {
        data.setApprovalStatus(ApprovalStatusEnum.PENDING);
        data.updateById();
        PamirsSession.getMessageHub().success("提交审核成功");
        return data;
    }

    @Function(openLevel = FunctionOpenEnum.LOCAL)
    @Function.Advanced(type = FunctionTypeEnum.UPDATE, displayName = "审核通过")
    public DemoBaseAbstractModel applySuccess(DemoBaseAbstractModel data) {
        data.setApprovalStatus(ApprovalStatusEnum.APPROVED);
        data.updateById();

        return data;
    }

    @Action(displayName = "撤销", bindingType = ViewTypeEnum.TABLE)
    public DemoBaseAbstractModel undo(DemoBaseAbstractModel data) {
        if (data.getInstanceId() == null) {
            return data;
        }
        WorkflowInstance instance = new WorkflowInstance().setId(data.getInstanceId()).queryById();
        workflowInstanceService.undoInstance(instance.getId());

        data.setApprovalStatus(ApprovalStatusEnum.NC);
        data.updateById();

        return data;
    }

}
三 、定义业务模型
@Model.model(AssetsProxy.MODEL_MODEL)
@Model(displayName = "资产代理模型")
public class AssetsProxy extends DemoBaseAbstractModel {

    public static final String MODEL_MODEL = "land.mgmt.AssetsProxy";

    @Field(displayName = "使用单位")
    private String useUnit;

    @Field.String
    @Field(displayName = "统一社会信用代码")
    private String creditCode;

    @Field(displayName = "联系电话")
    private String contactNumber;

    @Field.String
    @Field(displayName = "申请单号", invisible = true)
    private String number;

}
四、业务数据逻辑
在业务表格中、通过自定义queryPage查询,将工作流实例ID、用户待办ID,动态的放到业务数据中,以便于实现催办、撤销逻辑。
如需只能自己发起的才能进行操作,这个条件可以在页面设计器上配置,也可以写到Action上,本文催办按钮在Action上定义。也可以在界面设计器设置按钮的隐藏条件(activeRecord.canUrge==true)
@Slf4j
@Component
@Model.model(AssetsProxy.MODEL_MODEL)
public class AssetsProxyAction {

    @Autowired
    private WorkflowUserTaskHandler workflowUserTaskHandler;

    @Function.Advanced(type = FunctionTypeEnum.QUERY, displayName = "查询列表")
    @Function.fun(FunctionConstants.queryPage)
    @Function(openLevel = {FunctionOpenEnum.API})
    public Pagination<AssetsProxy> queryPage(Pagination<AssetsProxy> page, QueryWrapper<AssetsProxy> queryWrapper) {
        page = new AssetsProxy().queryPage(page, queryWrapper);
        workflowUserTaskHandler.computeWorkflowUserTask(page.getContent(), AssetsProxy.MODEL_MODEL);
        return page;
    }

    @Transactional
    @Action.Advanced(name = FunctionConstants.create, managed = true, invisible = ExpConstants.idValueExist)
    @Action(displayName = "保存", summary = "创建", bindingType = ViewTypeEnum.FORM)
    @Function(name = FunctionConstants.create)
    @Function.fun(FunctionConstants.create)
    public AssetsProxy create(AssetsProxy data) {
        data.setApprovalStatus(ApprovalStatusEnum.NC);
        data.construct();
        data.create();

        return data;
    }

    @Transactional
    @Action.Advanced(invisible = ExpConstants.idValueExist)
    @Action(displayName = "保存并发起流程", summary = "保存并发起流程", bindingType = ViewTypeEnum.FORM)
    public AssetsProxy saveAndSubmit(AssetsProxy data) {
        data.setApprovalStatus(ApprovalStatusEnum.PENDING);
        data.construct();
        data.create();

        // 代码触发工作流ID
        WorkflowD workflowD = new WorkflowD().setId(759036552176484888L).queryOne();
        if (workflowD != null) {
            startWorkflow(workflowD, data);
        }

        return data;
    }

    /**
     * 触发⼯作流实例
     */
    private Boolean startWorkflow(WorkflowD workflowD, IdModel modelData) {
        WorkflowDefinition workflowDefinition = new WorkflowDefinition().queryOneByWrapper(
                Pops.<WorkflowDefinition>lambdaQuery()
                        .from(WorkflowDefinition.MODEL_MODEL)
                        .eq(WorkflowDefinition::getWorkflowCode, workflowD.getCode())
                        .eq(WorkflowDefinition::getActive, 1)
        );
        if (null == workflowDefinition) {
            // 流程没有运⾏实例
            return Boolean.FALSE;
        }
        String model = Models.api().getModel(modelData);

        //⼯作流上下⽂
        WorkflowDataContext wdc = new WorkflowDataContext();
        wdc.setDataType(WorkflowVariationTypeEnum.ADD);
        wdc.setModel(model);
        wdc.setWorkflowDefinitionDefinition(workflowDefinition.parseContent());
        wdc.setWorkflowDefinition(workflowDefinition);
        wdc.setWorkflowDefinitionId(workflowDefinition.getId());
        IdModel copyData = KryoUtils.get().copy(modelData);
        // ⼿动触发创建的动作流,将操作⼈设置为当前⽤户,作为流程的发起⼈
        copyData.setCreateUid(PamirsSession.getUserId());
        copyData.setWriteUid(PamirsSession.getUserId());
        String jsonData = JsonUtils.toJSONString(copyData.get_d());
        //触发⼯作流 新增时触发-onCreateManual 更新时触发-onUpdateManual
        String msgId = UUIDUtil.getUUIDNumberString();
        Fun.run(WorkflowModelTriggerFunction.FUN_NAMESPACE, "onCreateManual", wdc, msgId, jsonData);
        return Boolean.TRUE;
    }

}
@Component
public class WorkflowUserTaskHandler<T extends DemoBaseAbstractModel> {
public void computeWorkflowUserTask(List<T> datas, String model) {
if (CollectionUtils.isEmpty(datas)) {
return;
}
// 过滤掉【草稿状态】和【审核通过】的数据,减少数据查询量
List<Long> bizIds = ListUtils.transform(datas, DemoBaseAbstractModel::getId);
LambdaQueryWrapper<WorkflowUserTask> userTaskWrapper = new LambdaQueryWrapper<>();
userTaskWrapper.setModel(WorkflowUserTask.MODEL_MODEL);
userTaskWrapper.select(WorkflowUserTask::getId, WorkflowUserTask::getNodeDataBizId, WorkflowUserTask::getUserId, WorkflowUserTask::getInitiatorUid,
WorkflowUserTask::getNodeName, WorkflowUserTask::getNodeId, WorkflowUserTask::getInstanceId);
userTaskWrapper.eq(WorkflowUserTask::getModel, model)
.eq(WorkflowUserTask::getStatus, WorkflowUserStatusEnum.ACTIVE)
.in(WorkflowUserTask::getNodeDataBizId, bizIds);
Pagination<WorkflowUserTask> userTaskPagination = new Pagination<>();
userTaskPagination.setCurrentPage(1);
userTaskPagination.setSize(200L);
userTaskPagination.setSort(new Sort().addOrder(SortDirectionEnum.DESC, WorkflowUserTask::getCreateDate));
List<WorkflowUserTask> allUserTasks = new WorkflowUserTask().queryListByWrapper(userTaskPagination, userTaskWrapper);
if (CollectionUtils.isEmpty(allUserTasks)) {
return;
}
// 按NodeDataBizId分组,保留第一个出现的对象
Map<Long, WorkflowUserTask> workflowUserTaskMap = allUserTasks.stream().filter(user -> user.getNodeDataBizId() != null)
.collect(Collectors.toMap(WorkflowUserTask::getNodeDataBizId, user -> user, (existing, replacement) -> existing));
// userTaskWrapper.eq(WorkflowUserTask::getUserId, PamirsSession.getUserId())
List<WorkflowUserTask> userTasks = allUserTasks.stream().filter(task -> task.getUserId() != null && task.getUserId().equals(PamirsSession.getUserId())).collect(Collectors.toList());
Map<Long, WorkflowUserTask> userTaskMap = userTasks.stream().collect(Collectors.toMap(WorkflowUserTask::getNodeDataBizId, v -> v, (a, b) -> a));
Map<Long, String> nodeNameResult = nodeNameResult(allUserTasks);
datas.forEach(item -> {
item.setCanUrge(Boolean.FALSE);
WorkflowUserTask currenctWorkflowUserTask = userTaskMap.get(item.getId());
if (currenctWorkflowUserTask != null) {
item.setWorkflowUserTaskId(currenctWorkflowUserTask.getId());
item.setCurrentFlowNode(currenctWorkflowUserTask.getNodeName());
}
WorkflowUserTask workflowUserTask = workflowUserTaskMap.get(item.getId());
if (workflowUserTask != null) {
item.setInstanceId(workflowUserTask.getInstanceId());
item.setCurrentFlowNode(nodeNameResult.get(workflowUserTask.getNodeDataBizId()));
if (workflowUserTask.getInitiatorUid() != null
&& workflowUserTask.getInitiatorUid().equals(PamirsSession.getUserId())) {
item.setCanUrge(Boolean.TRUE);
}
}
if (ApprovalStatusEnum.APPROVED.equals(item.getApprovalStatus())) {
item.setCurrentFlowNode("审批通过");
} else if (ApprovalStatusEnum.REJECTED.equals(item.getApprovalStatus())) {
item.setCurrentFlowNode("审批拒绝");
}
});
}
private Map<Long, String> nodeNameResult(List<WorkflowUserTask> allUserTasks) {
// 分组逻辑:按 department 分组,提取 name 并去重拼接
Map<Long, String> result = new HashMap<>();
for (WorkflowUserTask userTask : allUserTasks) {
Long nodeDataBizId = userTask.getNodeDataBizId();
String nodeName = userTask.getNodeName();
// 过滤掉 null 和空字符串的 name
if (nodeName == null || nodeName.trim().isEmpty()) {
continue;
}
// 初始化分组 Set
result.putIfAbsent(nodeDataBizId, "");
// 使用 LinkedHashSet 去重并保留顺序
Set<String> nodeNamesSet = new LinkedHashSet<>();
if (!result.get(nodeDataBizId).isEmpty()) {
Collections.addAll(nodeNamesSet, result.get(nodeDataBizId).split(","));
}
nodeNamesSet.add(nodeName);
// 更新结果
result.put(nodeDataBizId, String.join(",", nodeNamesSet));
}
return result;
}
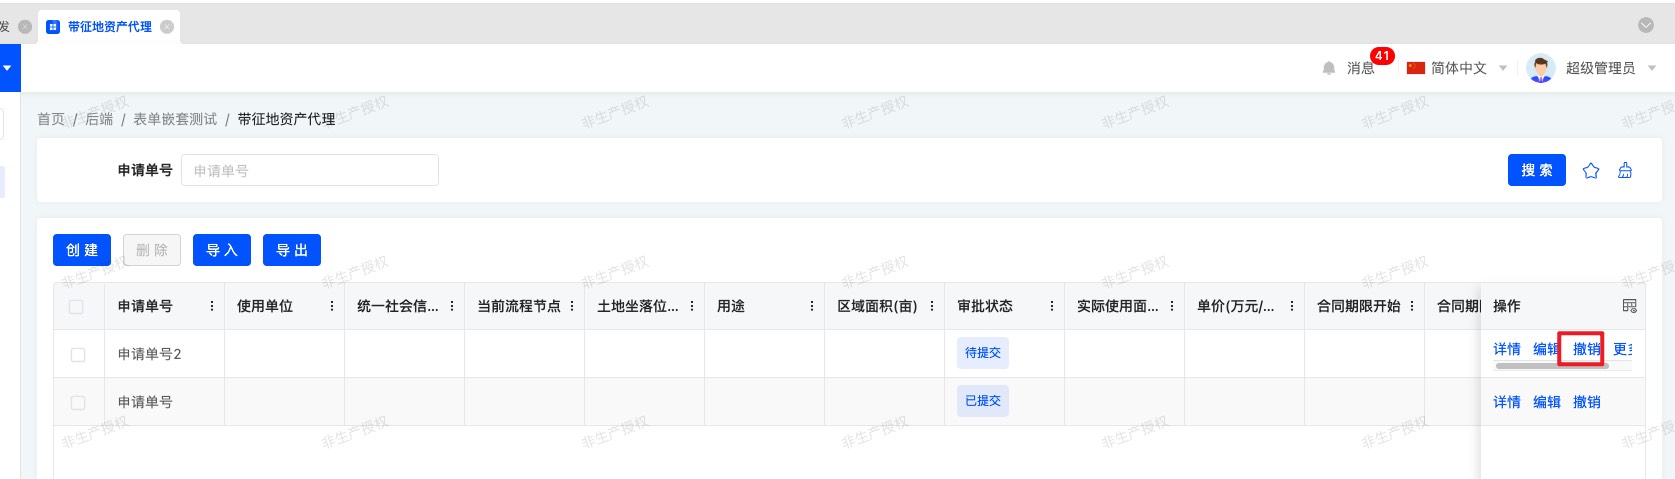
}五、效果图

Oinone社区 作者:yexiu原创文章,如若转载,请注明出处:https://doc.oinone.top/dai-ma-shi-jian/21291.html
访问Oinone官网:https://www.oinone.top获取数式Oinone低代码应用平台体验