
框架之信息概述
后端除了可以返回错误信息以外,还可以返回调试、告警、成功、信息等级别的信息给前端。但是默认情况下前端只提示错误信息,可以通过前端的统一配置放开提示级别,有点类似后端的日志级别。
框架之MessageHub
在oinone平台中,我们怎么做到友好的错误提示呢?接下来介绍我们的MessageHub,它为自定义错误提示提供无限的可能。
何时使用
错误提示是用户体验中特别重要的组成部分,大部分的错误体现在整页级别,字段级别,按钮级别。友好的错误提示应该是怎么样的呢?我们假设他是这样的
- 与用户操作精密契合
- 当字段输入异常时,错误展示在错误框底部
- 按钮触发服务时异常,错误展示在按钮底部
- 区分不同的类型
- 错误
- 成功
- 警告
- 提示
- 调试
- 简洁易懂的错误信息
不同信息类型的举例
package pro.shushi.pamirs.demo.core.action;

import org.springframework.stereotype.Component;
import pro.shushi.pamirs.demo.api.model.PetCatItem;
import pro.shushi.pamirs.demo.api.model.PetType;
import pro.shushi.pamirs.meta.annotation.Action;
import pro.shushi.pamirs.meta.annotation.Model;
import pro.shushi.pamirs.meta.api.dto.common.Message;
import pro.shushi.pamirs.meta.api.session.PamirsSession;
import pro.shushi.pamirs.meta.enmu.ActionContextTypeEnum;
import pro.shushi.pamirs.meta.enmu.InformationLevelEnum;
import pro.shushi.pamirs.meta.enmu.ViewTypeEnum;

@Model.model(PetType.MODEL_MODEL)
@Component
public class PetTypeAction {

    @Action(displayName = "消息",bindingType = ViewTypeEnum.TABLE,contextType = ActionContextTypeEnum.CONTEXT_FREE)
    public PetType message(PetType data){
        PamirsSession.getMessageHub().info("info1");
        PamirsSession.getMessageHub().info("info2");
        PamirsSession.getMessageHub().error("error1");
        PamirsSession.getMessageHub().error("error2");
        PamirsSession.getMessageHub().msg(new Message().msg("success1").setLevel(InformationLevelEnum.SUCCESS));
        PamirsSession.getMessageHub().msg(new Message().msg("success2").setLevel(InformationLevelEnum.SUCCESS));
        PamirsSession.getMessageHub().msg(new Message().msg("debug1").setLevel(InformationLevelEnum.DEBUG));
        PamirsSession.getMessageHub().msg(new Message().msg("debug2").setLevel(InformationLevelEnum.DEBUG));
        PamirsSession.getMessageHub().msg(new Message().msg("warn1").setLevel(InformationLevelEnum.WARN));
        PamirsSession.getMessageHub().msg(new Message().msg("warn2").setLevel(InformationLevelEnum.WARN));
        return data;
    }
}
查询运行返回和效果
1)系统提示的返回结果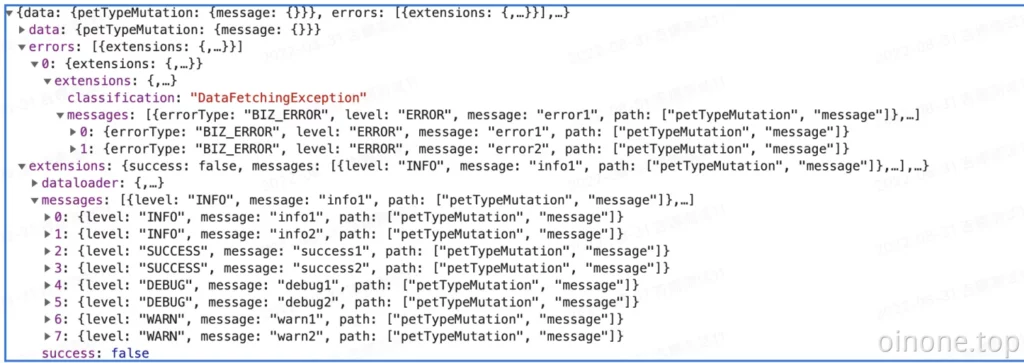

2)系统提示示例效果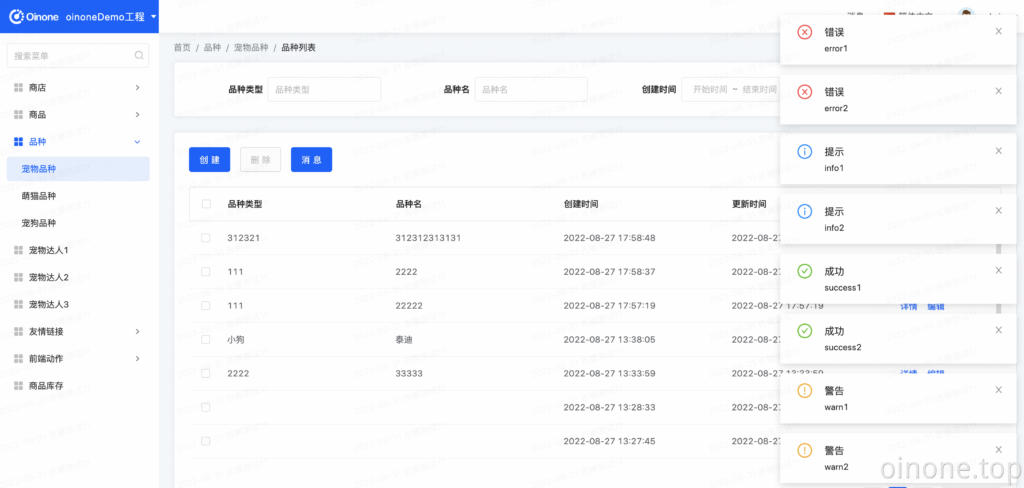
Oinone社区 作者:望闲原创文章,如若转载,请注明出处:https://doc.oinone.top/backend/7237.html
访问Oinone官网:https://www.oinone.top获取数式Oinone低代码应用平台体验