
Oinone项目引入nacos作为配置中心
- Oinone项目配置默认读取的项目中yml文件(application-xxx.yml), 实际项目中有可能要求项目的配置放到Nacos配置中心中;
- Oinone默认引入的nacos-client-1.4.1,低于1.4.1的版本不支持认证配置;1.4.1的客户端版本支持Nacos服务端1.x的和2.x的版本;
一、项目中增加依赖
项目主pom引入依赖(最新版平台已默认引入), Nacos版本要求1.4.1以上,低版本不支持认证配置
<dependency>
    <groupId>com.alibaba.cloud</groupId>
    <artifactId>spring-cloud-starter-alibaba-nacos-config</artifactId>
    <version>2021.1</version>
</dependency>
<dependency>
    <groupId>com.alibaba.nacos</groupId>
    <artifactId>nacos-client</artifactId>
    <version>1.4.1</version>
</dependency>
项目的boot工程的pom引入依赖(最新版平台已默认引入)
<dependency>
    <groupId>com.alibaba.cloud</groupId>
    <artifactId>spring-cloud-starter-alibaba-nacos-config</artifactId>
</dependency>
<dependency>
    <groupId>com.alibaba.nacos</groupId>
    <artifactId>nacos-client</artifactId>
</dependency>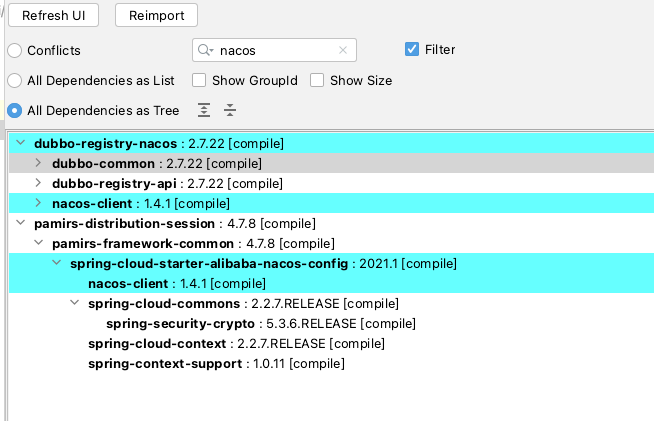

二、项目工程bootstrap配置
bootstrap.yml文件的配置修改为:
spring:
  application:
    name: hr-simple # 替换为实际服务名
  profiles:
    active: wx # 指定 profile
  cloud:
    config:
      enabled: false
    nacos:
      discovery:
        enabled: false
      config:
        server-addr: 127.0.0.1:8848
        enabled: true
        # namespace: # 如果使用 public 命名空间,建议省略此行
        # namespace: your-custom-namespace-id # 如果使用自定义命名空间,填写其 ID
        group: DEFAULT_GROUP
        # prefix: # 通常省略,使用默认的 spring.application.name
        file-extension: yaml # 推荐使用 yaml,而不是 yml (虽然通常兼容)
        timeout: 5000
        #【可选】修改为和nacos一致即可(如果服务端未开启可以不用配置)
        # username: wangxian
        # password: wangxian
三、Naocs服务端配置
在Nacos服务端的对应的namespace(5a8b3710-a9a2-4f7c-932f-50f326cb1ccf)下增加配置,把原本配置在代码中的(application-xxx.yml)配置到Nacos中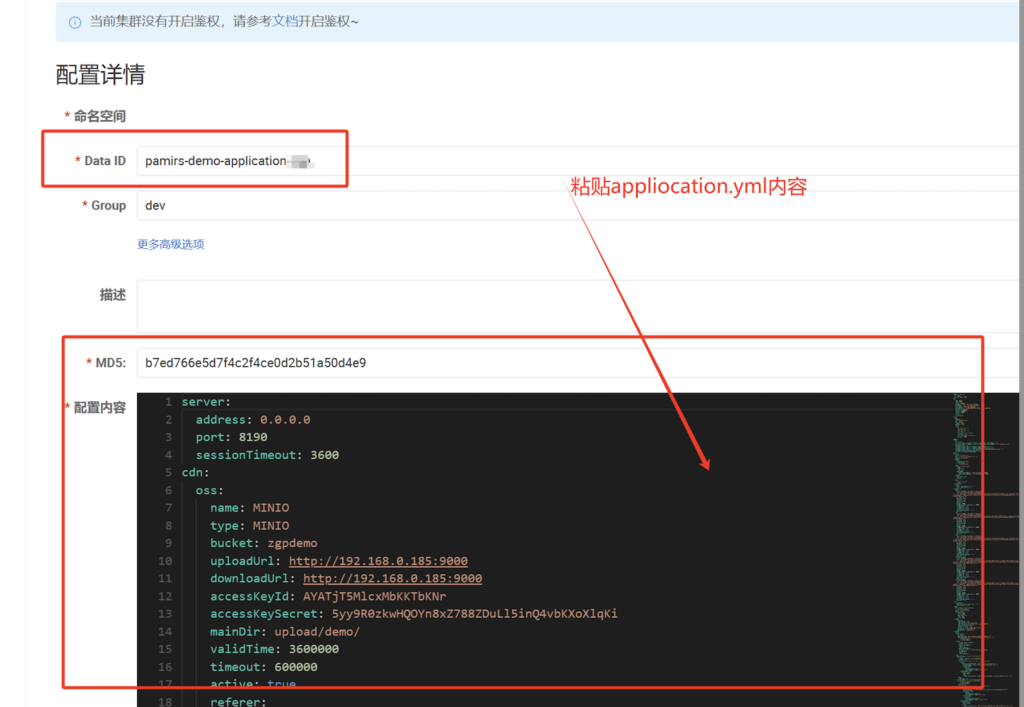
Oinone社区 作者:望闲原创文章,如若转载,请注明出处:https://doc.oinone.top/kai-fa-shi-jian/5828.html
访问Oinone官网:https://www.oinone.top获取数式Oinone低代码应用平台体验