
当前端发起对应用的访问时,如果出现错误,那么我们可以通过以下方式进行简易排查,如果排查不出来,则也可以把排查工具给出的信息发送给Oinone官方售后进行进一步分析。本文将通过模拟异常信息,来介绍排查工具,提供了哪些辅助信息帮我们来快速定位问题。
排查工具基础介绍
通过前端页面的 /debug 路由路径访问调试工具的页面,假设我们的前端页面访问地址为http://localhost:6800,那么我们的排查工具请求路径就是 http://localhost:6800/debug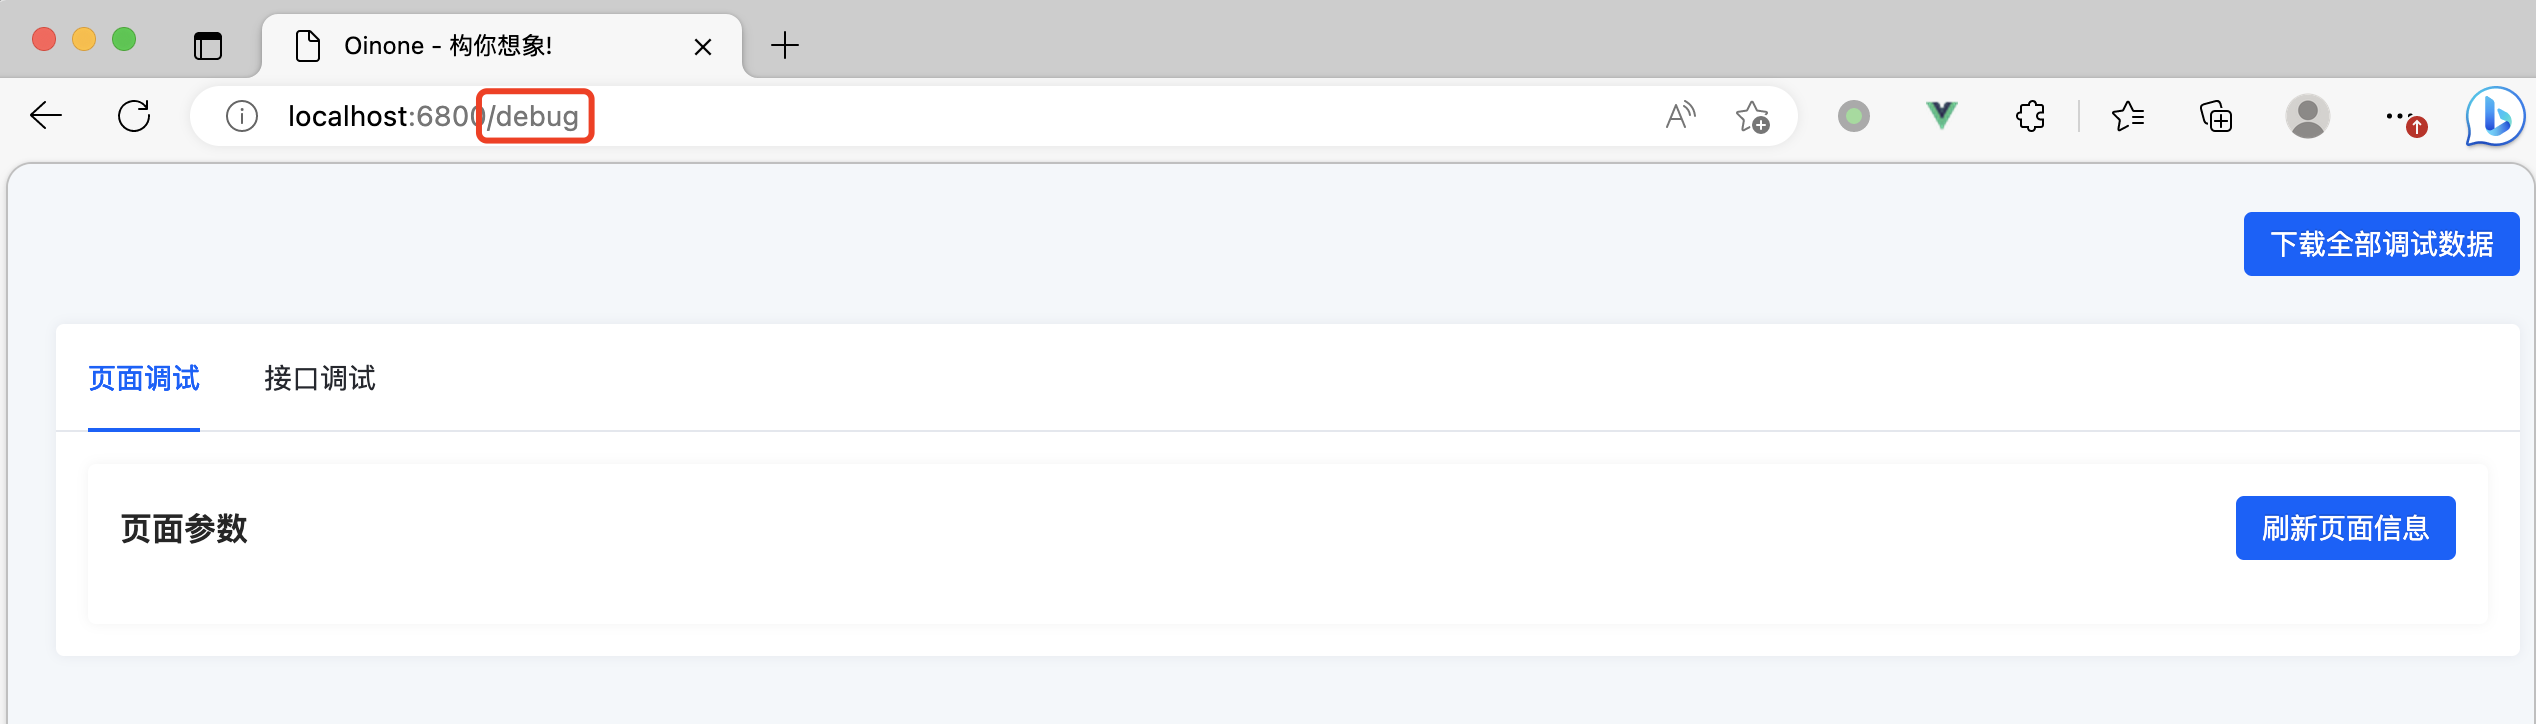

排查工具可以帮我们排查前端页面元数据异常和后端接口的异常
排查前端页面元数据
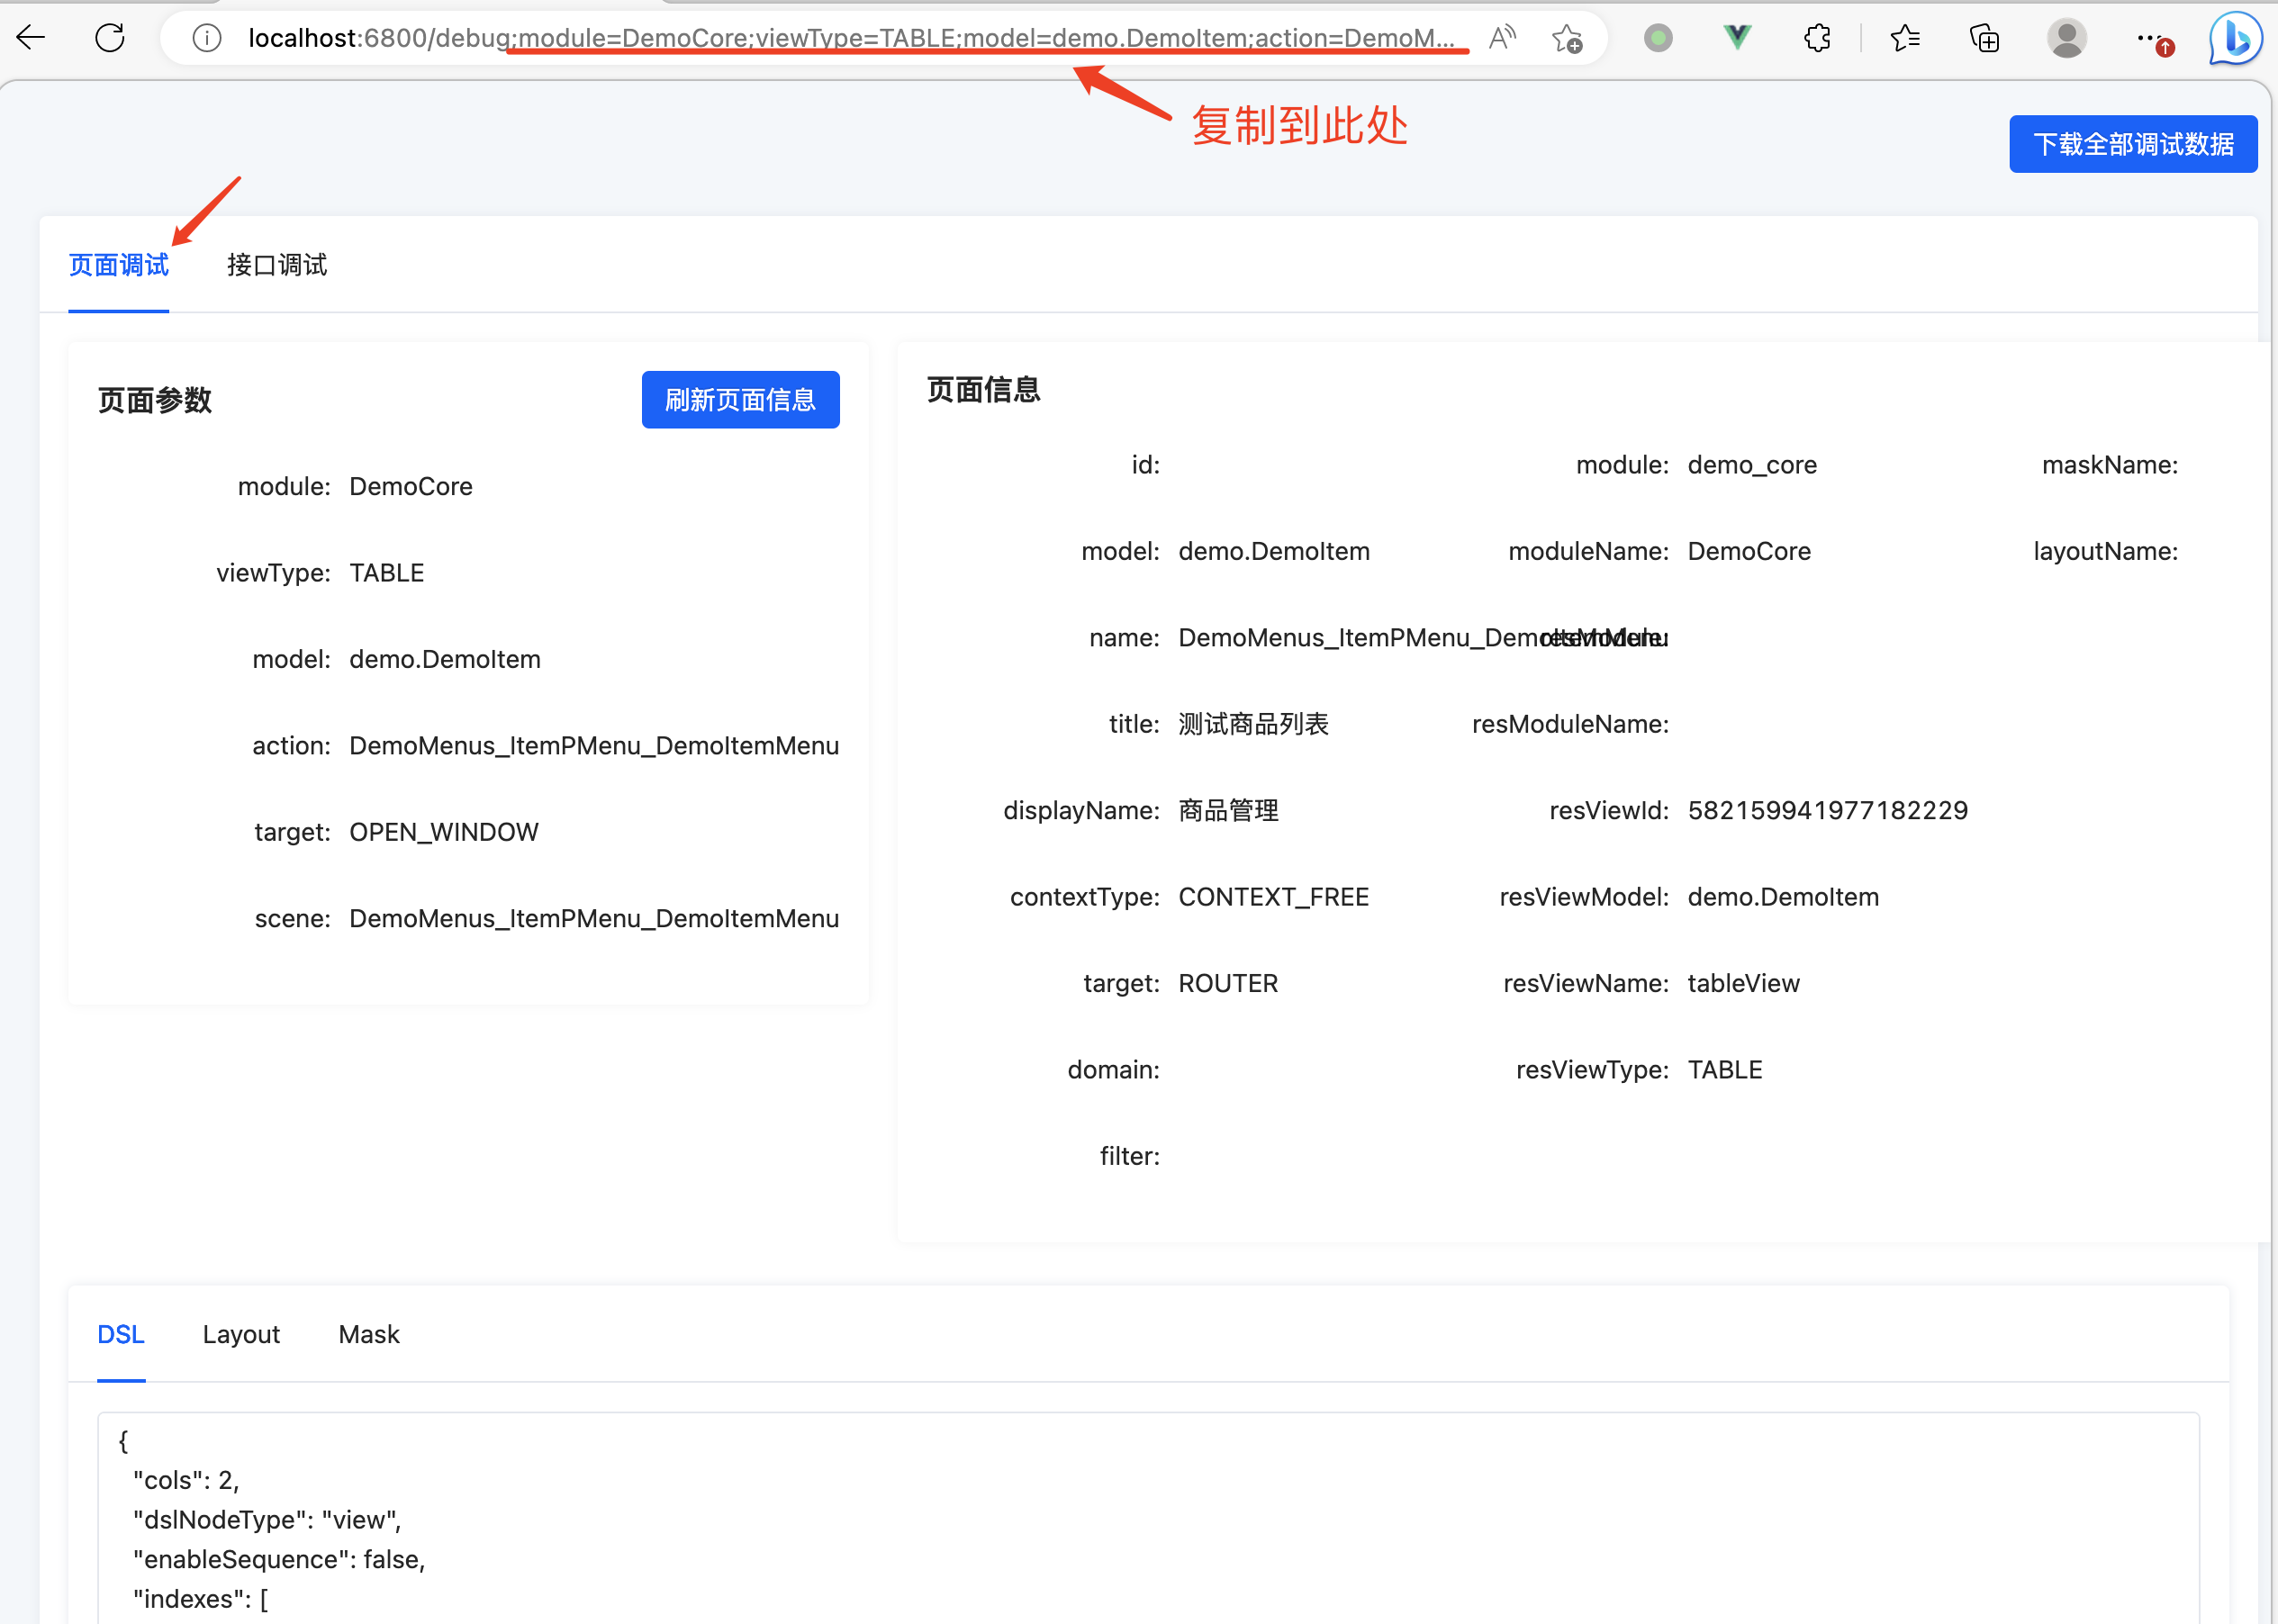
将问题页面浏览器地址栏内 page 后的部分复制到调试工具的 debug 路由后重新发起请求,如图可以看到调试工具展示的信息,可以根据这些信息排查问题。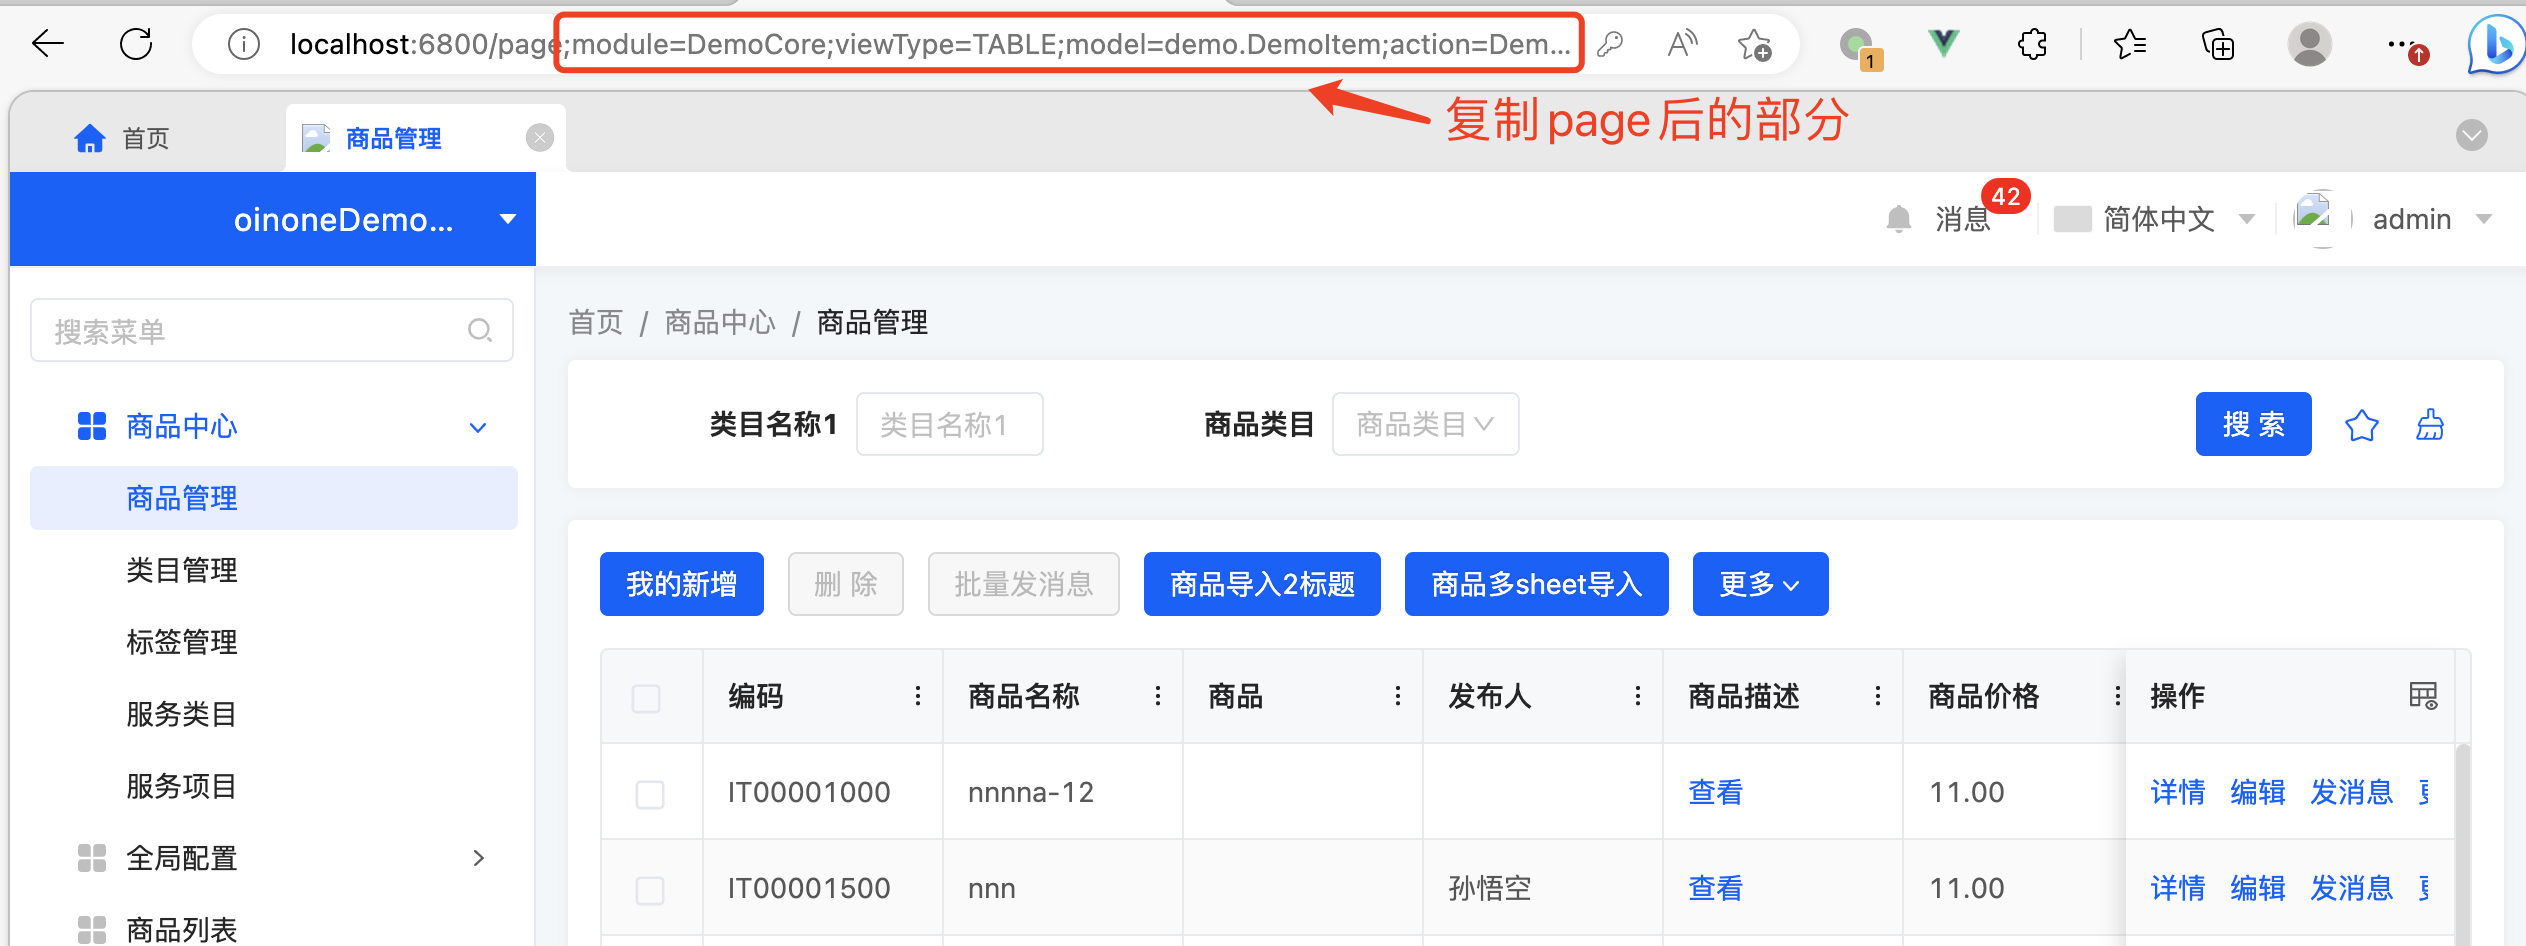

排查后端接口
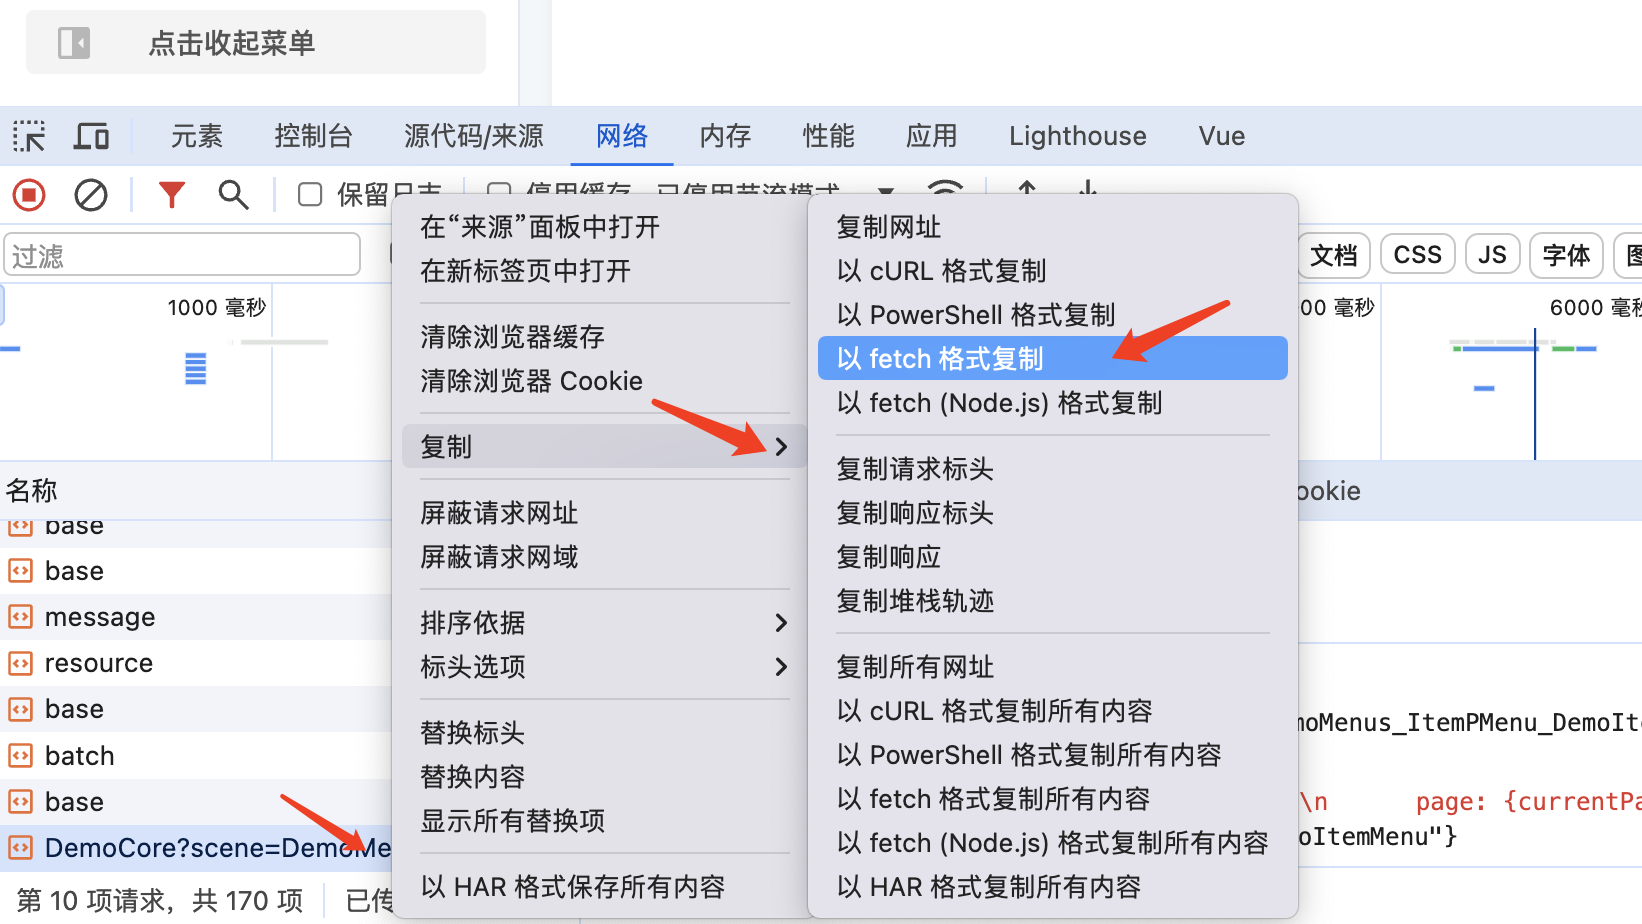
- 后端接口出现问题后,打开(在原页面)浏览器的调试工具,切换到“网络”的标签页,在左侧的历史请求列表中找到需要调试的请求,右键会弹出菜单,点击菜单中的 “复制”,再次展开该菜单,点击二级菜单中的“以 fetch 格式复制”,这样可以复制到调试所需要的信息
2.复制调试信息到“接口调试”标签页内的文本框内,点击“发起请求”按钮获取调试结果
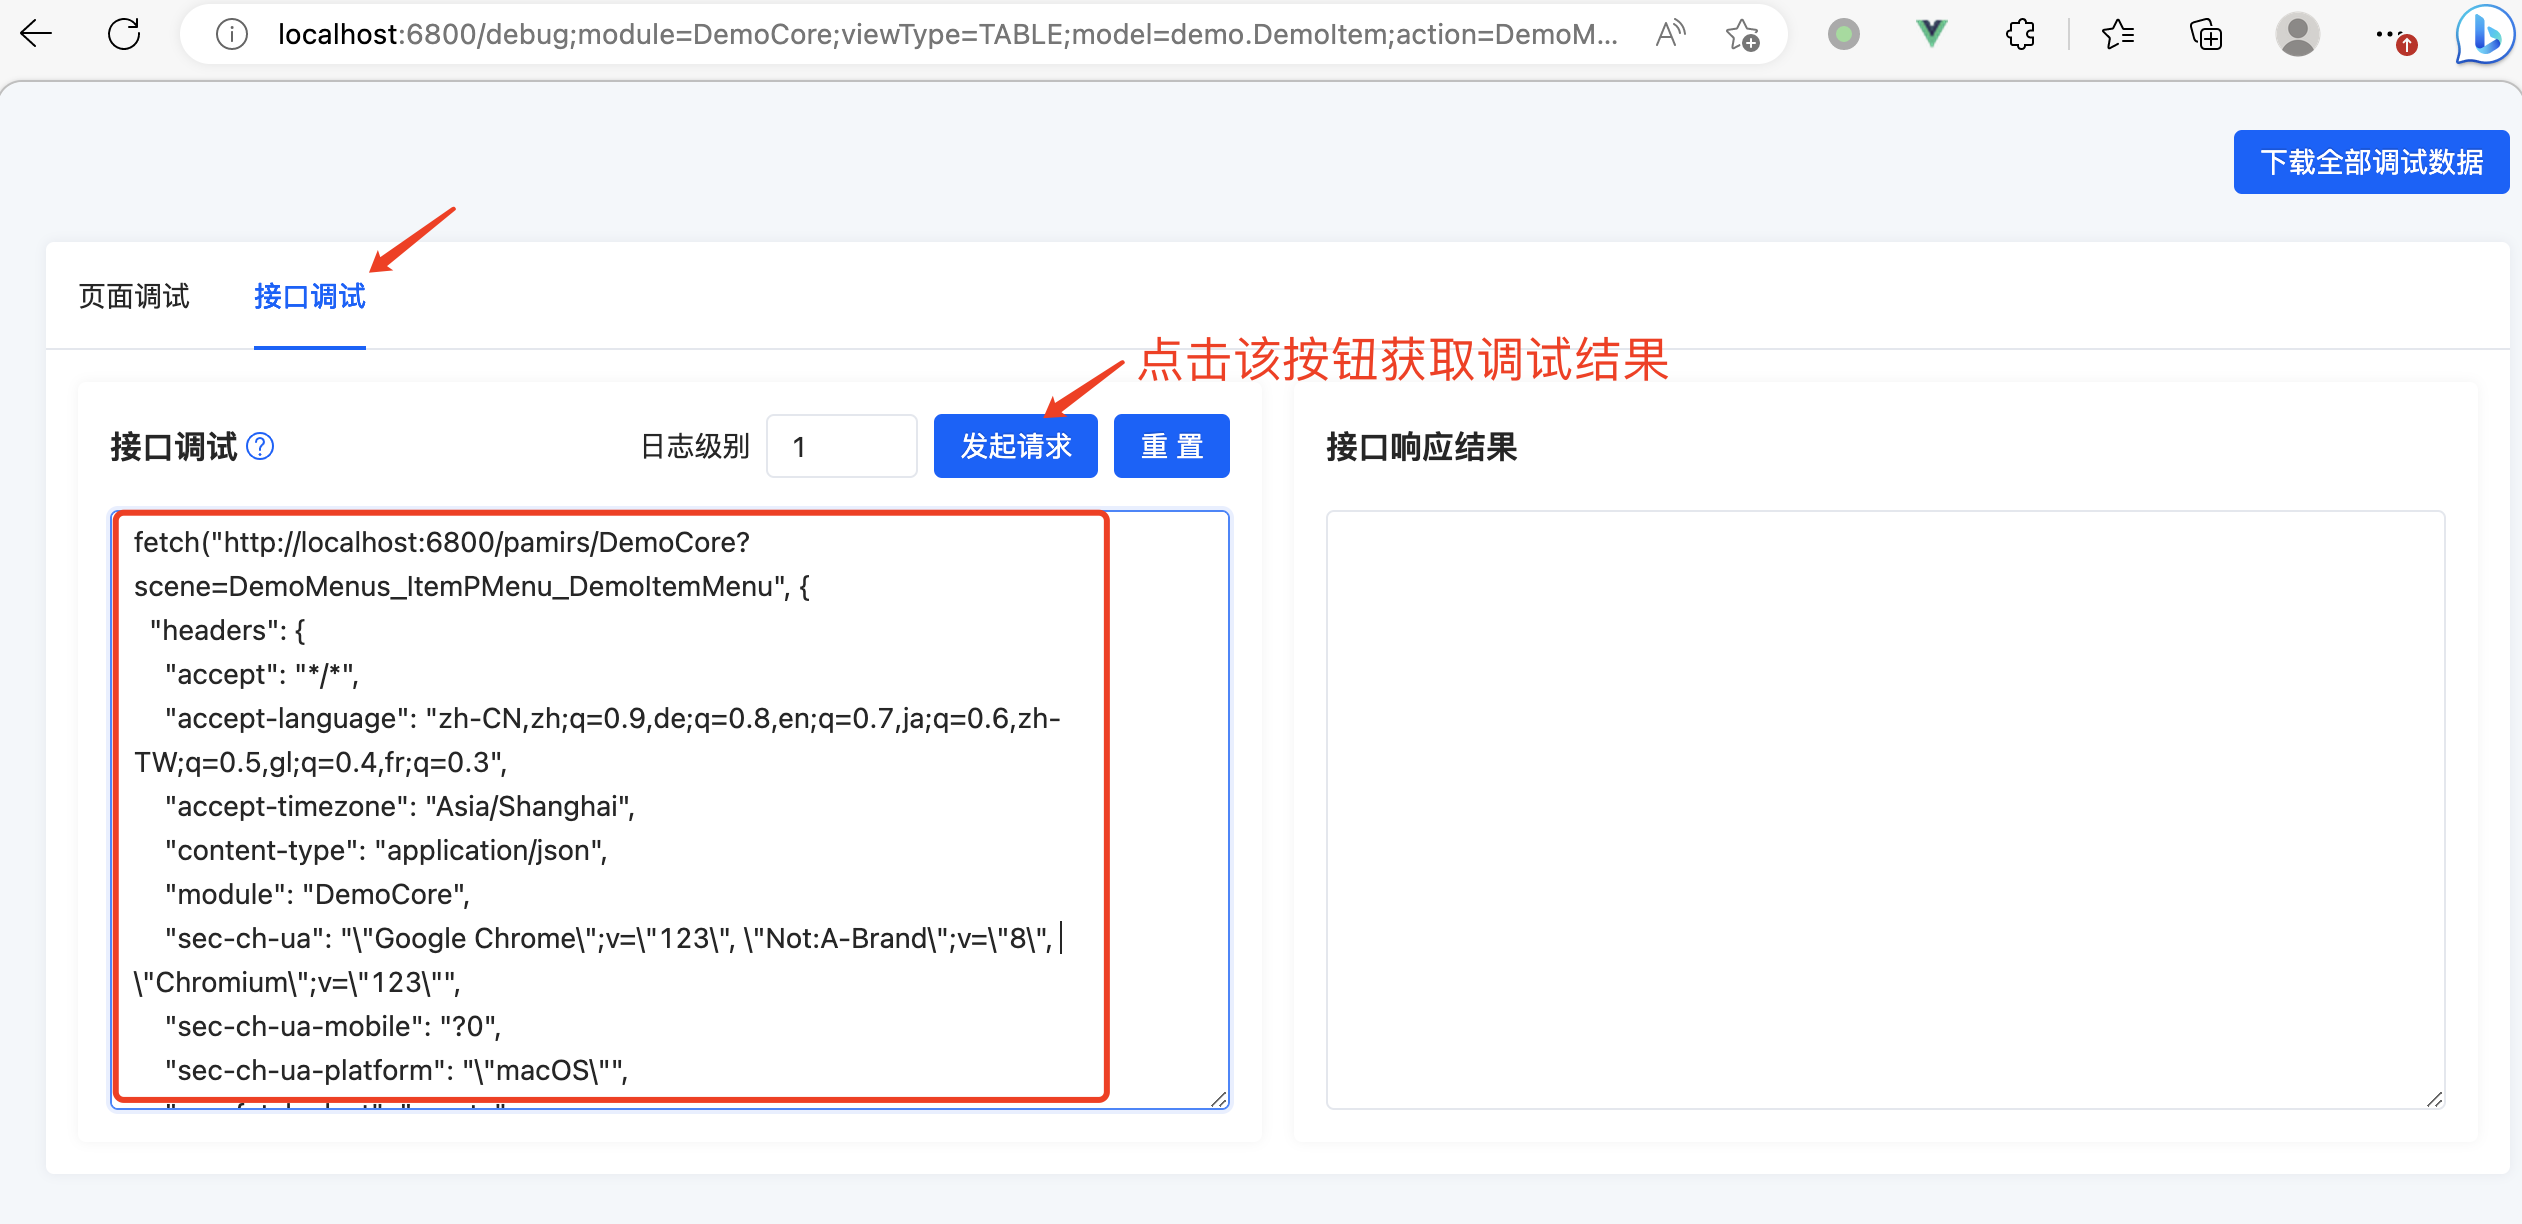
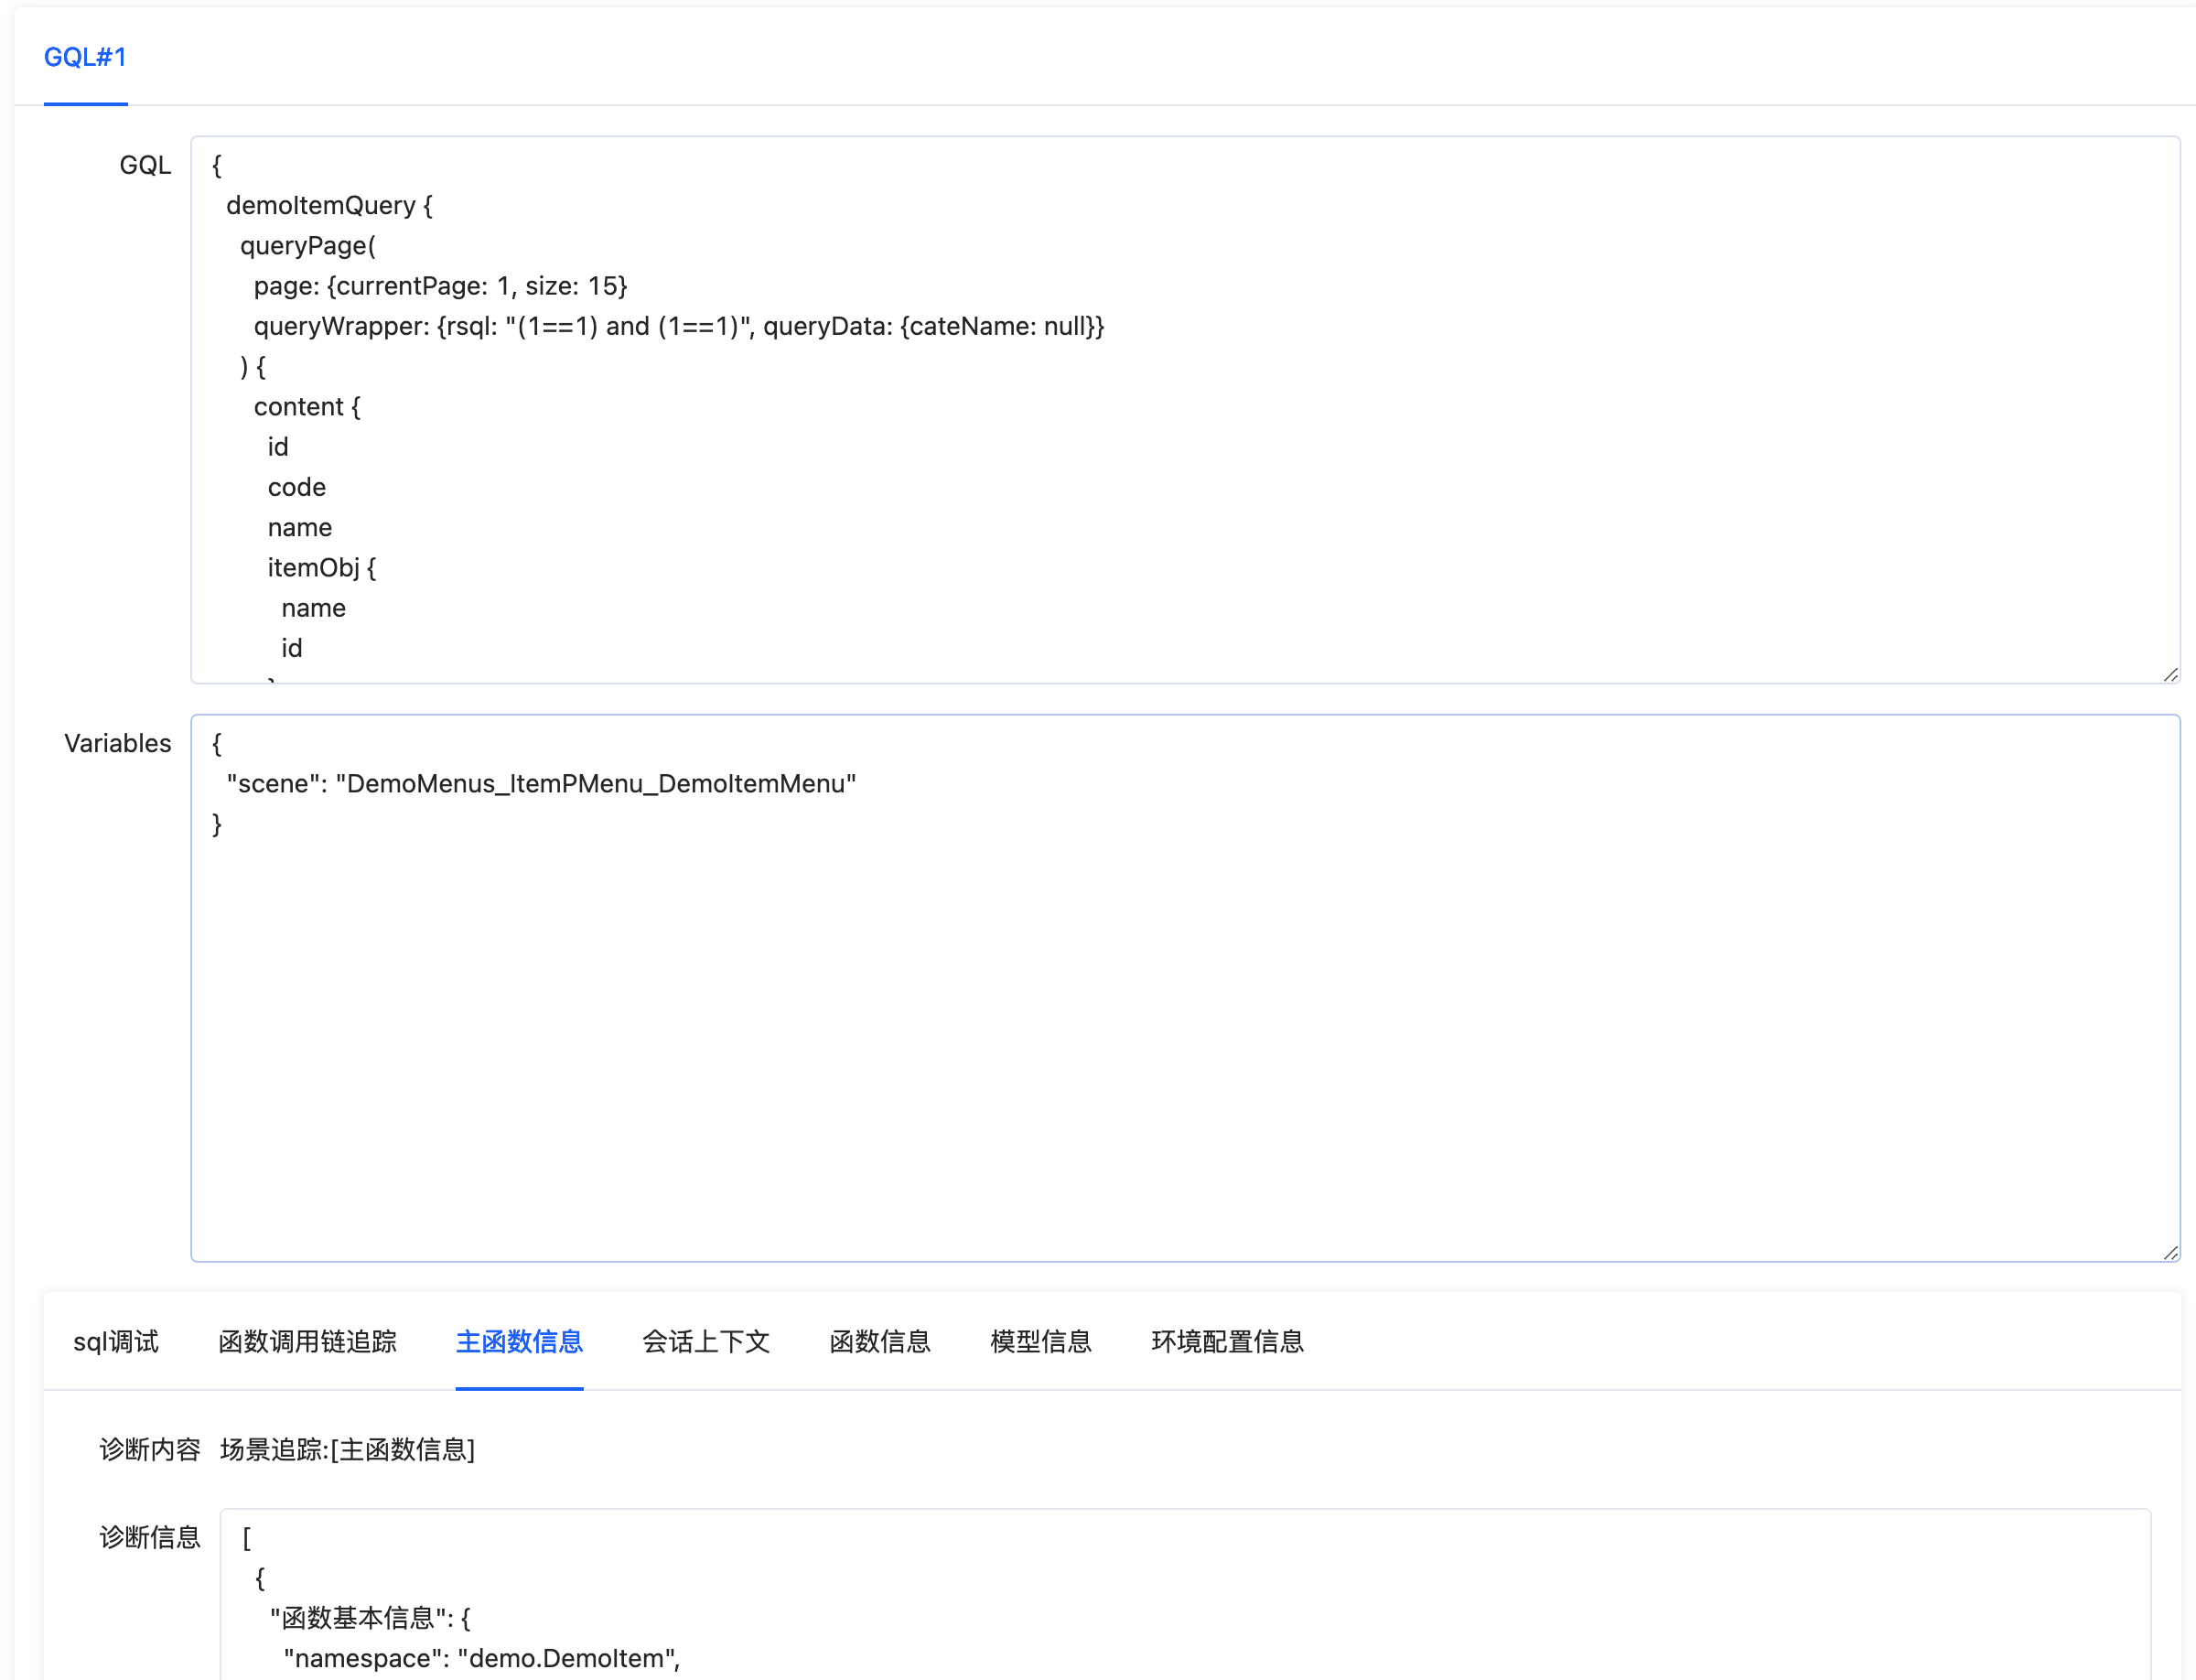
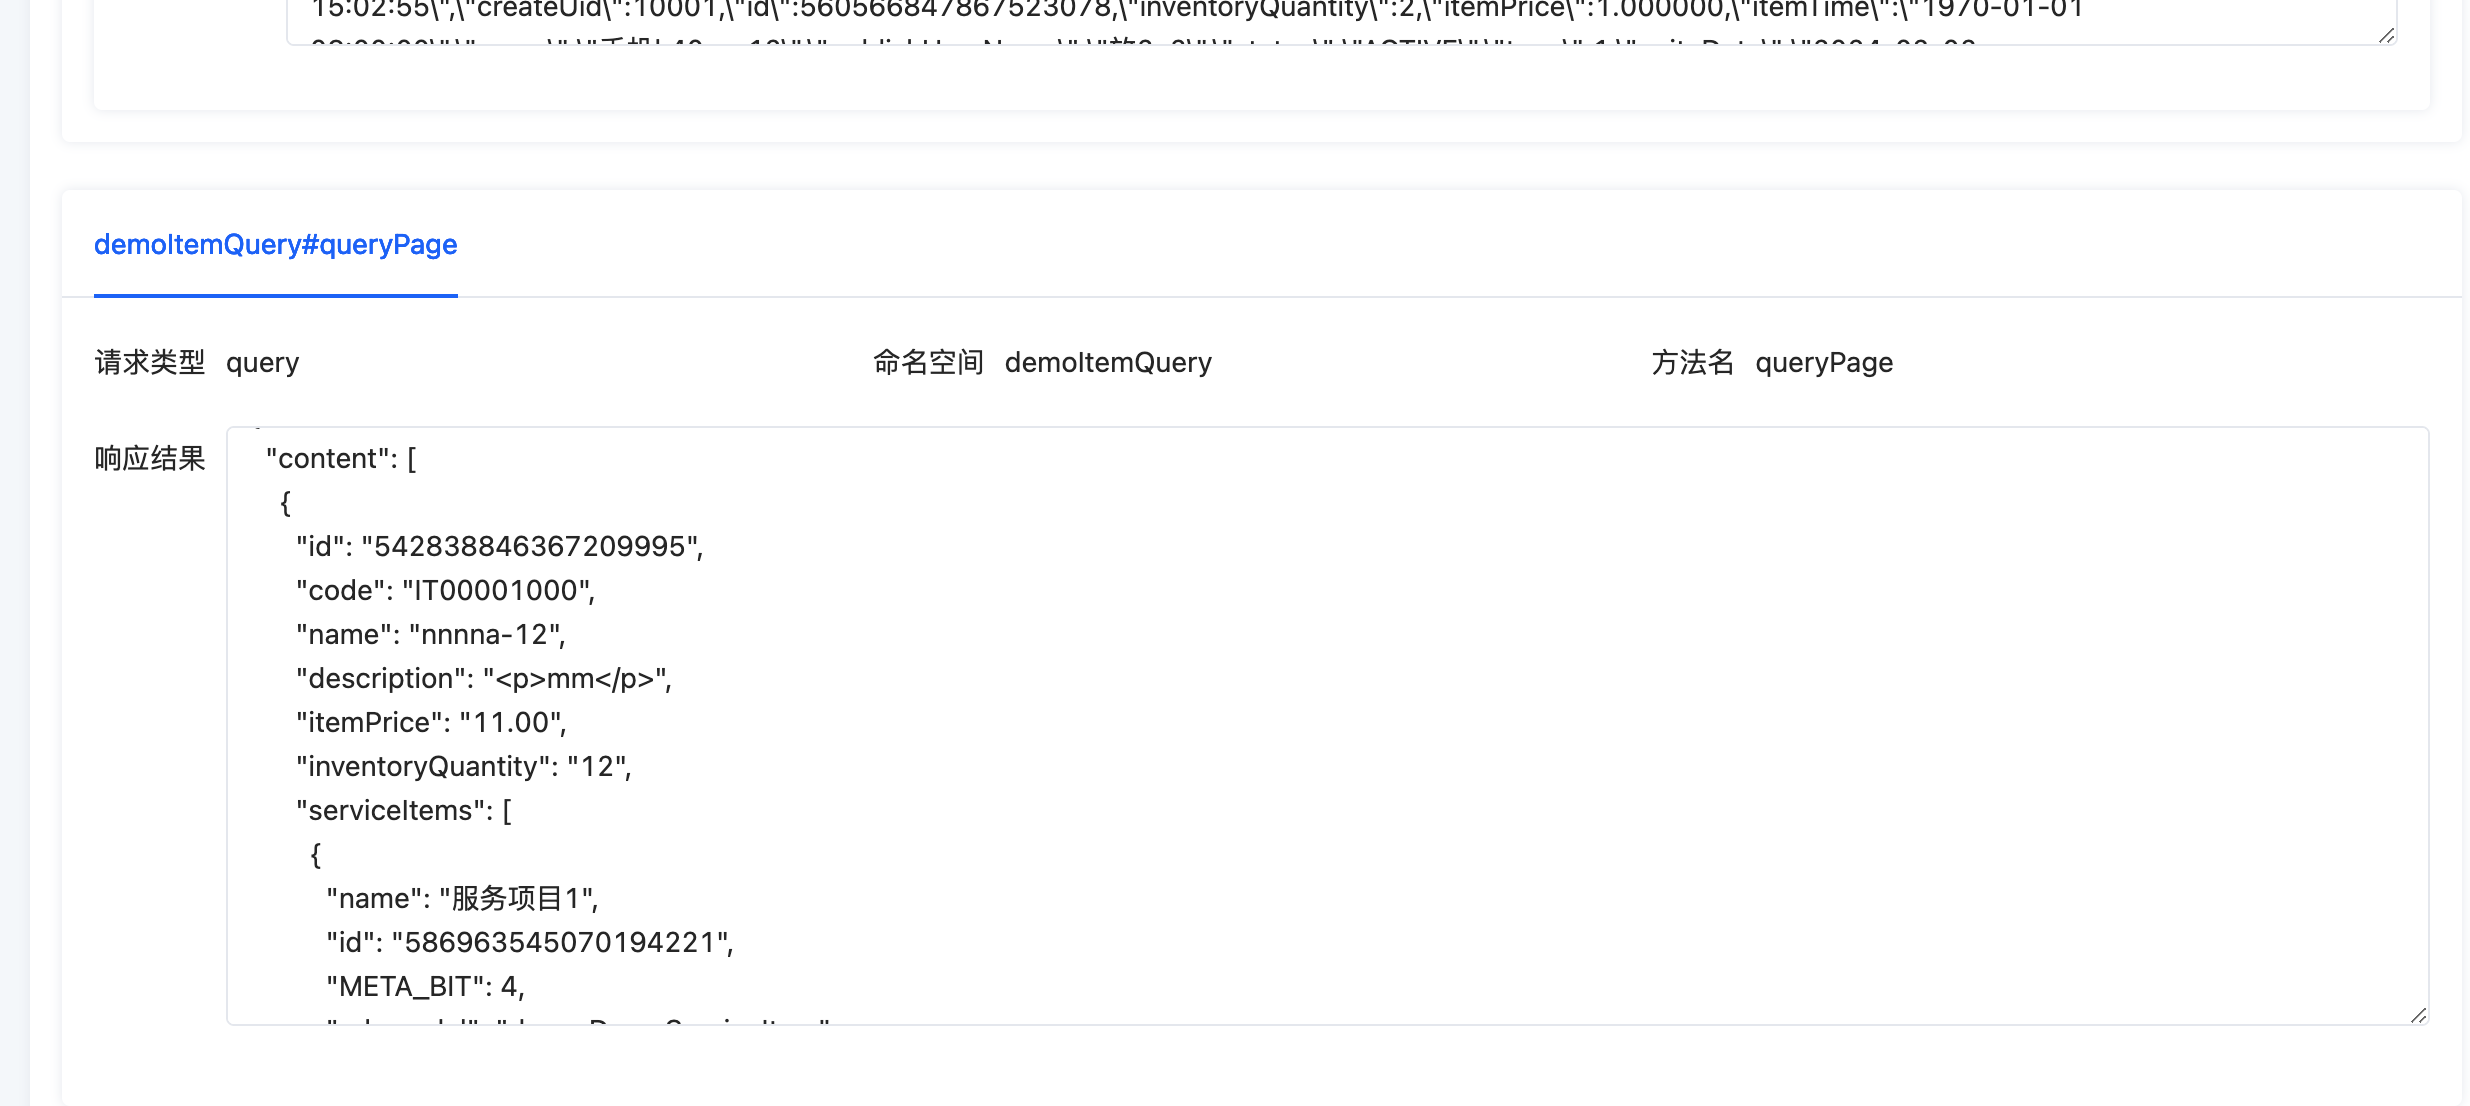
我们可以看到页面展示了该接口的各种调试信息,我们可以据此排查问题。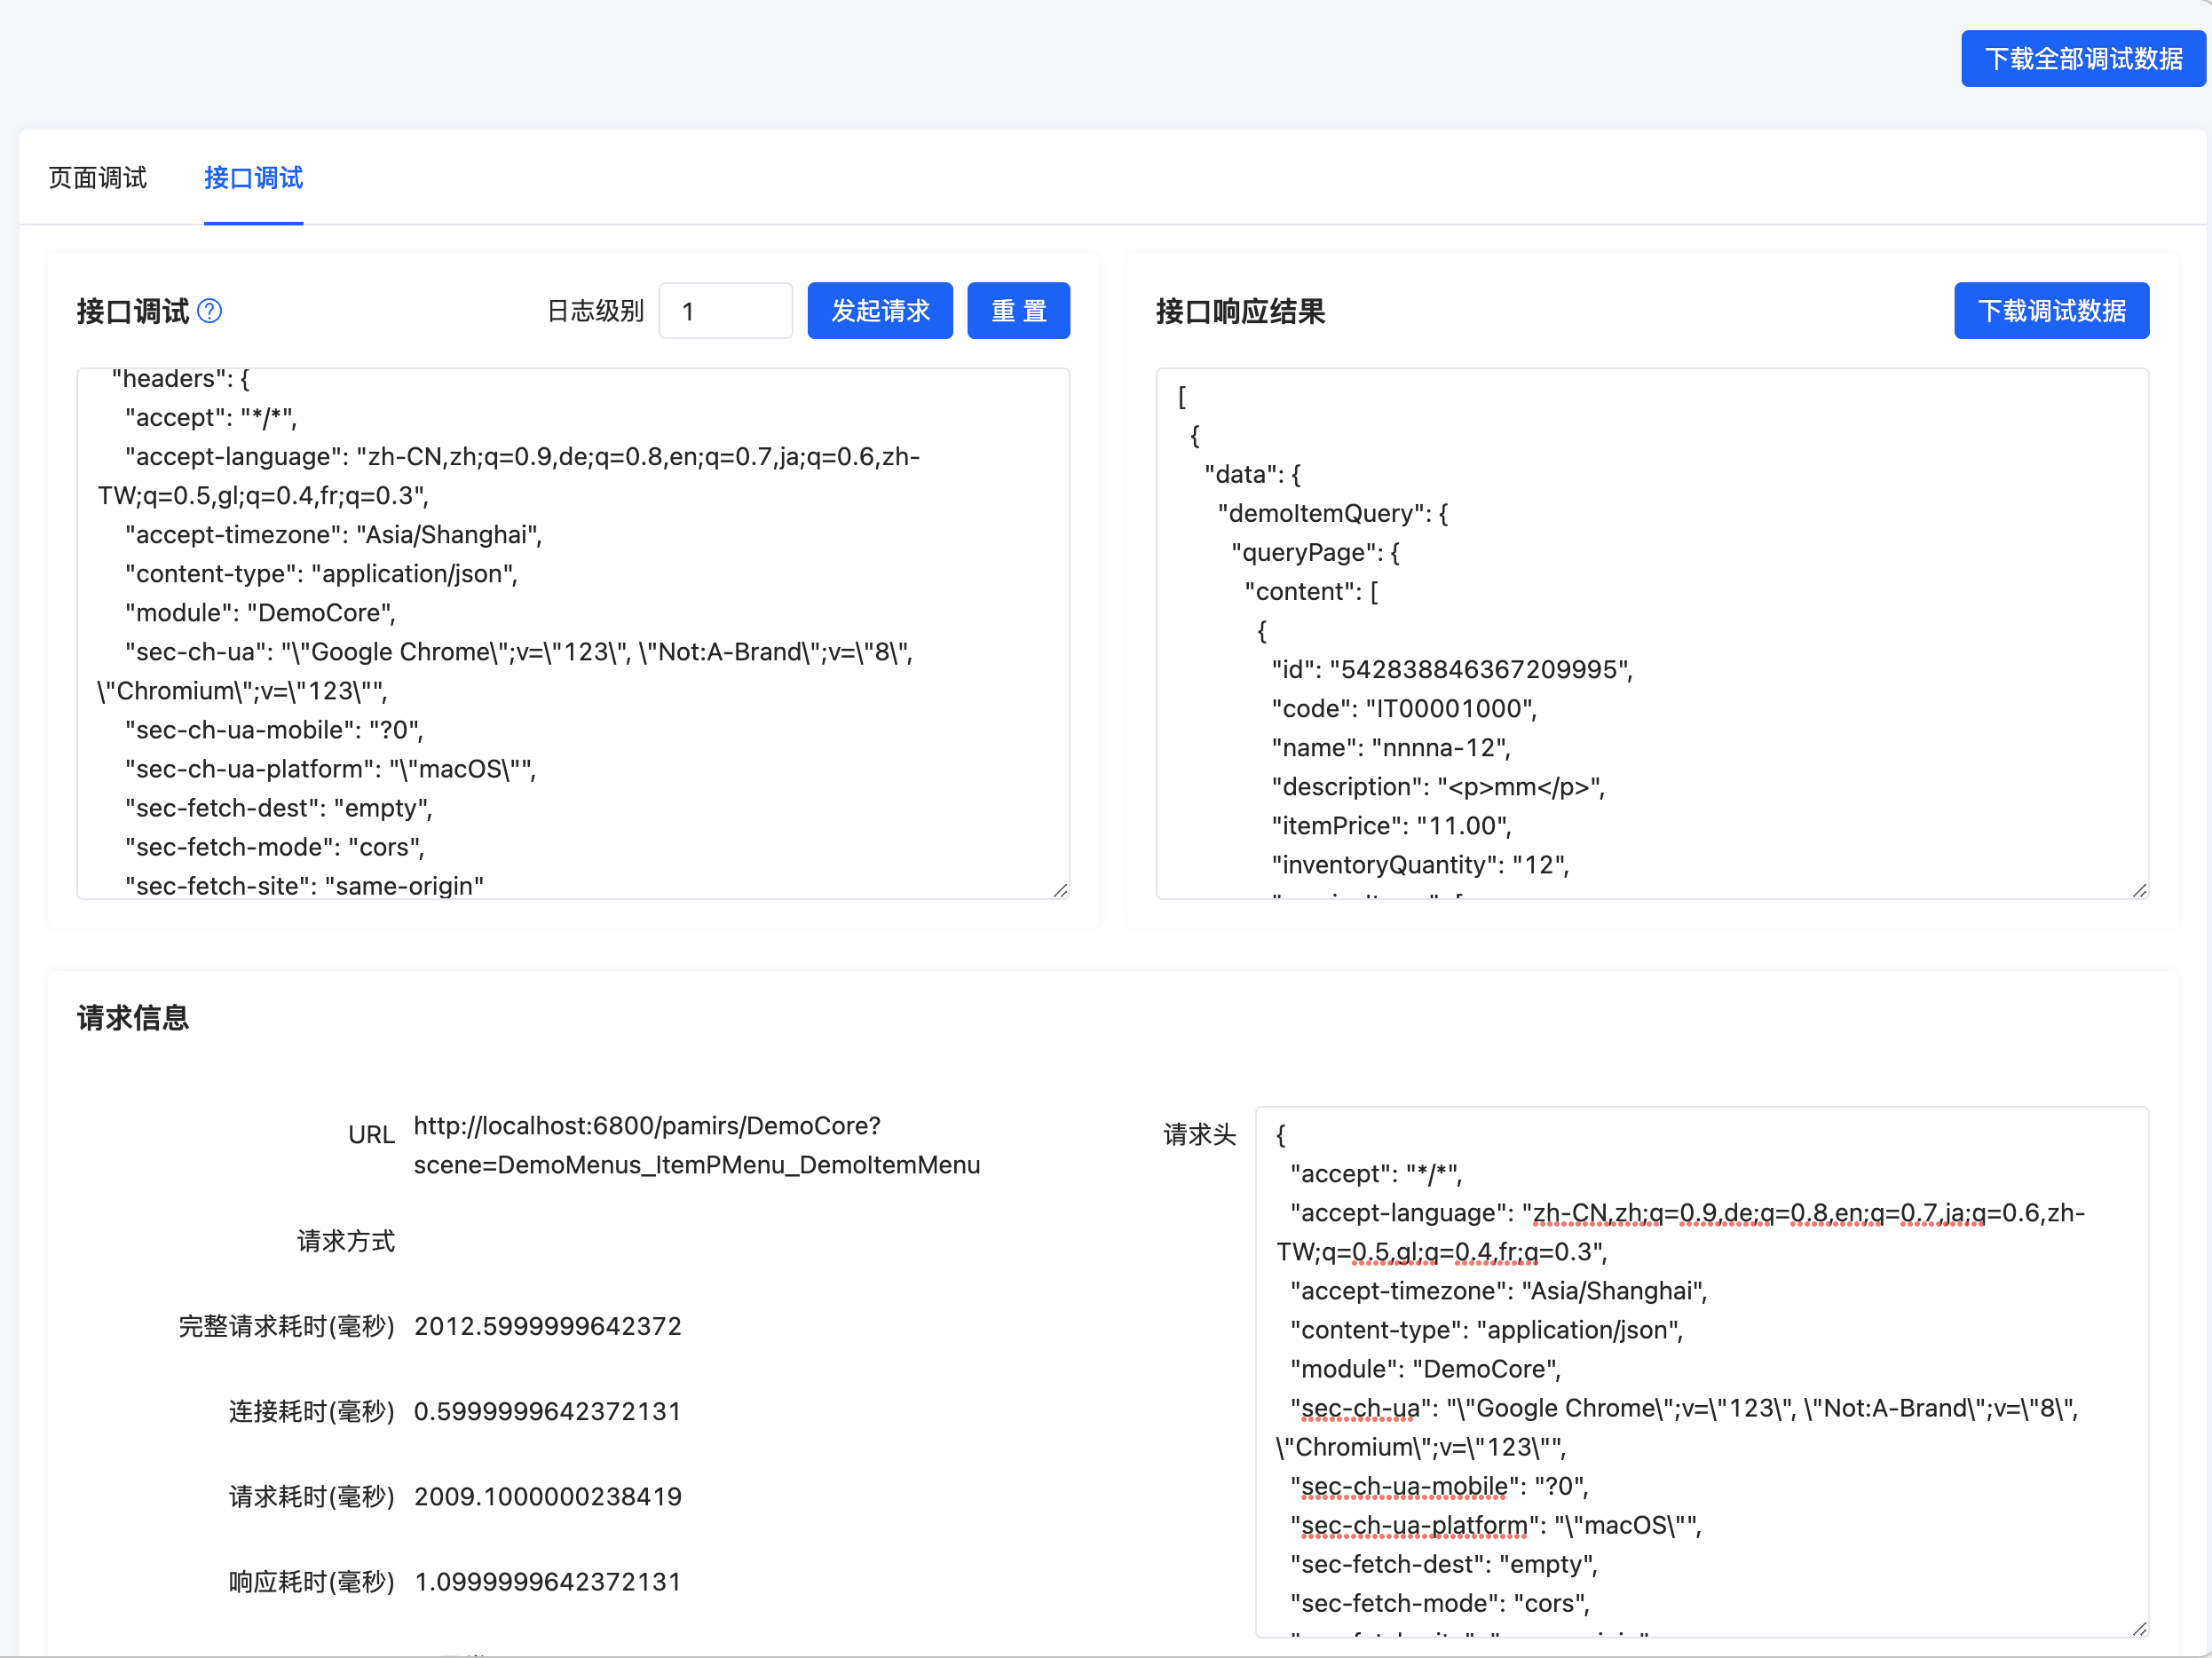
场景化的排查思路
业务代码中存在代码bug

报错后发起调试请求,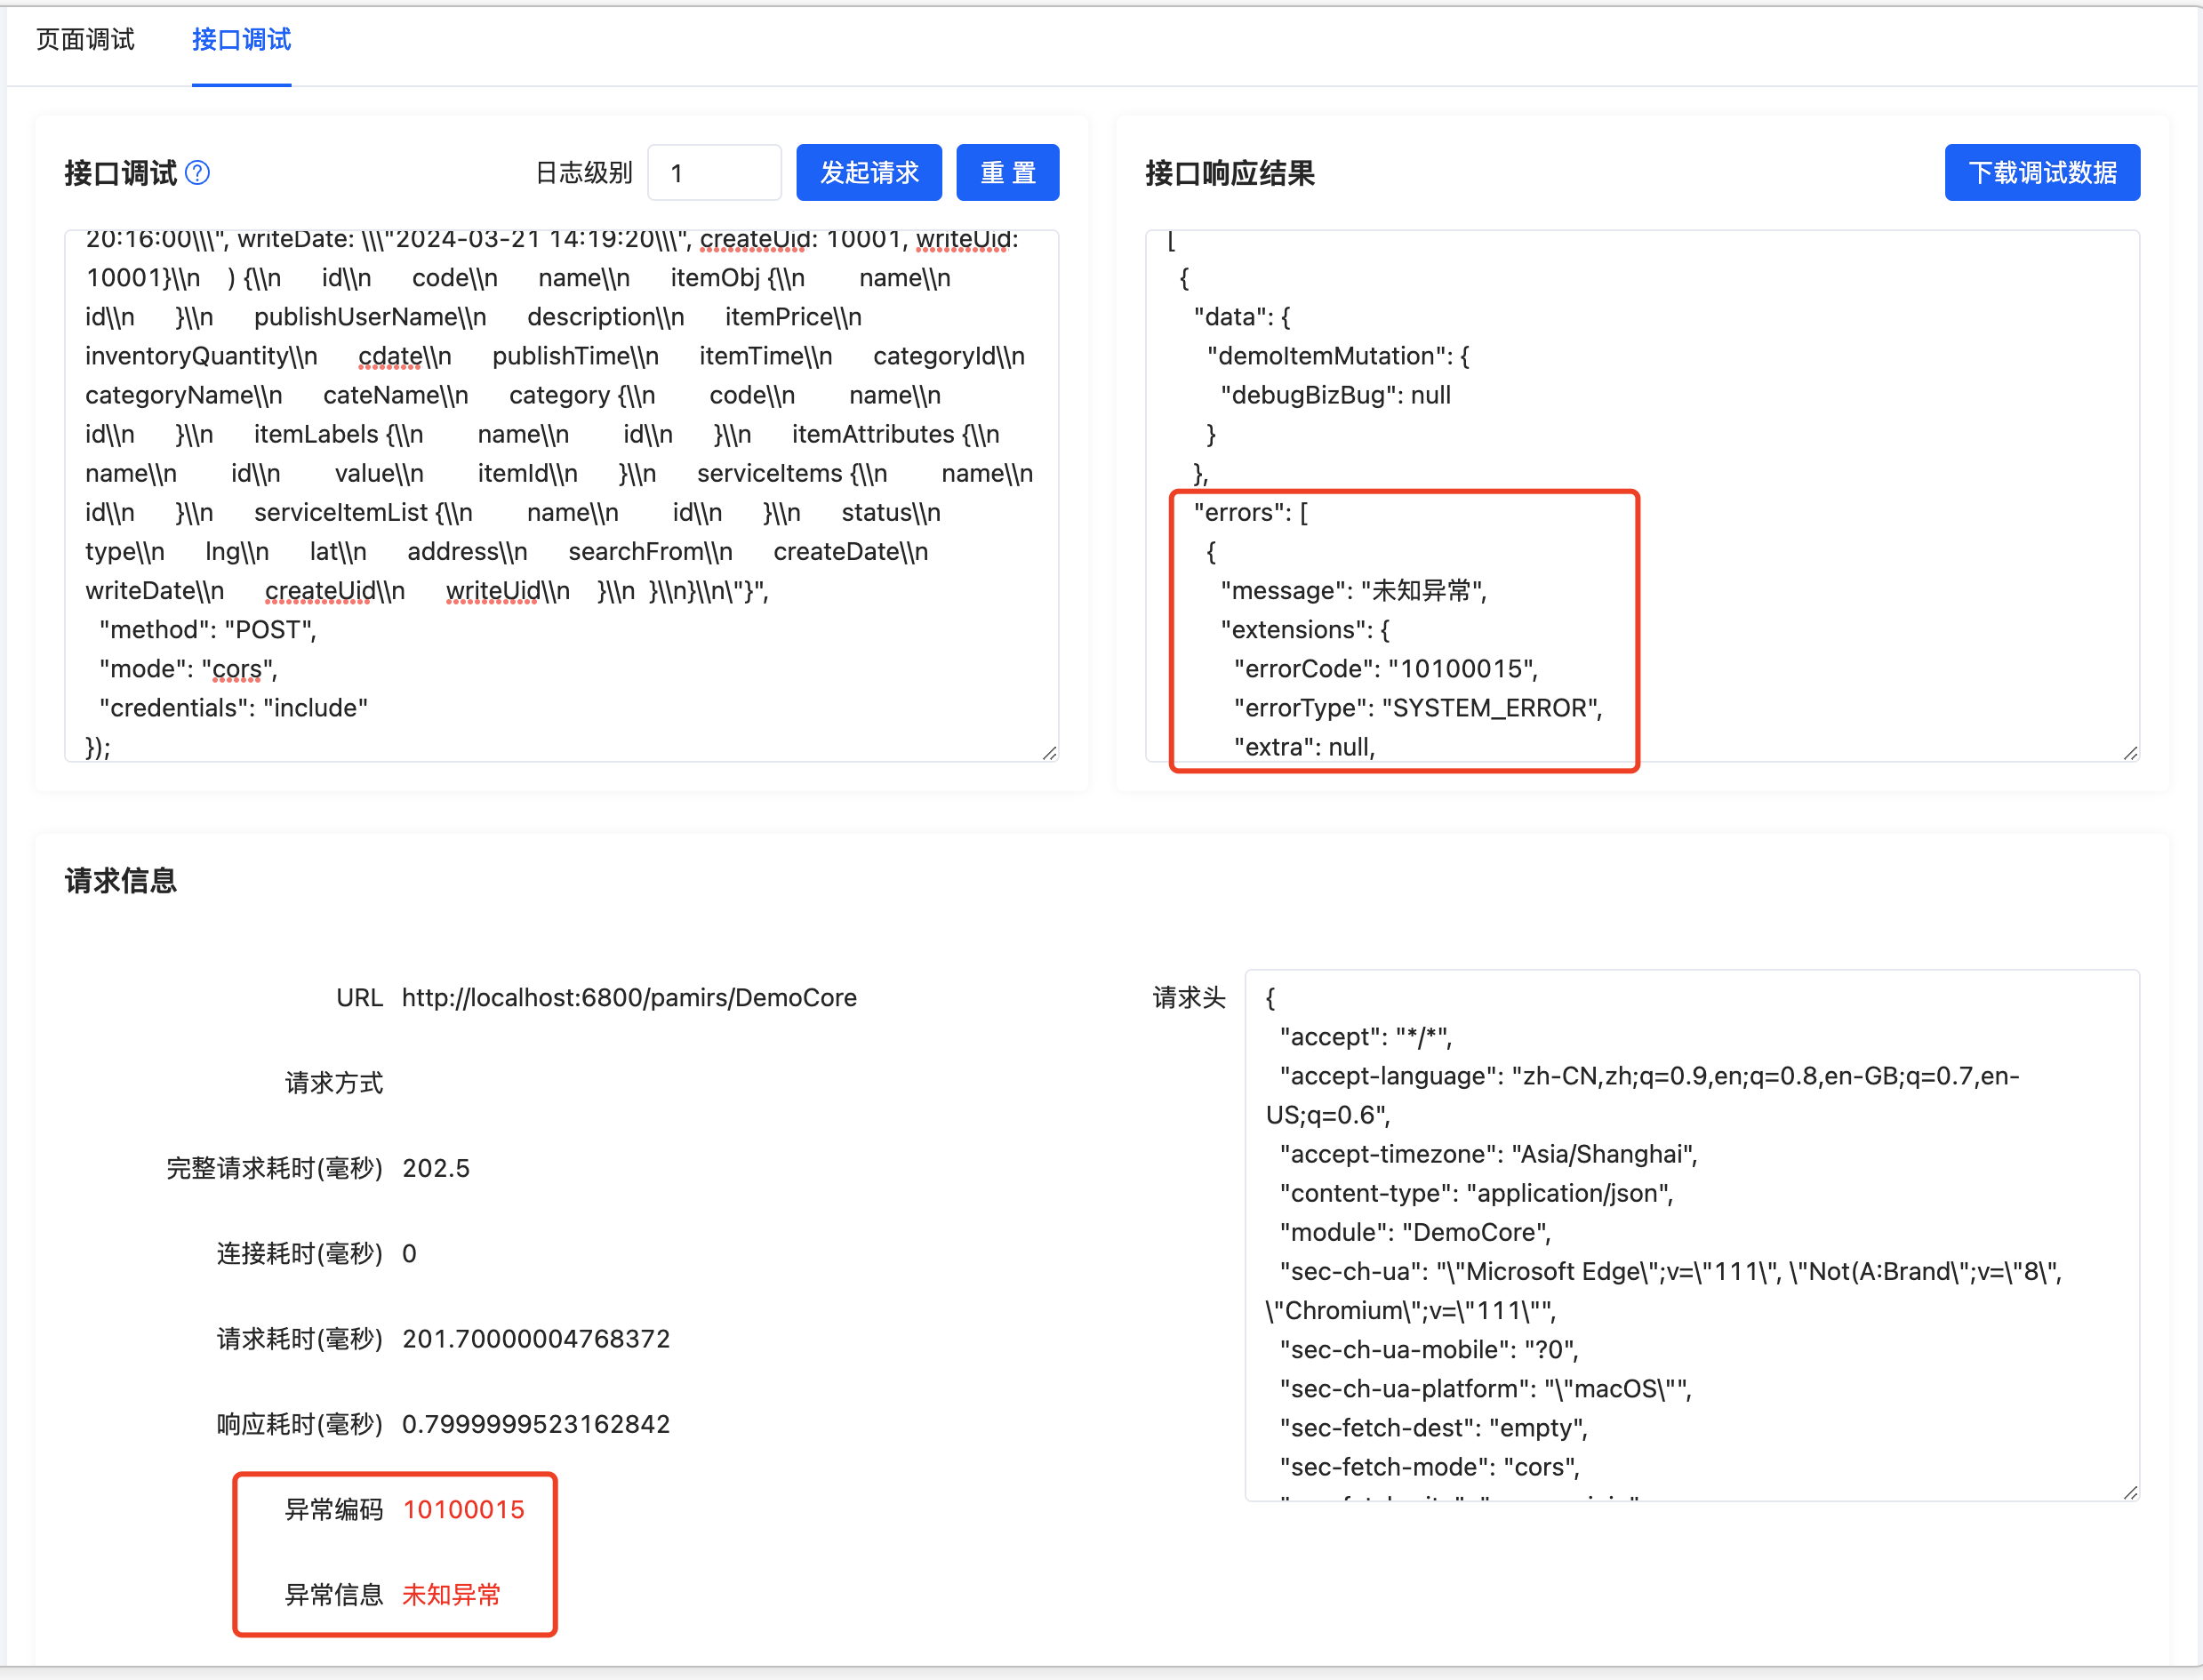
我们可以看到,调试工具直接给出了异常抛出的具体代码所在位置,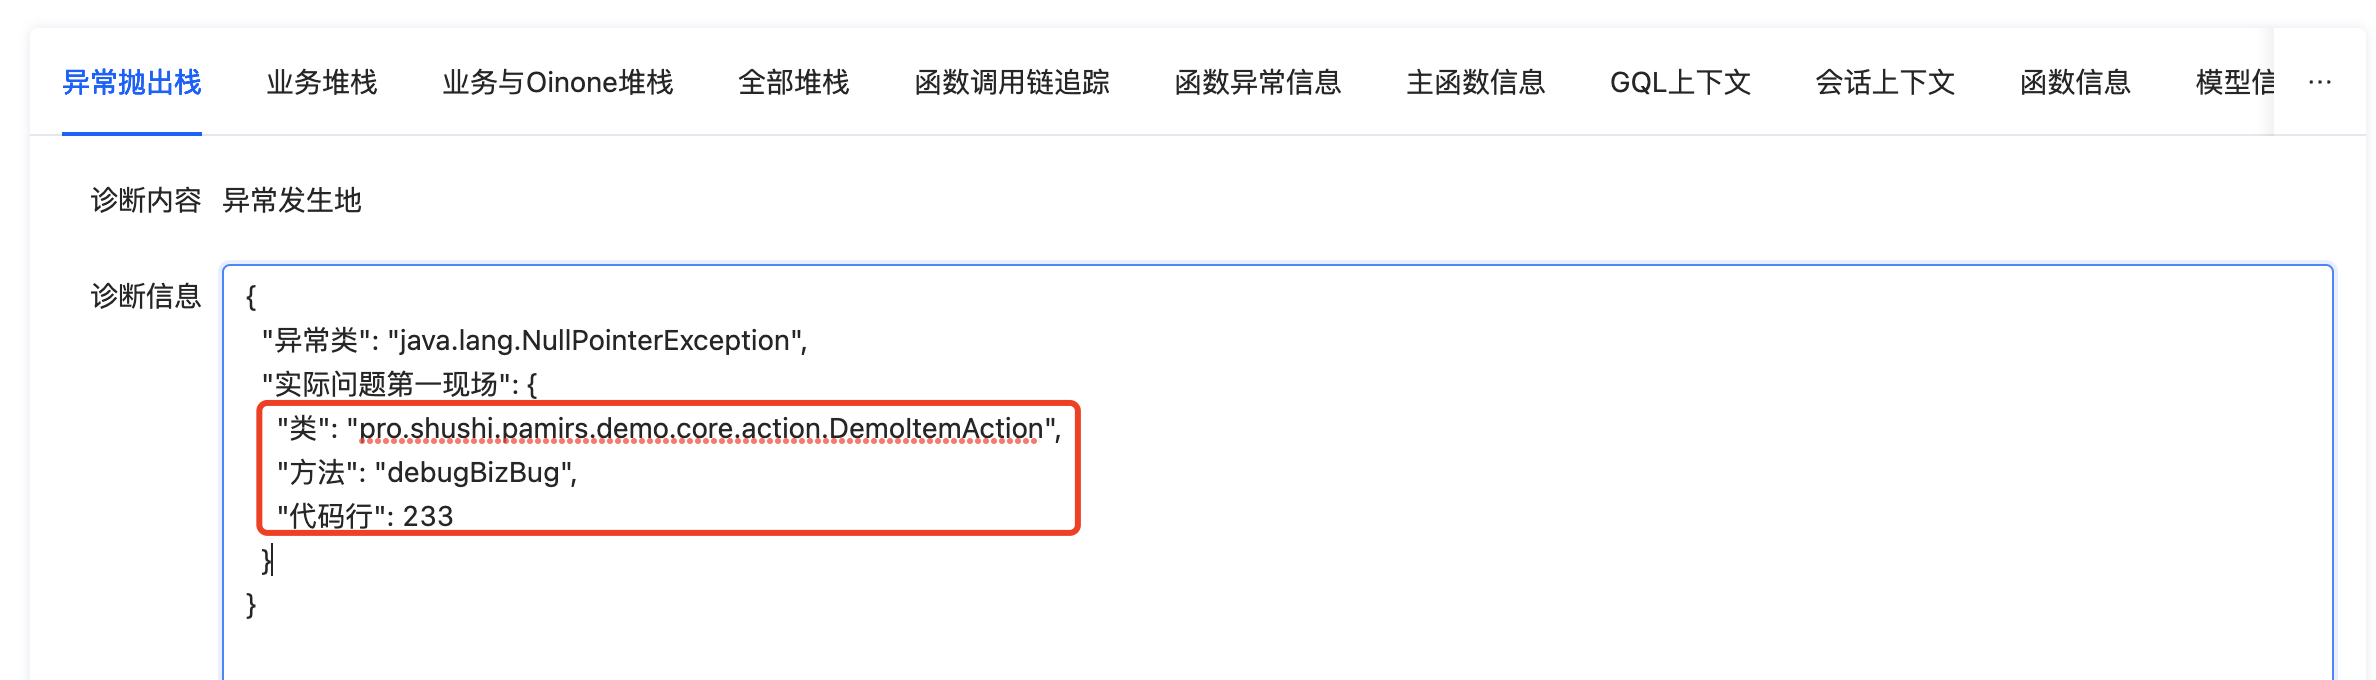
此时再切换到“全部堆栈”下,可以看到是业务类的233行导致的空指针异常,查看代码后分析可得是data.getName().eqauls方法在调用前未做条件判断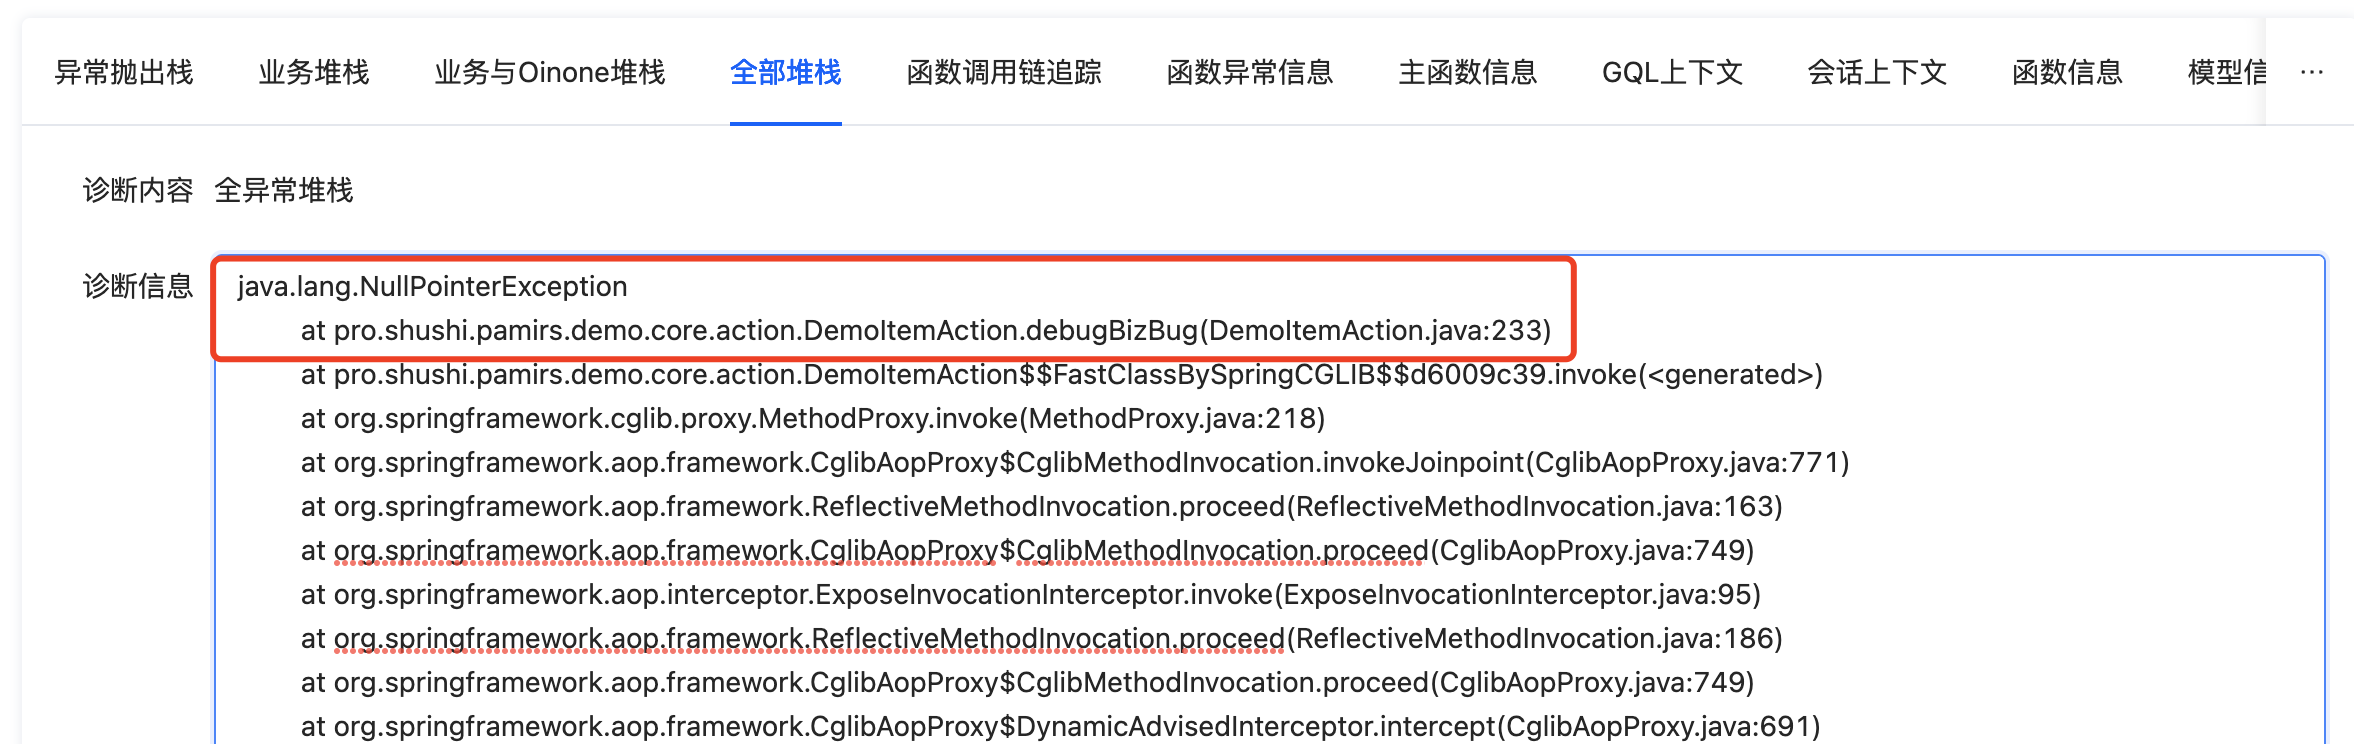
补全该判断后代码可以正常执行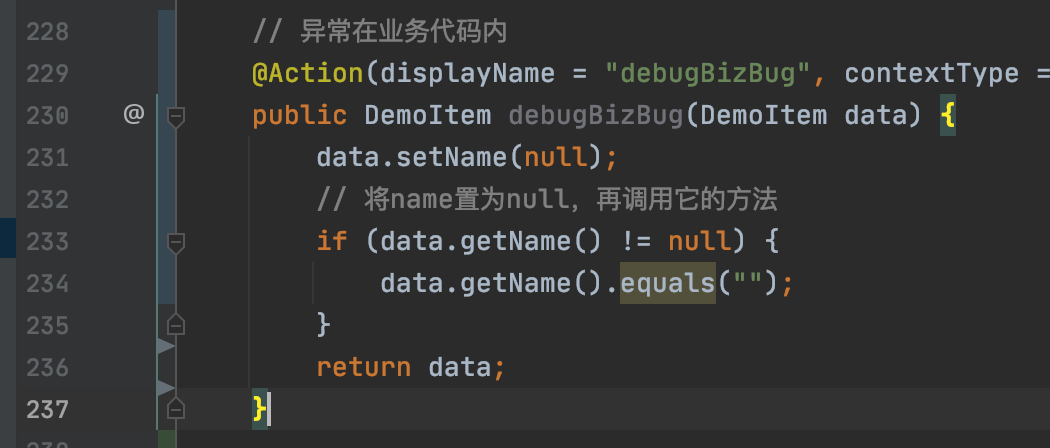
业务代码中没有直接的错误,异常在平台代码中抛出

报错后发起调试请求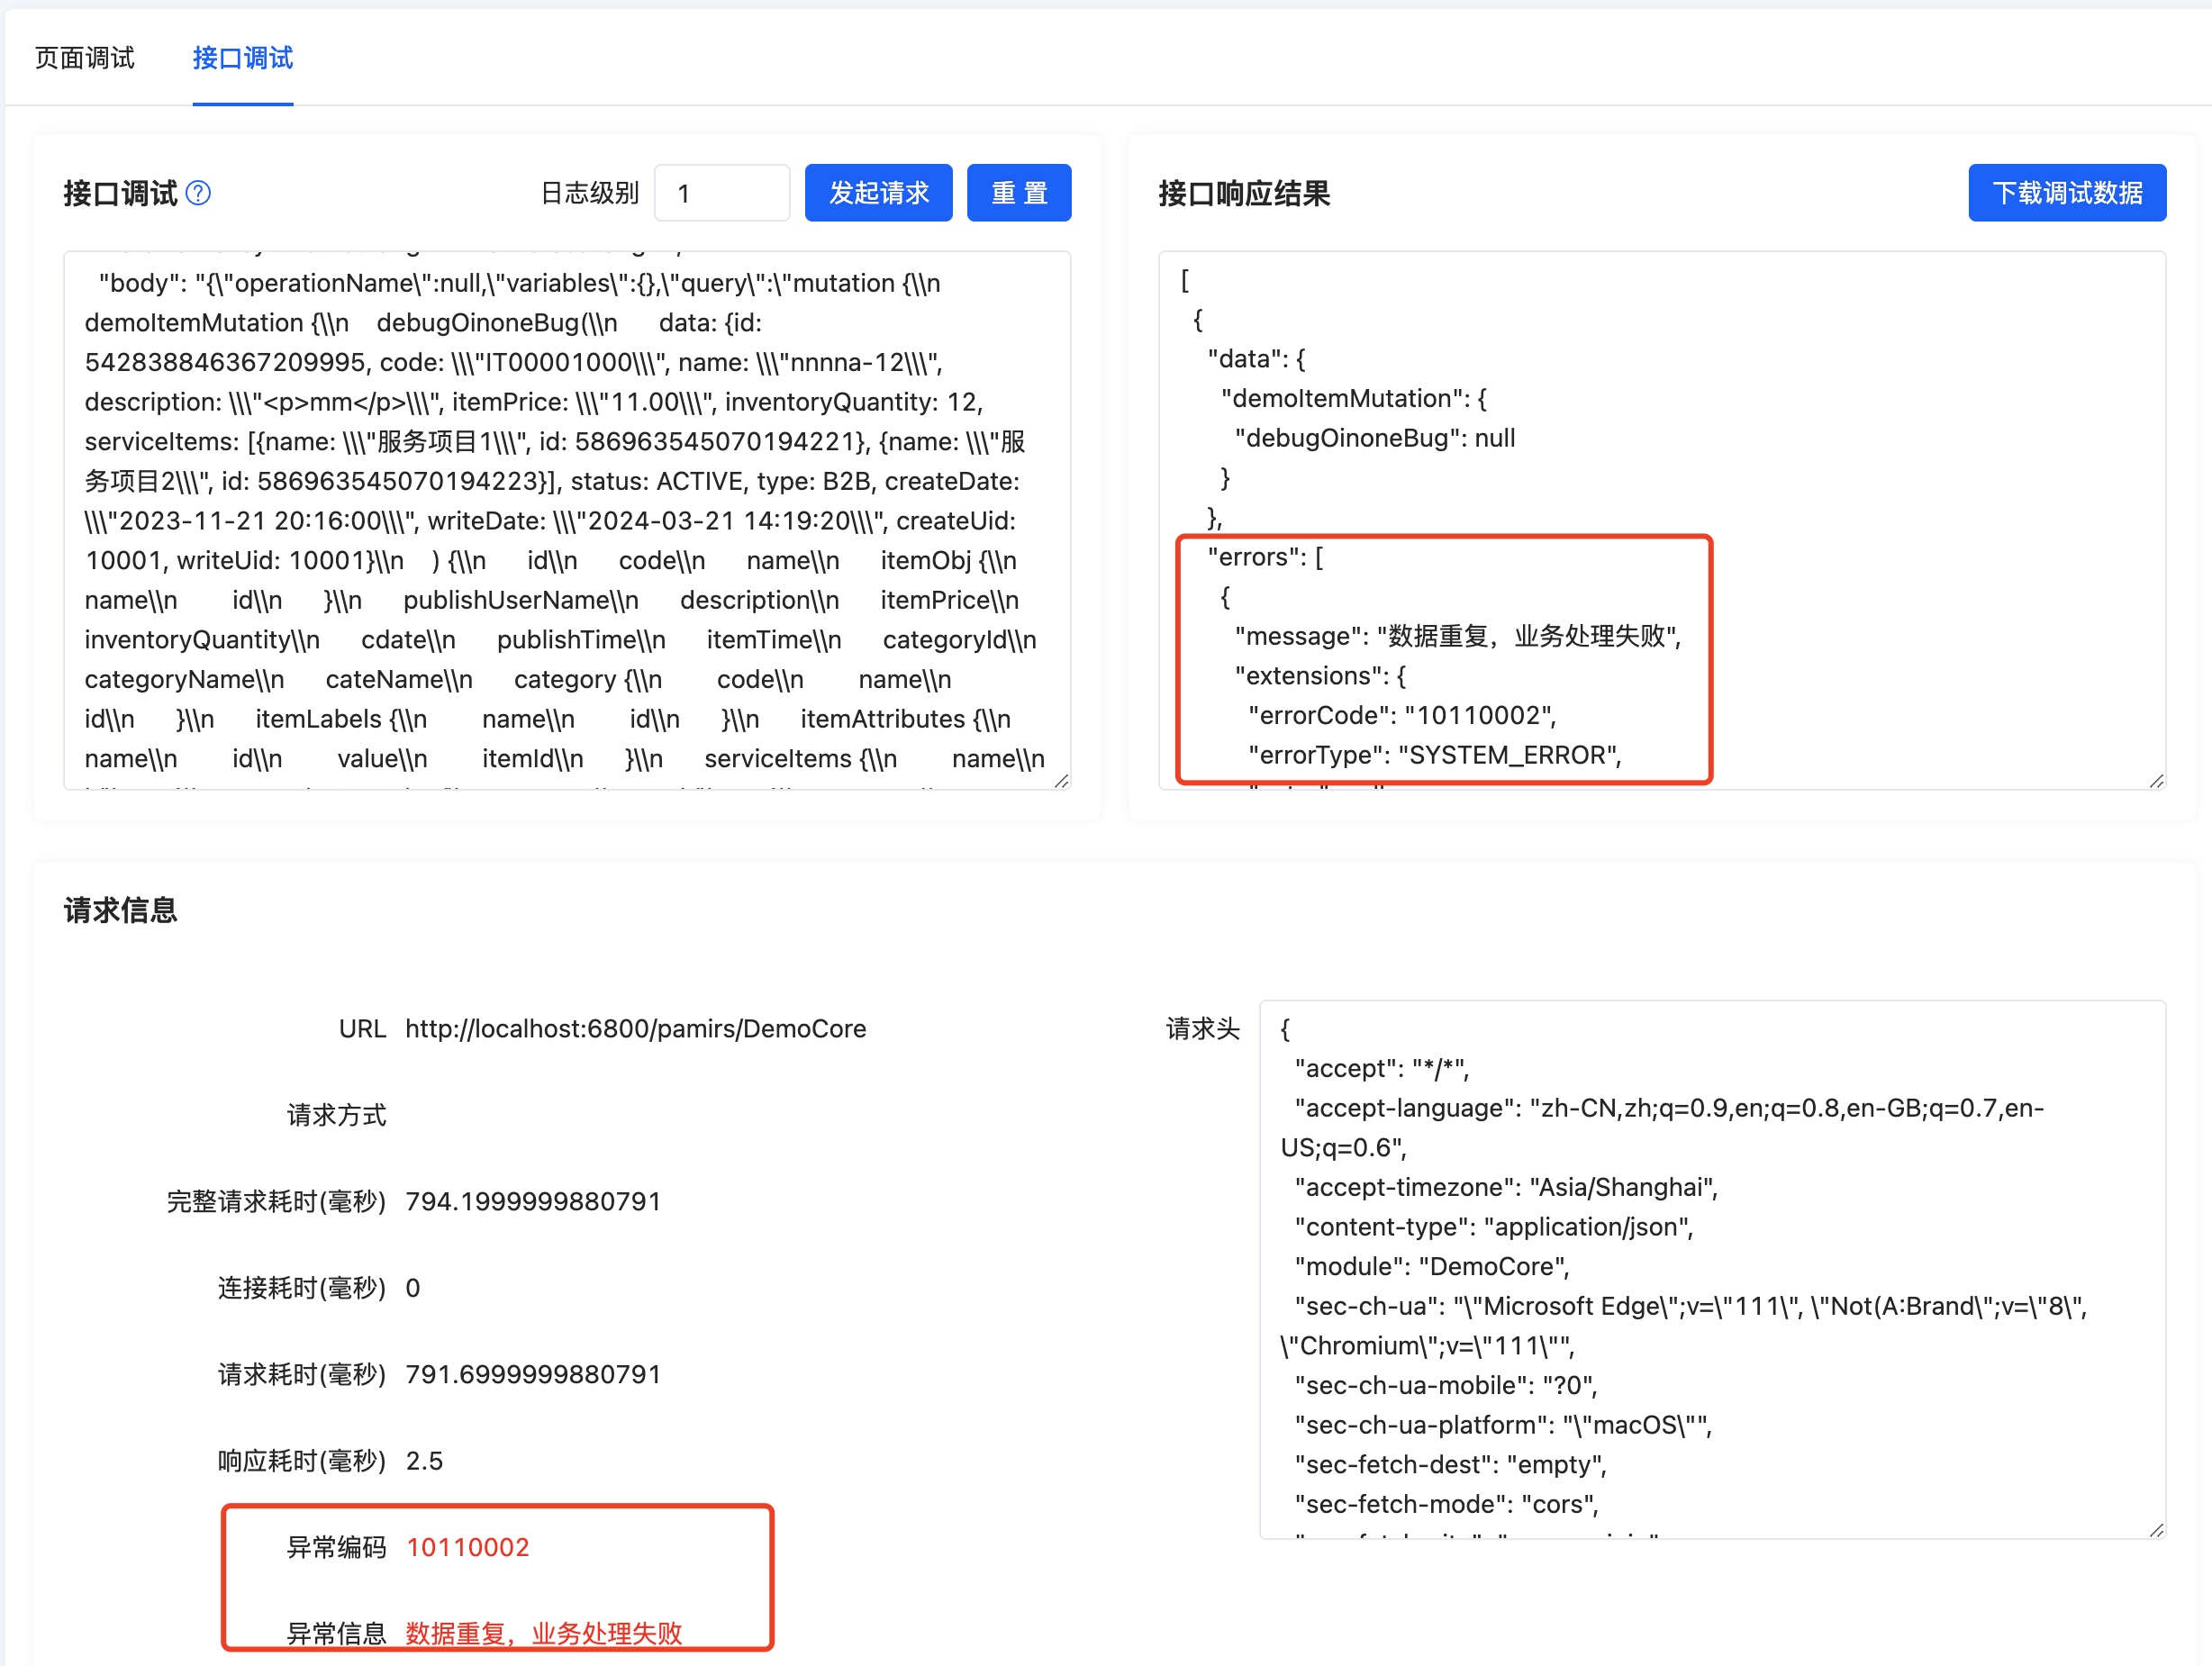
可以看到异常不在业务代码内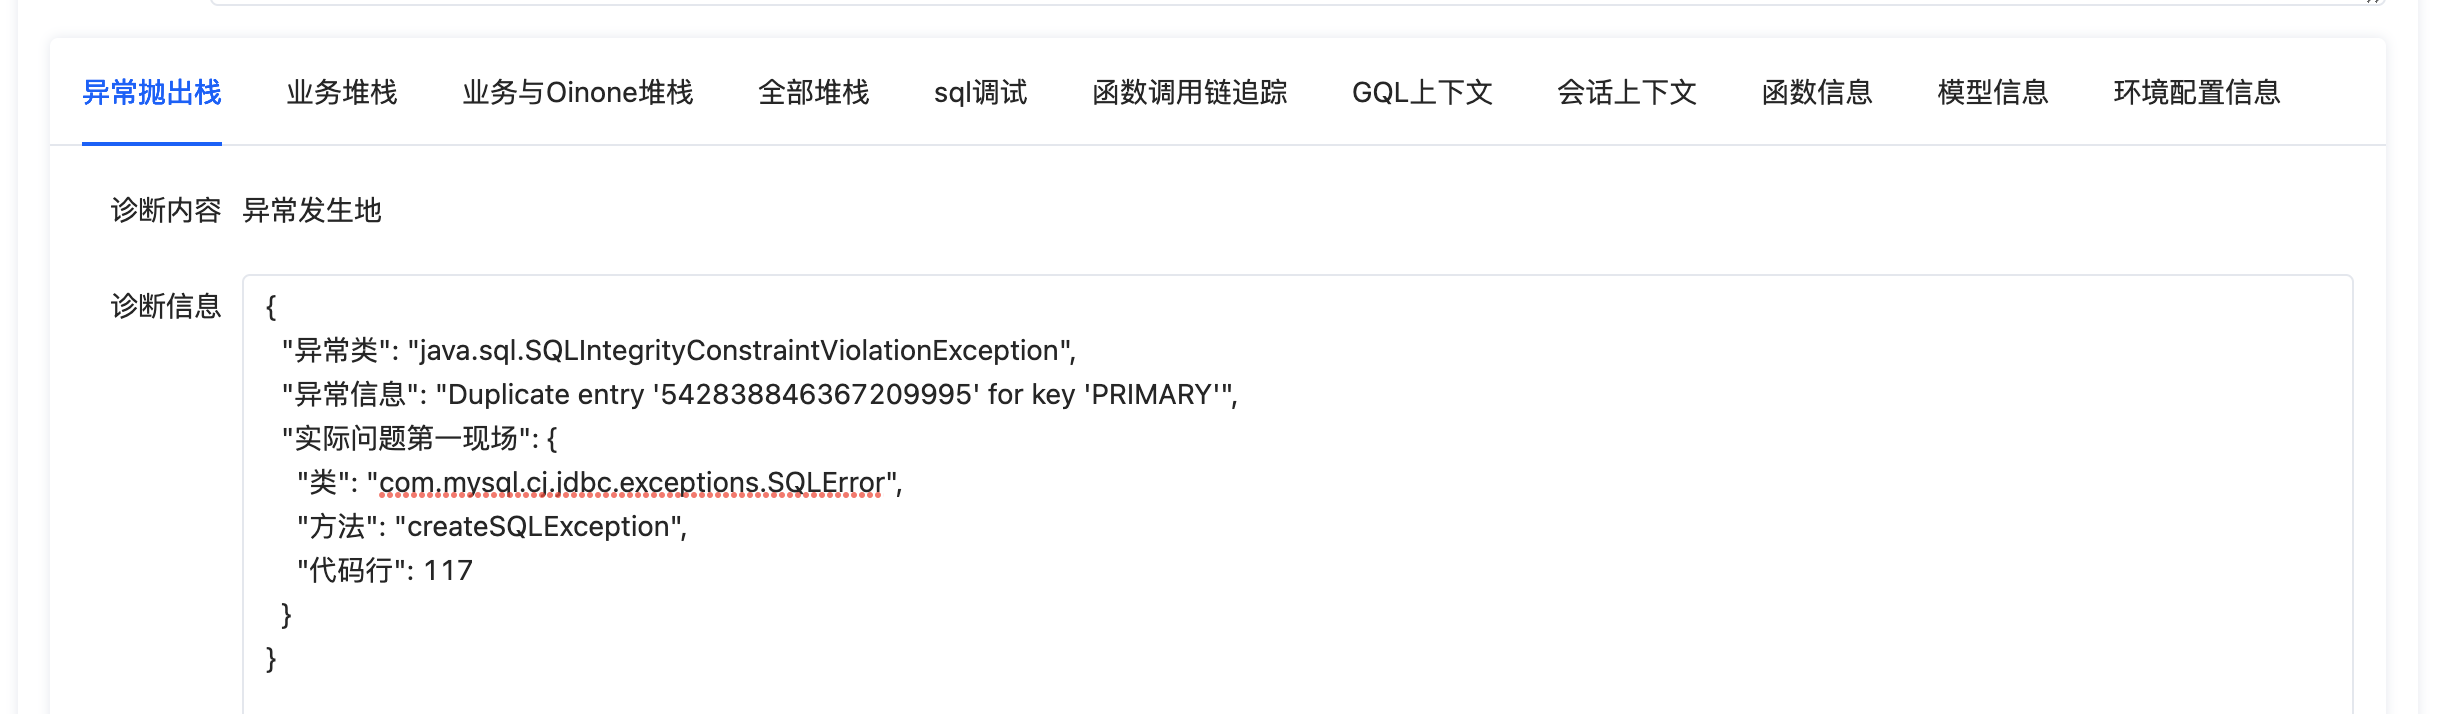
再切换到“全部堆栈”,可以看到具体异常信息,提示core_demo_item表出现了重复的主键,该表是DemoItem模型的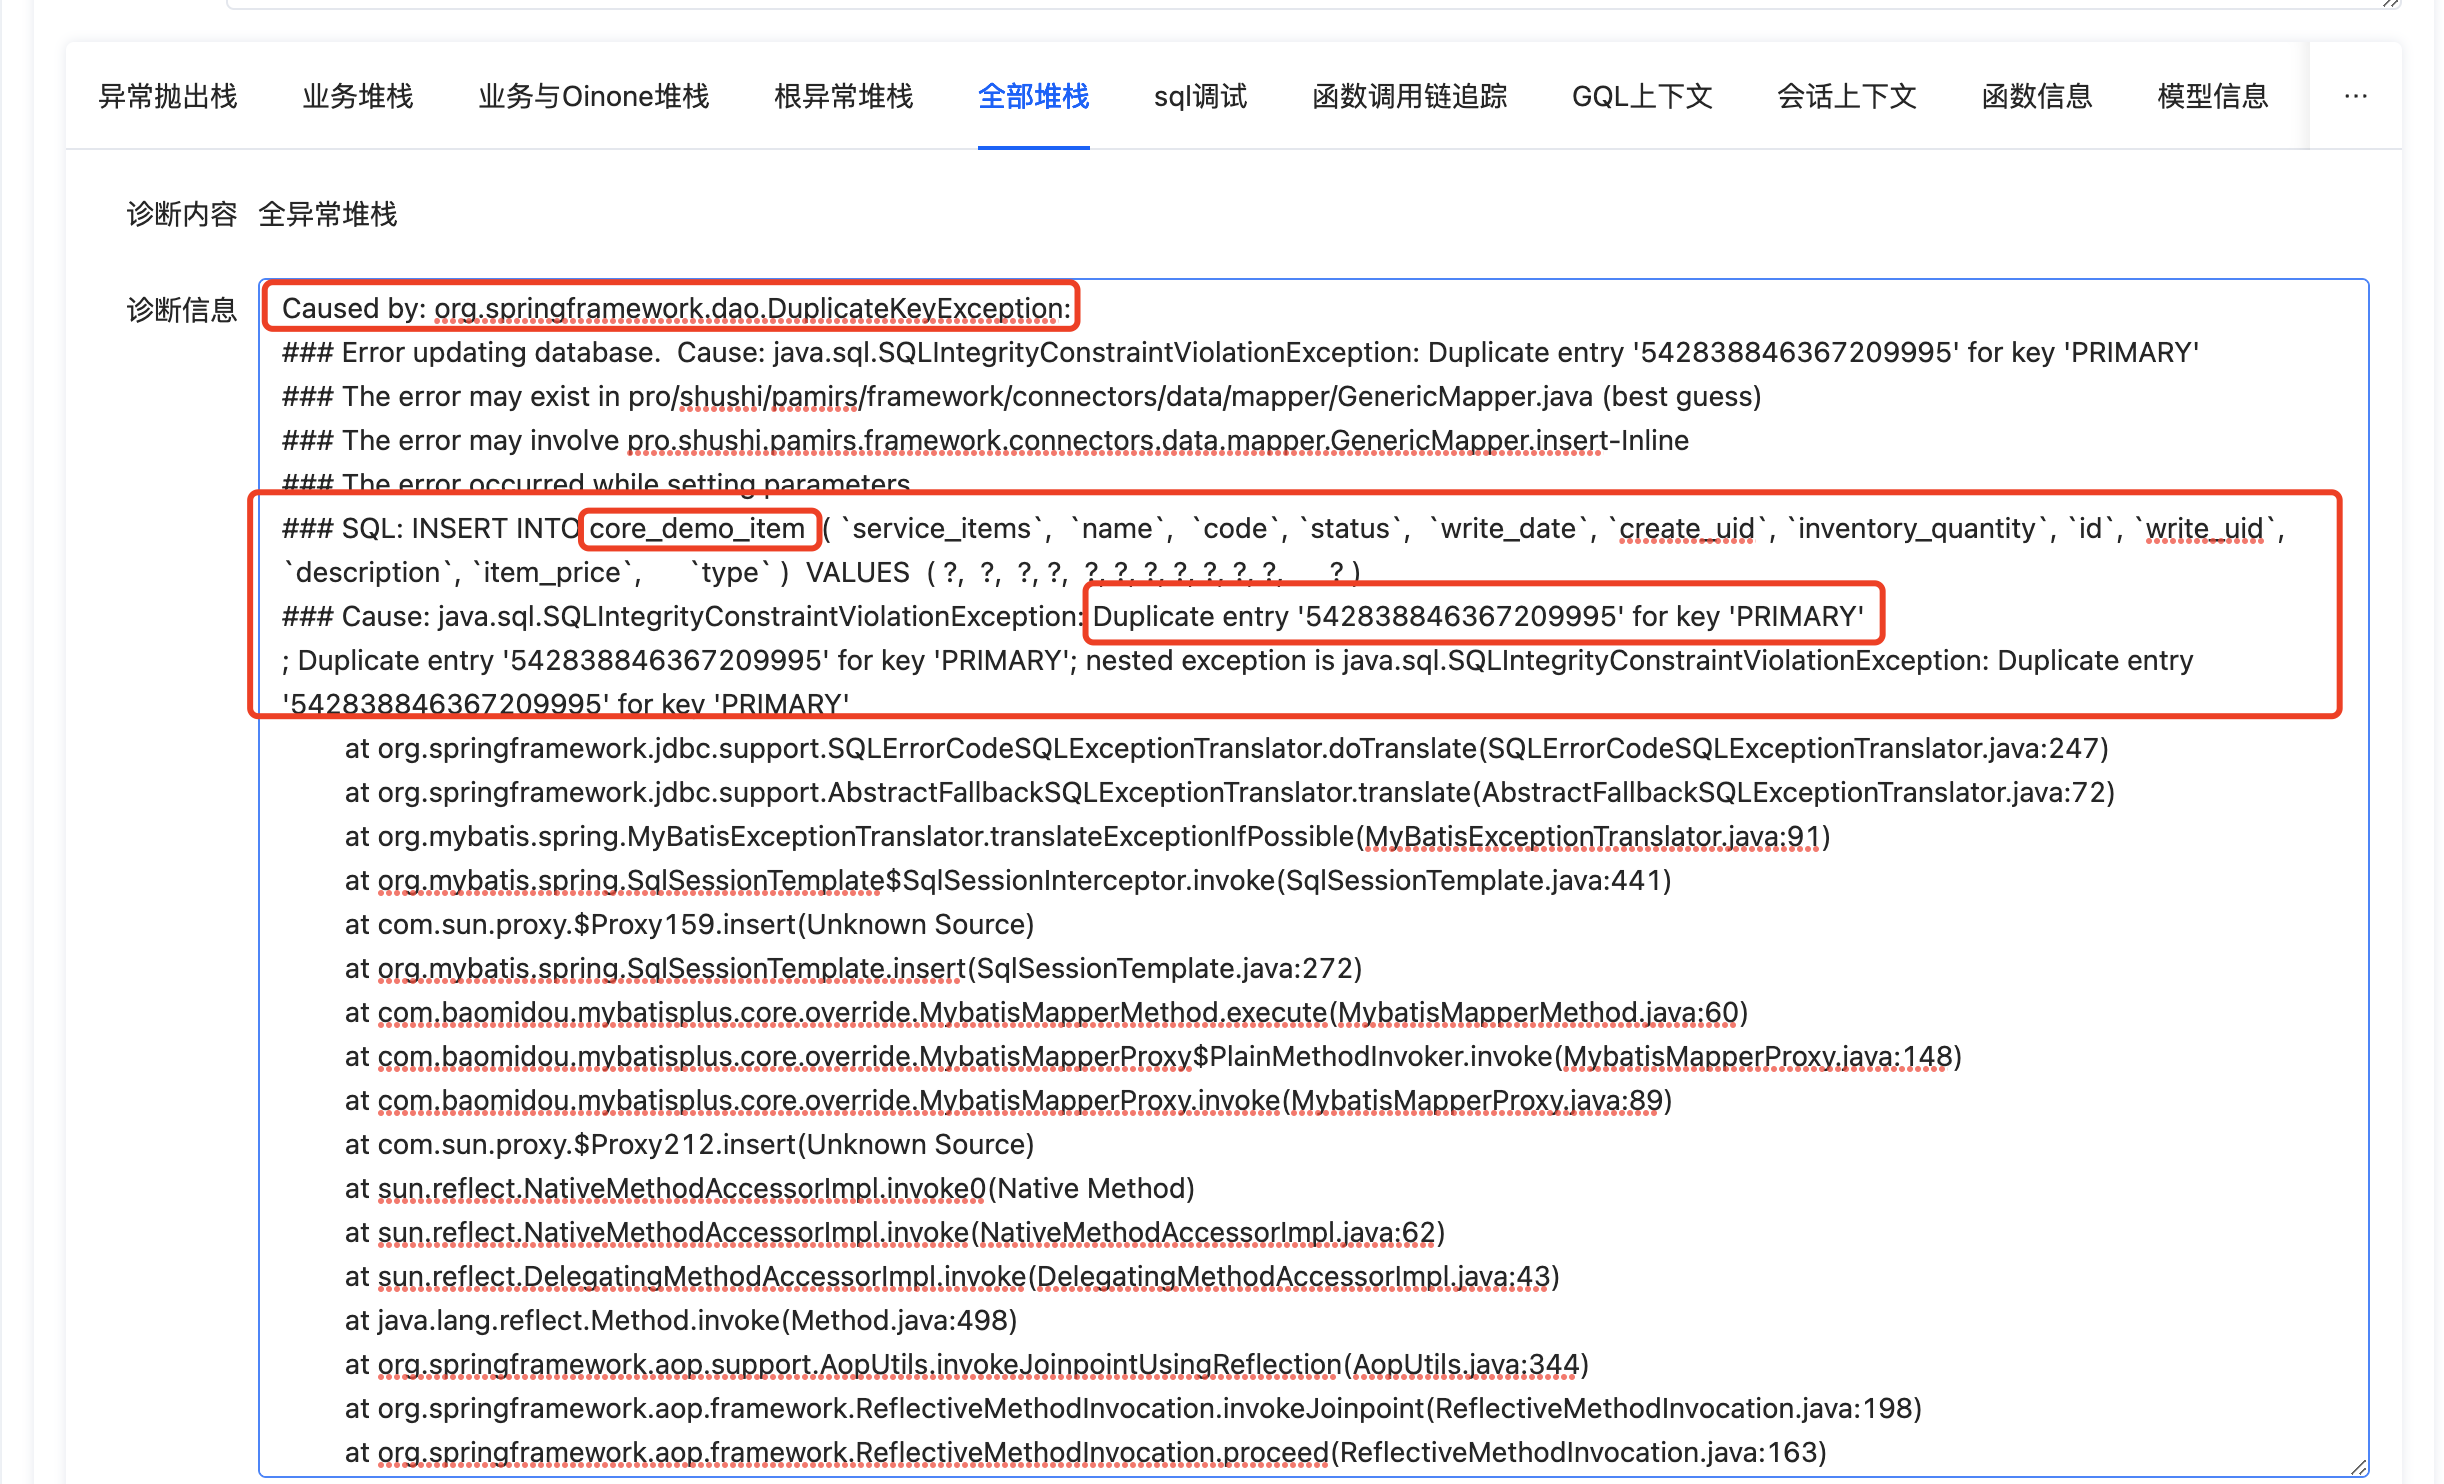
我们还可以切换到“sql调试”的标签页,可以看到出错的具体sql语句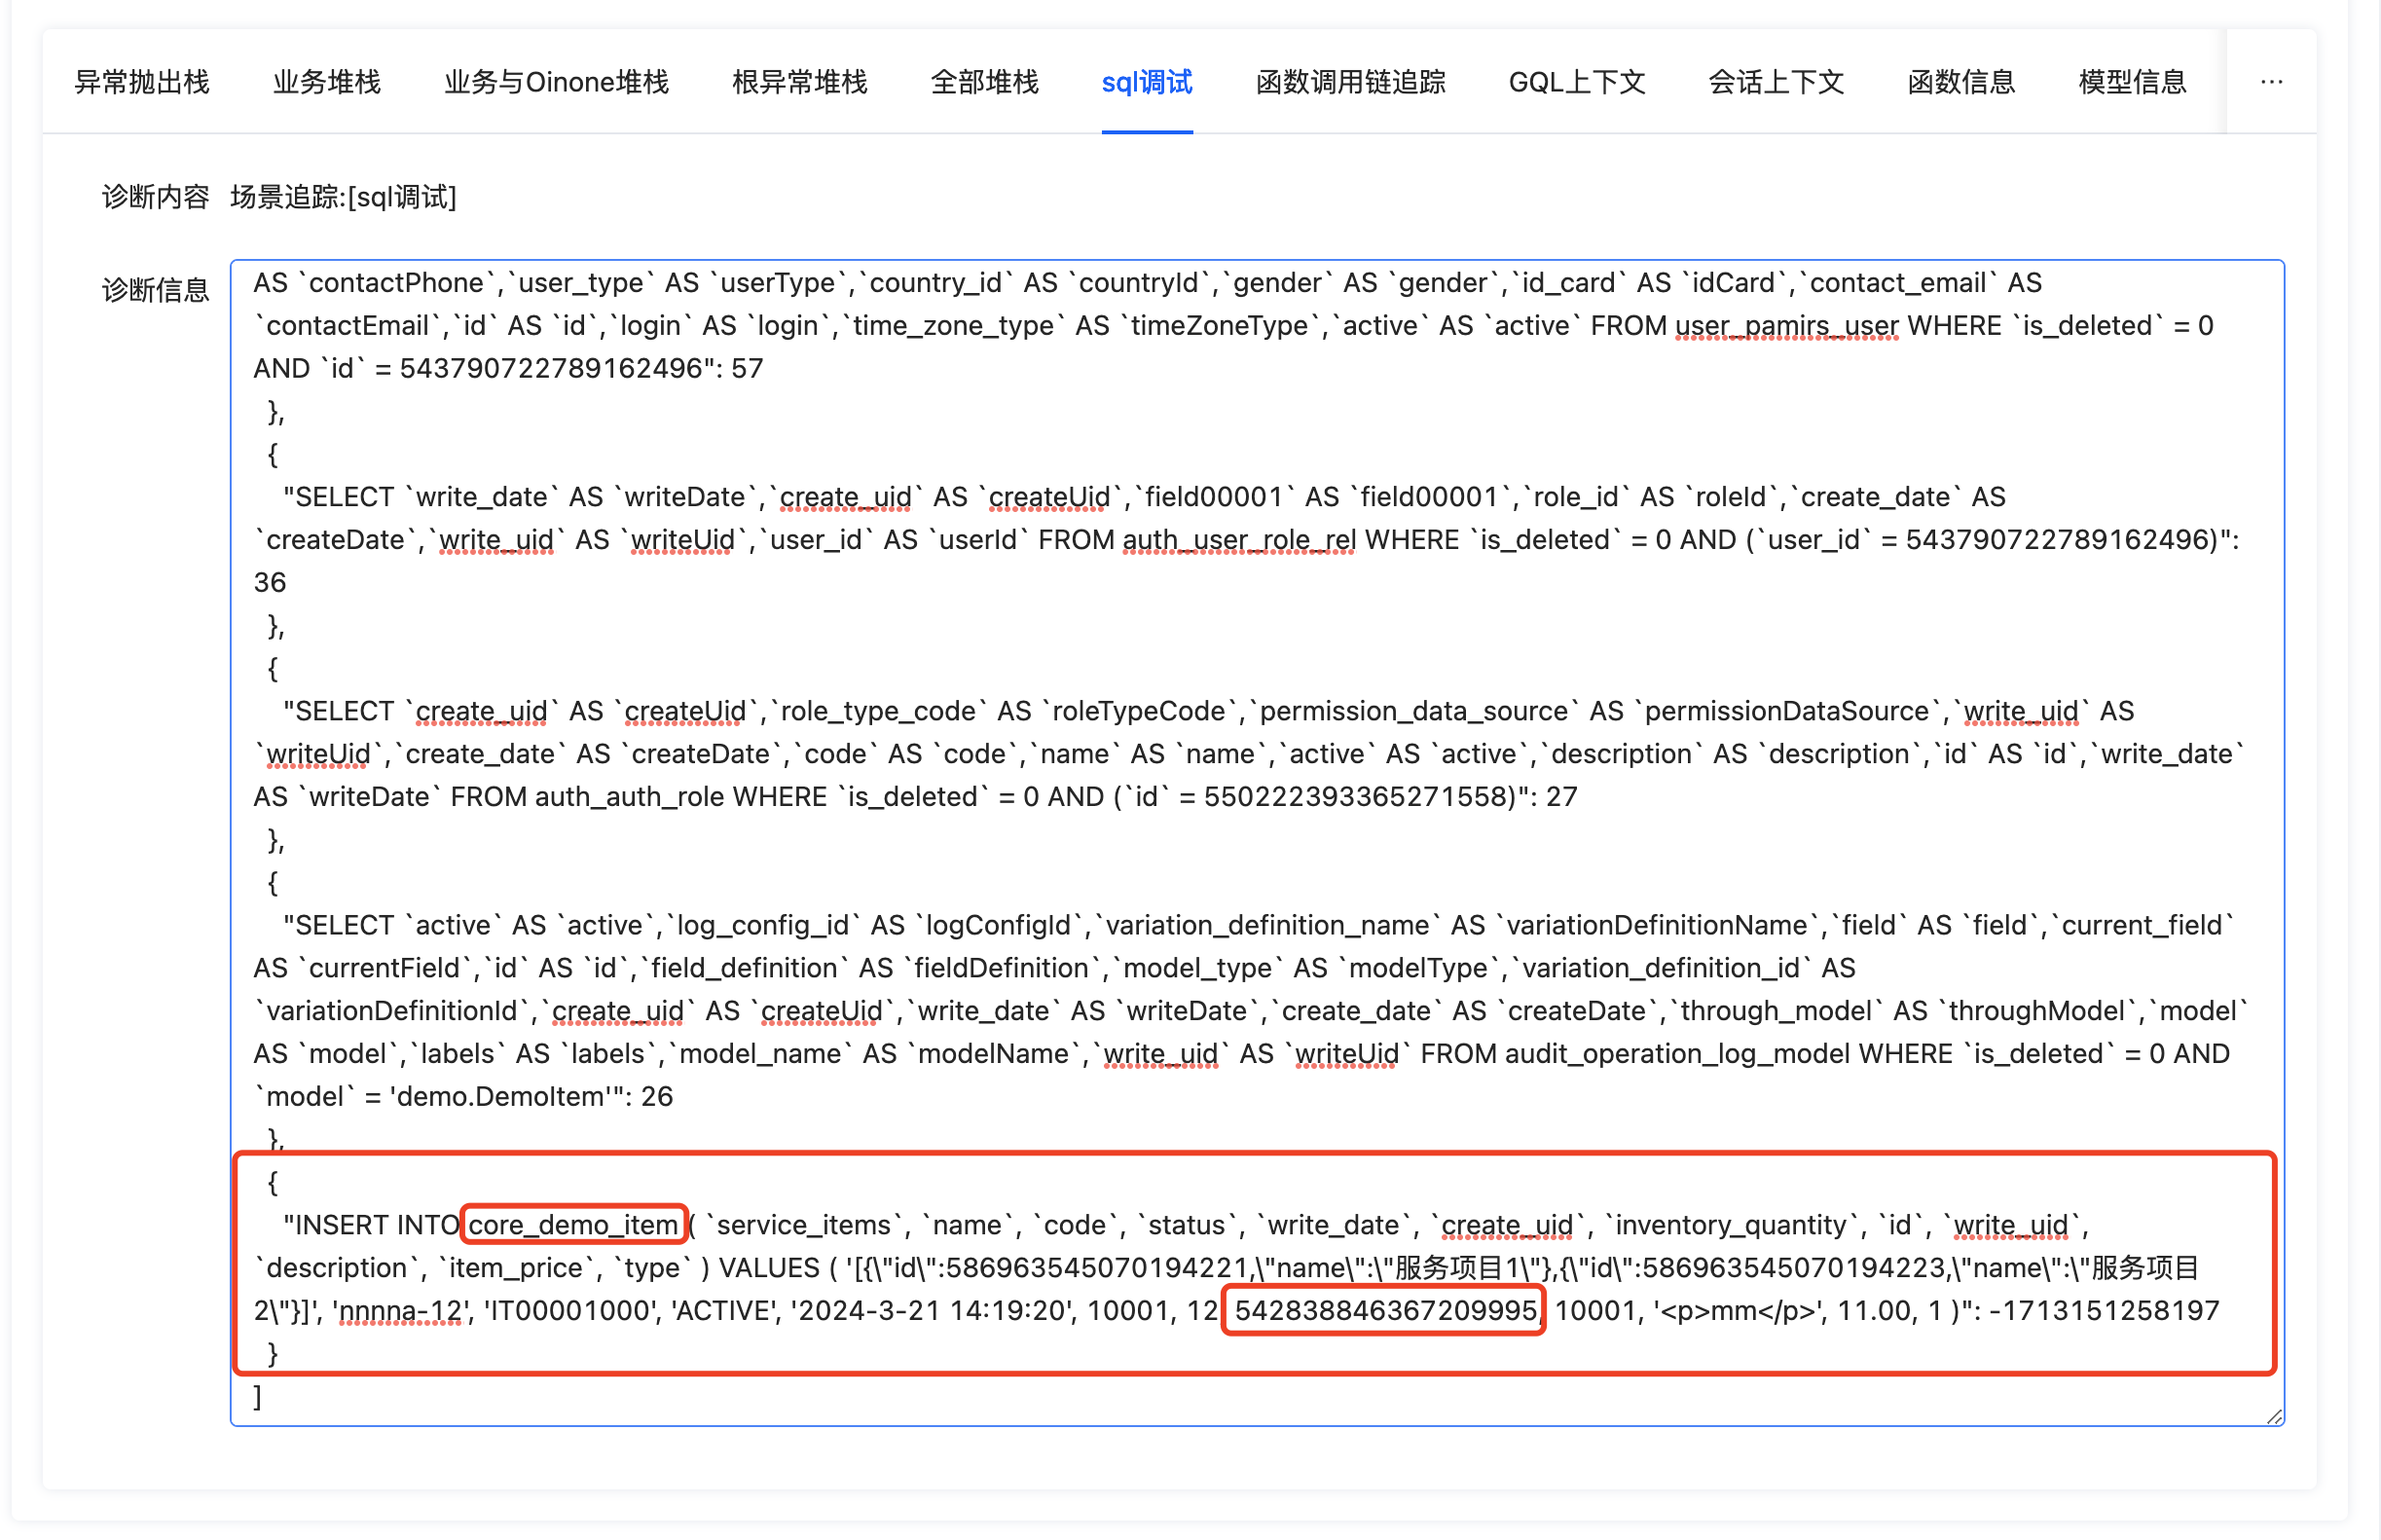
经过分析可以得知是240行的data.create()�重复创建数据导致的。
三、排查工具无法定位怎么办
当我们通过排查工具还是没有定位到问题的时候,可以通过调试页面的“下载全部调试数据”和“下载调试数据”按钮将调试信息的数据发送给官方售后人员帮助我们定位排查问题。
点击页面最顶部的“下载全部调试数据”按钮,可以下载页面调试数据和接口调试数据
点击“调试接口”标签页内的“下载调试数据”按钮,可以下载接口调试数据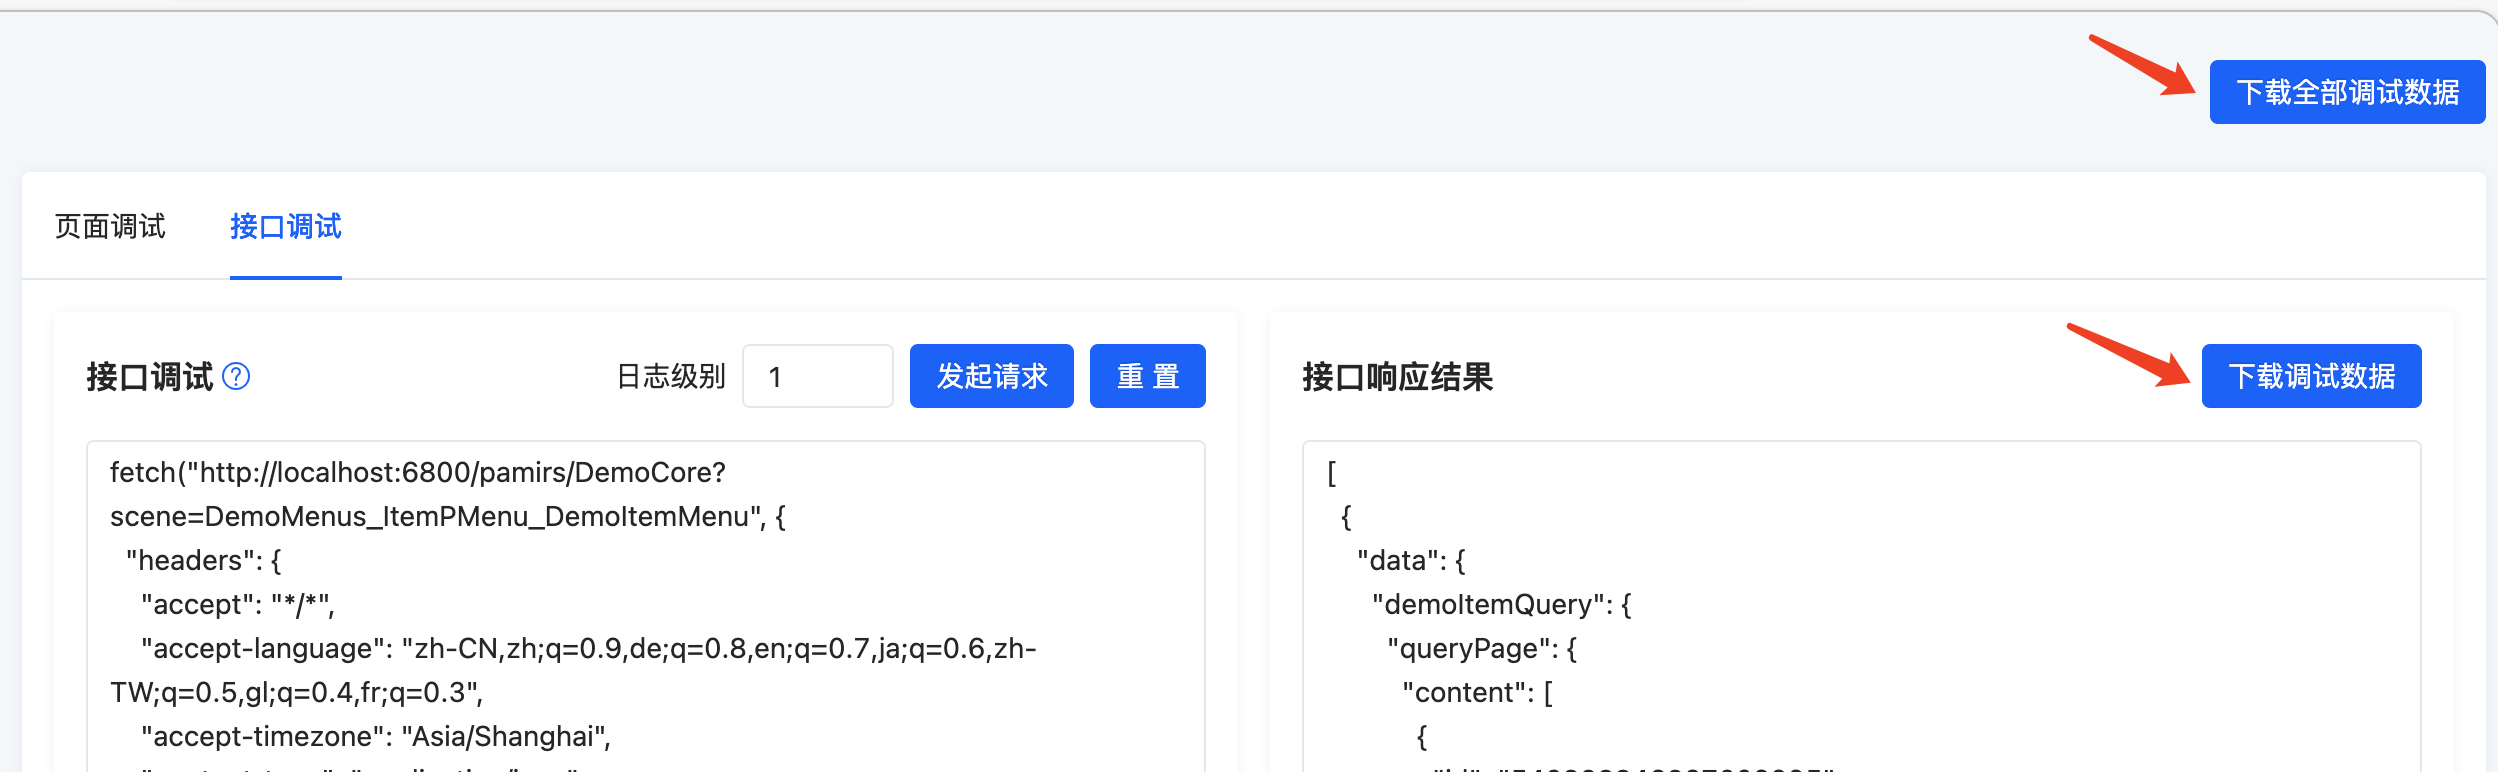
四、排查工具细节
Oinone社区 作者:史, 昂原创文章,如若转载,请注明出处:https://doc.oinone.top/oio4/9273.html
访问Oinone官网:https://www.oinone.top获取数式Oinone低代码应用平台体验