
我们在应用开发过程有一种特殊情况在后端逻辑编写的时候需要知道请求的发起入口,平台利用GQL协议中的Variables属性来传递信息,本文就介绍如何获取。
一、前端附带额外变量
| 属性名 | 类型 | 说明 |
|---|---|---|
| scene | String | 菜单入口 |
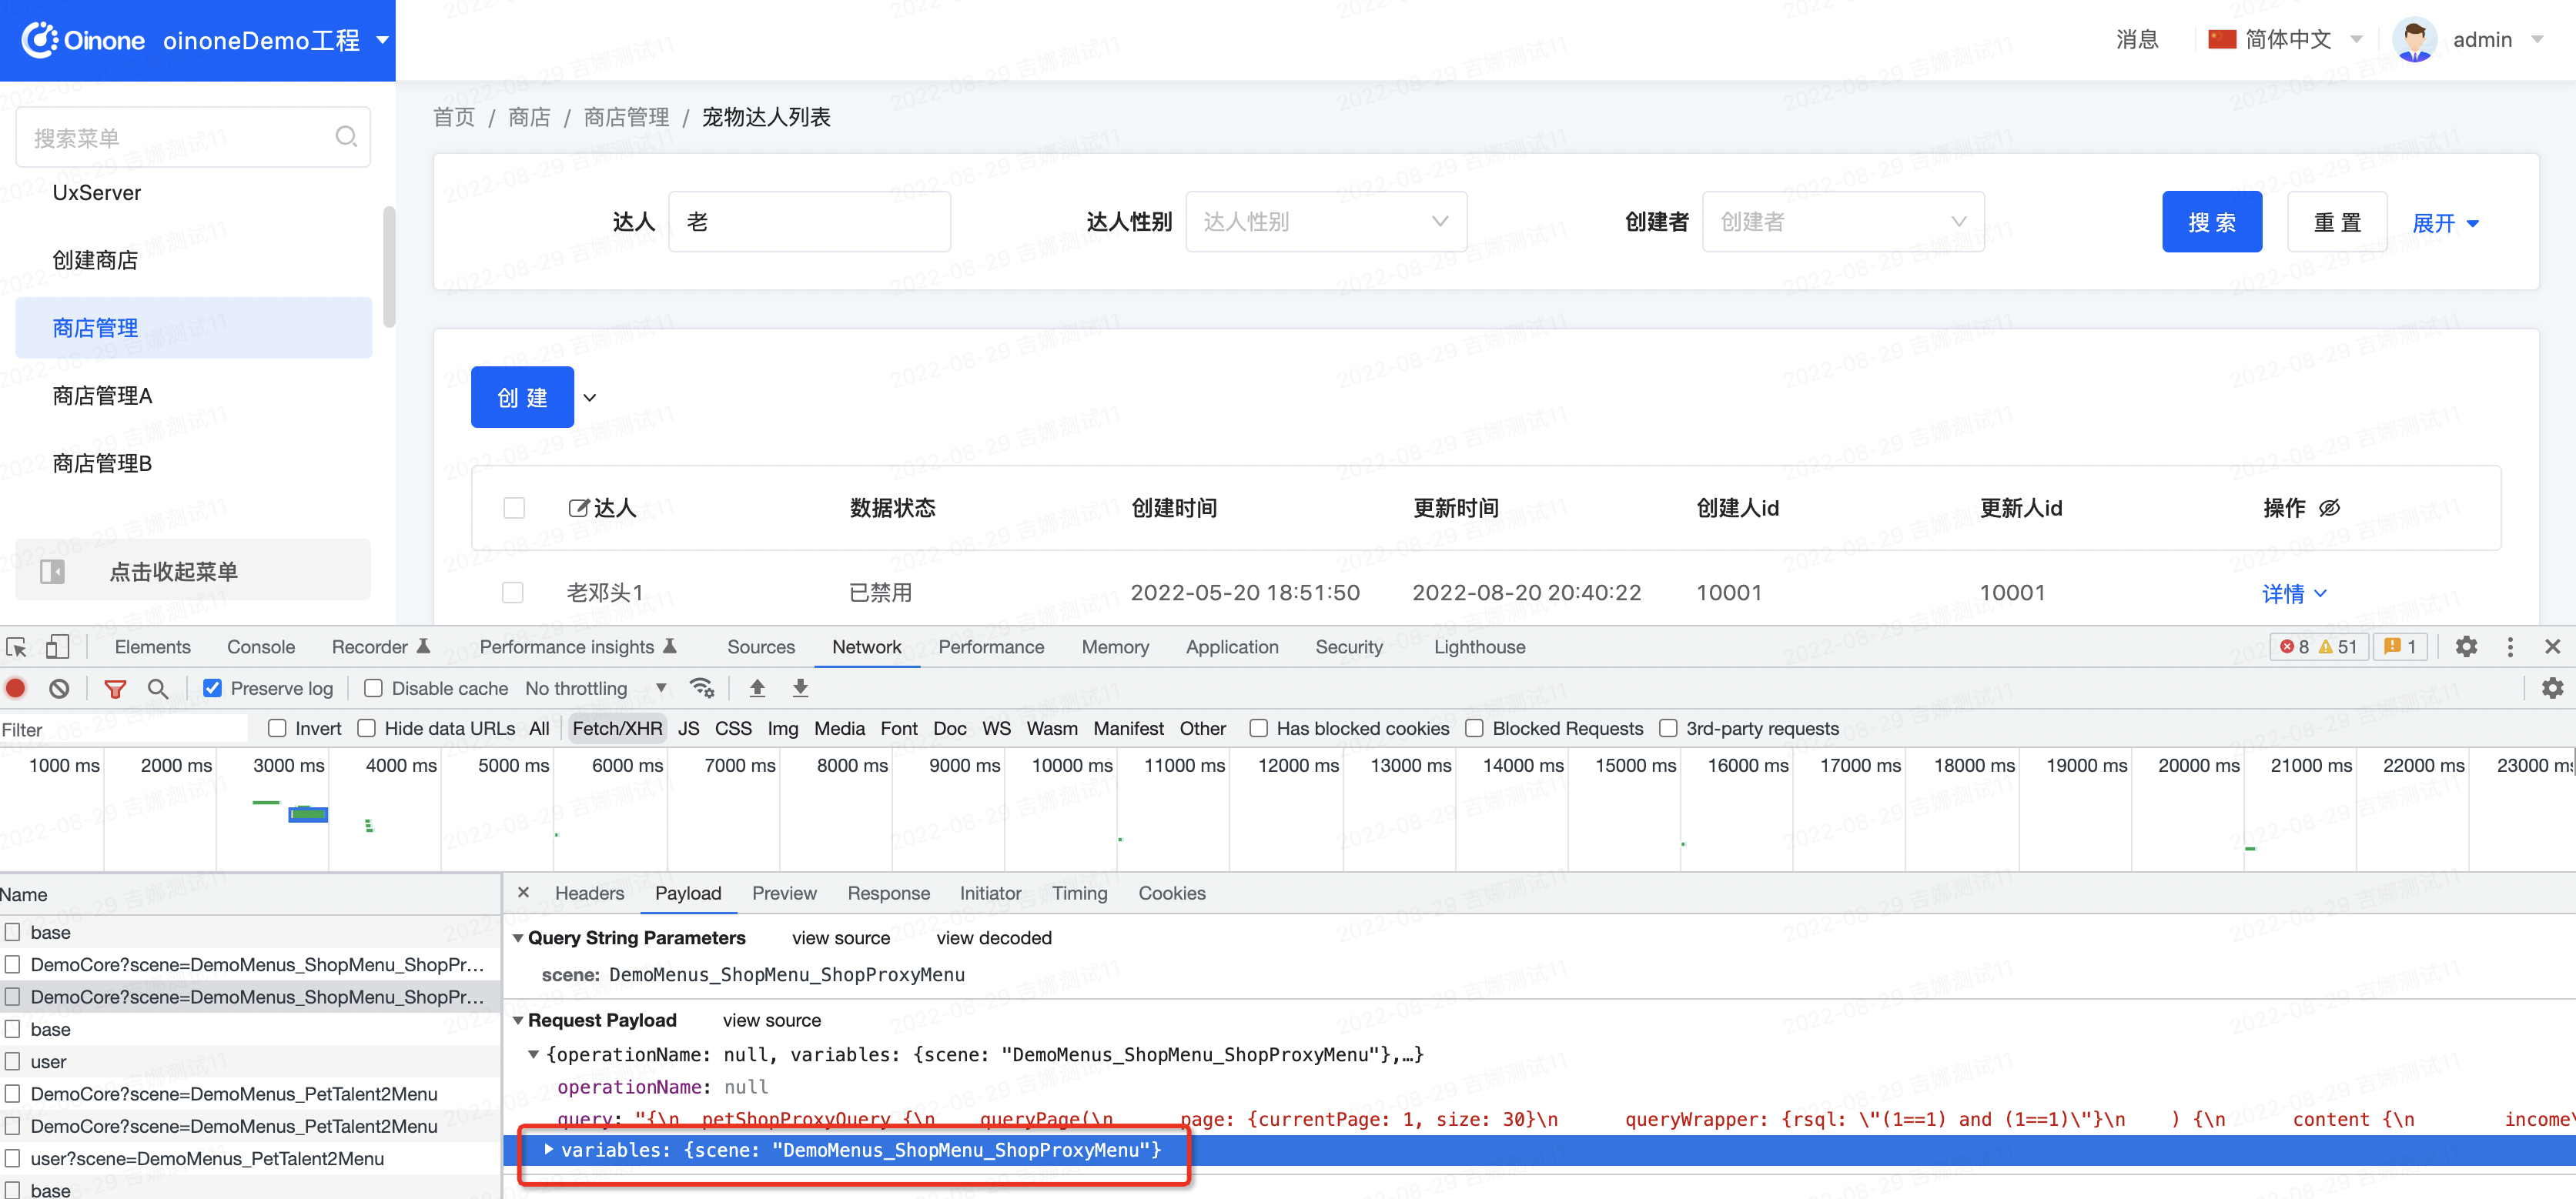

二、后端如何接收variables信息
通过PamirsSession.getRequestVariables()可以得到PamirsRequestVariables对象。
三、第一个variable(举例)
Step1 修改PetTalentAction,获取得到前端传递的Variables
package pro.shushi.pamirs.demo.core.action;
……类引用
@Model.model(PetTalent.MODEL_MODEL)
@Component
public class PetTalentAction {
……其他代码
 @Function.Advanced(type= FunctionTypeEnum.QUERY)
 @Function.fun(FunctionConstants.queryPage)
 @Function(openLevel = {FunctionOpenEnum.API})
 public Pagination<PetTalent> queryPage(Pagination<PetTalent> page, IWrapper<PetTalent> queryWrapper){
 String scene = (String)PamirsSession.getRequestVariables().getVariables().get("scene");
 System.out.println("scene: "+ scene);
 ……其他代码
 }
……其他代码
}
Step2 重启验证
点击宠物达人不同菜单入口,查看效果


Oinone社区 作者:史, 昂原创文章,如若转载,请注明出处:https://doc.oinone.top/oio4/9293.html
访问Oinone官网:https://www.oinone.top获取数式Oinone低代码应用平台体验