
在中后台业务场景中,大部分的请求时候是可以被枚举的,比如创建、删除、更新、查询。在上文中,我们讲了httpClient如何自定义请求,来实现自己的业务诉求。本文中讲到的Request是离业务更近一步的封装,他提供了开箱即用的API,比如insertOne、updateOne,它是基于HttpClient做的二次封装,当你熟悉Request时,在中后台的业务场景中,所有的业务接口自定义将事半功倍。
一、Request详细介绍
元数据-model
获取模型实例
import { getModel } from '@kunlun/dependencies'
getModel('modelName'); 清除所有缓存的模型
import { cleanModelCache } from '@kunlun/dependencies'
cleanModelCache(); 元数据-module
获取应用实例,包含应用入口和菜单
import { queryModuleByName } from '@kunlun/dependencies'
queryModuleByName('moduleName')查询当前用户所有的应用
import { loadModules } from '@kunlun/dependencies'
loadModules()query
分页查询
import { queryPage } from '@kunlun/dependencies'

queryPage(modelName, {
  pageSize: 15, // 一次查询几条
  currentPage, 1, // 当前页码
  condition?: '' // 查询条件
  maxDepth?: 1, // 查几层模型出来,如果有2,会把所有查询字段的关系字段都查出来
  sort?: []; // 排序规则
}, fields, variables, context)自定义分页查询-可自定义后端接口查询数据
import { customQueryPage } from '@kunlun/dependencies'

customQueryPage(modelName, methodName, {
  pageSize: 15, // 一次查询几条
  currentPage, 1, // 当前页码
  condition?: '' // 查询条件
  maxDepth?: 1, // 查几层模型出来,如果有2,会把所有查询字段的关系字段都查出来
  sort?: []; // 排序规则
}, fields, variables, context)查询一条-根据params匹配出一条数据
import { queryOne } from '@kunlun/dependencies'
customQueryPage(modelName, params, fields, variables, context)自定义查询
import { customQuery } from '@kunlun/dependencies'
customQuery(methodName, modelName, record, fields, variables, context)update
import { updateOne } from '@kunlun/dependencies'

updateOne(modelName, record, fields, variables, context)insert
import { insertOne } from '@kunlun/dependencies'

insertOne(modelName, record, fields, variables, context)delete
import { deleteOne } from '@kunlun/dependencies'

deleteOne(modelName, record, variables, context)construct
构造一条数据-获取初始化的值,一个页面一般只会调一次
import { constructOne } from '@kunlun/dependencies'

constructOne(modelName, record, fields, variables, context)构造一条数据-当需要重复获取初始化值时,第一次使用constructOne,后面的调用使用constructMirror
import { constructMirror } from '@kunlun/dependencies'

constructMirror(modelName, record, fields, variables, context)function
直接调用后端的function, 一般在特殊的业务场景中使用,比如导入导出等
import { callFunction } from '@kunlun/dependencies'
// action 后端定义的serverAction
callFunction(modelName, action, params, fields, variables, context)三、如何使用
让我们用Request里的函数改造PetForm/service.ts里的addPet方法
request insertOne
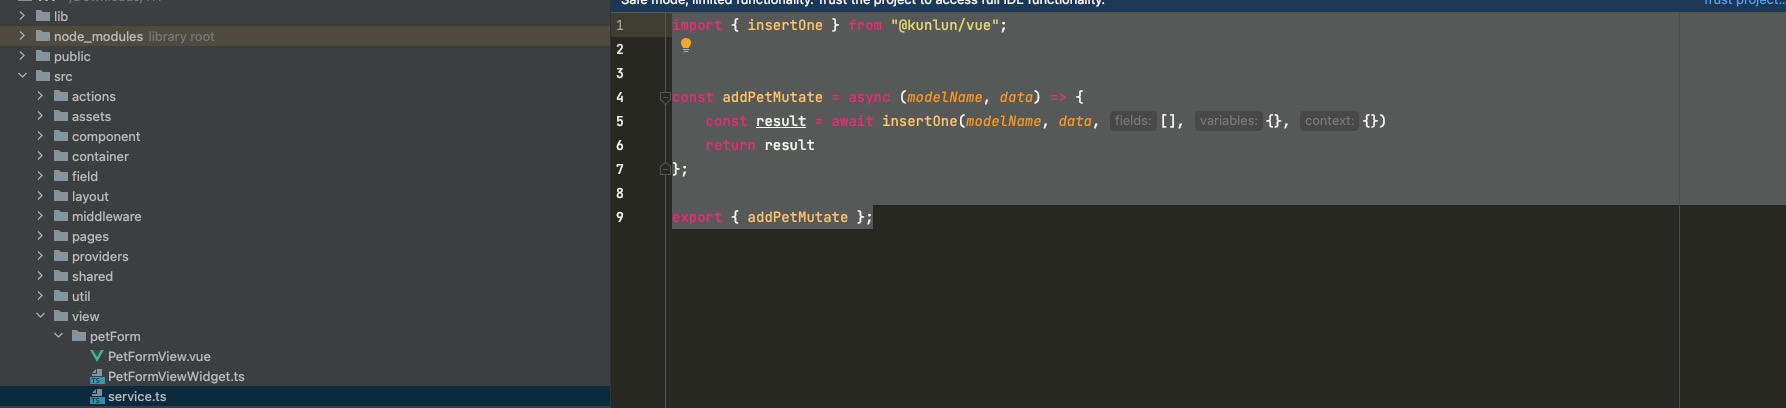

httpClient insertOne

import { insertOne } from "@kunlun/dependencies";

const addPetMutate = async (modelName, data) => {
    const result = await insertOne(modelName, data, [], {}, {})
    return result
};

export { addPetMutate };可以看到,在使用request的insertOne时,我们的代码量大大的减少。为了满足业务的多变性和便捷性,我们提供了两种方式,大家根据自己的场景自由选择。
Oinone社区 作者:史, 昂原创文章,如若转载,请注明出处:https://doc.oinone.top/oio4/9306.html
访问Oinone官网:https://www.oinone.top获取数式Oinone低代码应用平台体验